Ultimate Chocolate Meringue Cake (Make-Ahead Recipe)
A stunning Chocolate Meringue Cake with crisp meringue layers and rich chocolate crémeux. My guide makes this showstopper easy to prep ahead!
cookwithyara.com/recipes/chocolate-meringue-cake
There’s a special kind of magic in placing a truly show-stopping dessert on the table. It’s that moment of quiet awe before everyone digs in, a shared appreciation for something beautiful and delicious. But let’s be honest, the stress of creating that showstopper right before a gathering can sometimes overshadow the joy. The frantic whisking, the race against the clock, the prayer that everything sets perfectly—it can feel like a culinary tightrope walk. That’s why I believe the most impressive desserts are often the ones that can be made with calm, thoughtful preparation, not last-minute panic.
This is where the beauty of this Chocolate Meringue Cake truly shines. It’s a dessert that looks and tastes like it took all day to make, but its secret lies in a clever, make-ahead approach. Imagine having the core components of this masterpiece ready and waiting days before your event. Picture yourself on the day of your family dinner, calmly whipping some cream and assembling a dessert that looks like it came from a fine patisserie, all without breaking a sweat. This recipe transforms a potentially stressful bake into a joyful, meditative process. It’s about baking smarter, not harder, so you can enjoy both the process and the precious time with your loved ones. This is more than just a cake; it's your secret to effortless elegance.
Why This is the Perfect Make-Ahead Dessert
Not all desserts are created equal when it comes to advance preparation. Some crumble, some weep, and some lose their textural charm within hours. The Chocolate Meringue Cake, however, seems almost designed for a staged approach. Its brilliance lies in the stability and resilience of its individual components, which you can craft over several days, allowing you to manage your time beautifully.
The meringue layers, the cake’s very foundation, are best when made a day or two ahead. Baking them low and slow doesn’t just cook them; it dries them out, creating a wonderfully crisp, light-as-air texture. Once cooled completely, these discs can be stored in an airtight container at room temperature, safe from their nemesis, humidity. They will wait patiently, perfectly preserved, until you’re ready to build your masterpiece.
Similarly, the rich, velvety chocolate crémeux filling benefits from an overnight chill. This resting period isn’t just for convenience; it’s crucial for the flavor and texture. As it rests in the refrigerator, the deep chocolate notes meld and intensify, and the filling sets to the perfect consistency—firm enough to hold its shape between the delicate meringue layers, yet soft enough to melt in your mouth. By tackling these two key elements on separate days, you break down the process into small, manageable tasks, turning an ambitious project into a series of simple, satisfying steps. This thoughtful method ensures your final Chocolate Meringue Cake is not only spectacular but also a joy to create.
The Divine Contrast: Meringue and Chocolate
At its heart, this dessert is a celebration of contrast. It’s a culinary dialogue between light and dark, crisp and creamy, sweet and deep. The experience of eating a slice of this Chocolate Meringue Cake is a journey through textures and flavors that complement and elevate one another in the most delightful way. It's a dessert that engages all the senses, from the gentle crackle you hear as your fork breaks through the meringue to the smooth, cool sensation of the chocolate filling.
Let’s first talk about the meringue. This isn’t the soft, pillowy meringue you might find on a lemon pie. This is a crisp, fragile shell with a slightly chewy, marshmallow-like interior. It’s incredibly light, dissolving on the tongue like a sweet cloud. The technique is similar to that used in desserts like the French dacquoise, which uses nut-flour-infused meringue layers to build elegant cakes. Here, we keep it pure and simple to let the texture shine. The sweetness of the meringue provides the perfect counterpoint to the richness that’s to come.
And then there is the chocolate. We aren’t using a simple frosting here; we are crafting a decadent chocolate crémeux. The term crémeux translates to “creamy” in French, and it perfectly describes this filling. Made with high-quality dark chocolate, egg yolks, and cream, it has the richness of a pot de crème and the smoothness of a fine pudding. Its flavor is intense and profound, with a subtle bitterness from the dark chocolate that cuts through the meringue's sweetness. When layered together, these two elements create a perfect harmony. Each bite offers a satisfying crunch, followed by a wave of velvety, cool chocolate, and finished with a light, airy sweetness. It’s this incredible textural play that makes the Chocolate Meringue Cake so unforgettable.
Essential Ingredients for a Flawless Cake
While the list of ingredients for this cake is relatively short, their quality and preparation are paramount to achieving success. Each component plays a critical role in the final texture and flavor, so it's worth paying close attention to what you choose.
Egg Whites: This is the star of our meringue. For the best results, use fresh, room-temperature egg whites. Cold egg whites won't whip to their full volume. It's also absolutely crucial that your bowl, whisk, and all utensils are completely free of any grease or fat, as even a tiny speck of oil or egg yolk can prevent the meringue from forming stiff peaks.
Superfine Sugar (Caster Sugar): While you can use regular granulated sugar, superfine sugar is my preference for meringue. Its fine crystals dissolve more easily into the egg whites, preventing a gritty texture and creating a more stable, glossy meringue. If you only have granulated sugar, you can pulse it in a food processor for a few seconds to make it finer.
An Acidic Stabilizer: A small amount of white vinegar or cream of tartar is a baker's best friend when making meringue. The acid helps to stabilize the egg whites, allowing them to hold more air and preventing them from collapsing easily. This ensures your meringue layers are strong and crisp.
High-Quality Dark Chocolate: The flavor of your Chocolate Meringue Cake is defined by its filling, so this is the place to use the best chocolate you can find. I recommend a dark chocolate with 60-72% cacao content. This range provides a deep, robust flavor that isn't overly sweet, which is essential for balancing the sugary meringue. Look for bars or wafers (callets) over chocolate chips, which often contain stabilizers that can affect the final texture of the crémeux.
Heavy Cream: We use this in both the chocolate crémeux and the final whipped topping. Look for a cream with at least 35% fat content. This high fat content is what allows it to whip into stable peaks and gives the crémeux its luxurious, silky mouthfeel. There is no substitute for the richness it provides.
Mastering the Meringue Layers
Making perfect, crisp meringue is an art, but it’s one that is entirely achievable with a bit of knowledge and care. Think of it as a gentle science experiment where your goal is to create a stable structure of air bubbles held together by protein. The key to success is patience and a dry environment, as humidity is the natural enemy of crisp meringue.
First, begin with a meticulously clean stand mixer bowl. I like to wipe my bowl and whisk attachment with a paper towel dampened with a little white vinegar to remove any residual fat, then dry it thoroughly. Add your room-temperature egg whites and begin whisking on medium speed until they become foamy and opaque, like seafoam. Once you reach this stage, you can start adding the superfine sugar, one tablespoon at a time, with the mixer still running. This slow addition is crucial; it allows the sugar to dissolve completely into the egg whites, which creates a strong, stable, and glossy meringue. Rushing this step can result in a weeping or gritty meringue.
Once all the sugar is incorporated, add your stabilizer (vinegar or cream of tartar) and a little cornstarch, which helps absorb any moisture and ensures a chewier center. Turn the mixer up to high and continue to whip until the meringue is very stiff, glossy, and holds a firm peak. When you lift the whisk, the peak should stand straight up without curling over. You should also be able to rub a little of the meringue between your fingers and feel no sugar granules.
Now, for the baking—or more accurately, the drying. We’re not looking to brown the meringue, but to slowly bake out the moisture. Pipe or spread your meringue into even discs on parchment-lined baking sheets. Place them in a preheated oven at a very low temperature, around 225°F (110°C). The long, slow bake, which can take up to two hours, is what creates that signature crispness. Once baked, turn the oven off, prop the door open with a wooden spoon, and let the meringue discs cool completely inside the oven. This gradual cooling prevents them from cracking. With these careful steps, you'll have perfect, crisp foundations for your Chocolate Meringue Cake.
Crafting the Rich Chocolate Filling
The soul of this cake is its deep, dark, and decadent chocolate crémeux filling. This element provides a rich, creamy counterpoint to the airy meringue, and its flavor is what guests will remember long after the last bite. Making a crémeux is similar to making a classic custard base or crème anglaise, but it’s finished with melted chocolate for an intensely luxurious result.
Start by finely chopping your high-quality dark chocolate and placing it in a heatproof bowl. This is an important step—smaller pieces will melt more evenly and quickly when the hot cream mixture is added. In a separate saucepan, gently heat the heavy cream until it’s just simmering around the edges. You don’t want it to come to a rolling boil.
While the cream is heating, whisk your egg yolks and sugar together in a separate bowl until they are pale and slightly thickened. This process, known as ribboning, helps ensure a smooth final texture. Now for the most delicate part: tempering the eggs. Slowly pour the hot cream into the egg yolk mixture while whisking constantly. This gradual introduction of heat gently raises the temperature of the yolks without scrambling them. If you pour the hot cream in too quickly, you’ll end up with sweet scrambled eggs!
Pour the entire mixture back into the saucepan and cook over low heat, stirring constantly with a spatula, making sure to scrape the bottom and corners of the pan. The mixture will slowly thicken. The key is to cook it until it coats the back of a spoon, and when you draw a line through it with your finger, the line holds its shape. This indicates it has reached the right temperature, around 180°F (82°C). Immediately pour the hot custard through a fine-mesh sieve directly over your chopped chocolate. Let it sit for a minute to allow the heat to melt the chocolate, then stir gently until the crémeux is completely smooth, glossy, and emulsified. Cover with plastic wrap, pressing it directly onto the surface to prevent a skin from forming, and chill for at least four hours, or preferably overnight. This will be the glorious heart of your Chocolate Meringue Cake.
Your Baking Timeline: A Stress-Free Guide
The true secret to this spectacular Chocolate Meringue Cake is planning. By breaking the recipe down into three distinct stages over a few days, you remove all the pressure and turn it into a relaxing, enjoyable project. Here is my recommended timeline for a completely stress-free experience.
Two Days Before Serving: Master the Meringue This is the perfect day to focus solely on your meringue layers. The weather can impact meringue, so try to choose a day with low humidity if possible. Follow the steps carefully: ensure your equipment is spotless, whip the egg whites to stiff, glossy peaks, and pipe or spread your discs. Bake them low and slow until they are crisp and dry. The most important step is to let them cool completely in the turned-off oven. Once they are at room temperature, store them in a large airtight container in a cool, dry place. Do not refrigerate them, as the moisture will make them soft.
One Day Before Serving: Craft the Crémeux Today is all about that rich, velvety chocolate filling. This task takes less active time than the meringue. Prepare the chocolate crémeux by making the custard base, tempering the eggs, and melting in the beautiful dark chocolate. Once it’s smooth and glossy, pour it into a container, cover it, and let it chill in the refrigerator. An overnight chill is ideal, as it gives the flavors time to deepen and the filling time to set to the perfect, spreadable consistency.
Day of Serving: Assemble and Adorn This is the easy and fun part! With your two main components ready to go, assembly will take just a few minutes. All you need to do is whip your heavy cream with a little sugar and vanilla until it forms soft peaks. Now, build your cake: place one meringue disc on your serving platter, top with a generous layer of the chilled chocolate crémeux, then a layer of whipped cream. Repeat with the remaining layers. You can finish the top with more whipped cream, chocolate shavings, or fresh berries. Your stunning Chocolate Meringue Cake is ready to wow your guests, and you are calm and ready to enjoy the gathering.
Assembling Your Chocolate Meringue Cake Masterpiece
After all your patient preparation, the moment of assembly is incredibly rewarding. This is where the separate, humble components come together to create something truly magical. Before you begin, have everything ready: your crisp meringue discs, your chilled chocolate crémeux, your freshly whipped cream, and your final serving platter. A clean workspace makes for a beautiful final product.
Start by placing a small dab of whipped cream or crémeux on the center of your serving platter. This acts as a bit of “glue” to hold the bottom meringue layer in place and prevent it from sliding around. Gently place your first meringue disc onto the platter. Meringue is delicate, so handle it with care.
Next, spoon a generous amount of the chilled chocolate crémeux onto the meringue. Using an offset spatula or the back of a spoon, gently spread the crémeux evenly across the disc, leaving a small half-inch border around the edge. This prevents the filling from squishing out too much when you add the next layer. Follow the crémeux with a layer of softly whipped cream, spreading it in the same manner.
Carefully place the second meringue disc on top of the cream layer and press down very gently. Repeat the process: a layer of rich chocolate crémeux, followed by a layer of light whipped cream. For the final, top layer of meringue, you can choose your own adventure. You can cover it completely with the remaining whipped cream for a classic, billowy look, or you can create beautiful piped rosettes. Garnish with dark chocolate shavings, a dusting of high-quality cocoa powder, or a scattering of fresh raspberries for a pop of color and tartness. Your magnificent Chocolate Meringue Cake is now ready for its debut.
Smart Storage for Perfect Texture
The key to a successful Chocolate Meringue Cake lies in understanding how to store its different parts to maintain their distinct and wonderful textures. As we've discussed, the meringue and the filling should be prepared and stored separately until you are ready to assemble.
Storing Meringue Layers: Once your meringue discs are baked and completely cooled, their biggest enemy is moisture. Any humidity in the air will cause them to become soft and sticky. The best way to store them is in a large, completely airtight container at room temperature. Do not put them in the refrigerator, as the cool, moist environment is detrimental to their crispness. Stored properly in a dry place, they will stay perfectly crisp for up to three days.
Storing the Chocolate Crémeux: The chocolate filling, on the other hand, needs the refrigerator. Once made, cover the crémeux with plastic wrap, pressing it directly against the surface to prevent a skin from forming. Stored this way, it will keep beautifully in the refrigerator for up to three days. The chill is essential for it to set to the correct consistency for layering.
Storing the Assembled Cake: This is one dessert that is truly best enjoyed on the day it is assembled. Once the creamy, moist fillings come into contact with the crisp meringue, the meringue will begin to soften over time. While it will still be delicious the next day, it will have lost that signature textural contrast. For the best experience, assemble the cake no more than 4-6 hours before you plan to serve it. If you have leftovers, cover the cake loosely and store it in the refrigerator for up to one day. The texture will change, but the flavor will remain wonderful.
Customizing Your Creation
While this classic Chocolate Meringue Cake is a masterpiece on its own, it also serves as a fantastic canvas for your own culinary creativity. There are so many simple ways to add a personal touch or adapt it to your specific tastes.
Flavor Infusions: Consider adding a new dimension of flavor to the chocolate crémeux. A teaspoon of instant espresso powder will intensify the chocolate notes beautifully, creating a mocha-like profile. For a touch of warmth and spice, inspired by my Levantine roots, a half-teaspoon of finely ground cardamom or a pinch of cinnamon in the crémeux is absolutely divine. You could also infuse the cream for the crémeux with a vanilla bean or a few crushed coffee beans before you begin.
Nutty Additions: To introduce another layer of texture and flavor, consider adding toasted nuts. You can fold finely chopped toasted hazelnuts, almonds, or pistachios into the chocolate crémeux. Alternatively, you could sprinkle a layer of toasted nuts between the cream and the next meringue layer for a delightful crunch. A hazelnut meringue dacquoise is a French classic for a reason!
Fruity Finishes: The pairing of dark chocolate and fruit is timeless. While assembling, you can add a layer of fresh raspberries or sliced strawberries between the cream and meringue layers. The tartness of the berries provides a wonderful contrast to the rich chocolate and sweet meringue. A simple drizzle of a raspberry coulis over the finished cake is another elegant touch. This makes for an especially refreshing dessert during warmer months.
Chocolate Meringue Cake FAQ
Why did my meringue turn out soft and chewy instead of crisp?
This is almost always due to one of two things: humidity or under-baking. Meringue is hygroscopic, meaning it absorbs moisture from the air. Baking on a very rainy or humid day can be challenging. The other culprit is not baking it long enough at a low temperature. The goal is to dry the meringue out completely. Make sure to let it cool fully in the turned-off oven, as this final drying stage is crucial for crispness.
Can I make the entire cake in one day?
Yes, you certainly can, but you'll need to plan your time accordingly. The meringue takes a couple of hours to bake and at least another hour or two to cool completely. While it's in the oven, you can prepare the chocolate crémeux. The crémeux needs a minimum of four hours to chill and set properly. So, while possible, it will be a long baking day! Following the staged timeline makes it much more manageable.
My chocolate crémeux seems too soft. What went wrong?
If the crémeux is runny, it likely wasn't cooked long enough or didn't have enough time to chill and set. When cooking the custard base, make sure it visibly thickens and coats the back of a spoon before you pour it over the chocolate. Then, give it ample time in the refrigerator—at least four hours, but overnight is even better for the firmest, most stable set.
How do I get clean slices of the cake?
Slicing a cake with such different textures can be tricky! The best method is to use a long, sharp knife. For the cleanest cuts, dip the knife in hot water and wipe it dry before each slice. Use a gentle sawing motion rather than pressing straight down, which can shatter the delicate meringue layers. Clean the knife between each cut for perfect, professional-looking slices.
Can I use a different type of chocolate?
Absolutely! While I love the balance of 60-72% dark chocolate, you could use a semi-sweet chocolate for a slightly sweeter filling. A high-quality milk chocolate could also work, but it will result in a much sweeter cake and a softer-set crémeux. I would avoid using white chocolate in this crémeux recipe as its composition is very different and it may not set correctly without adjustments.
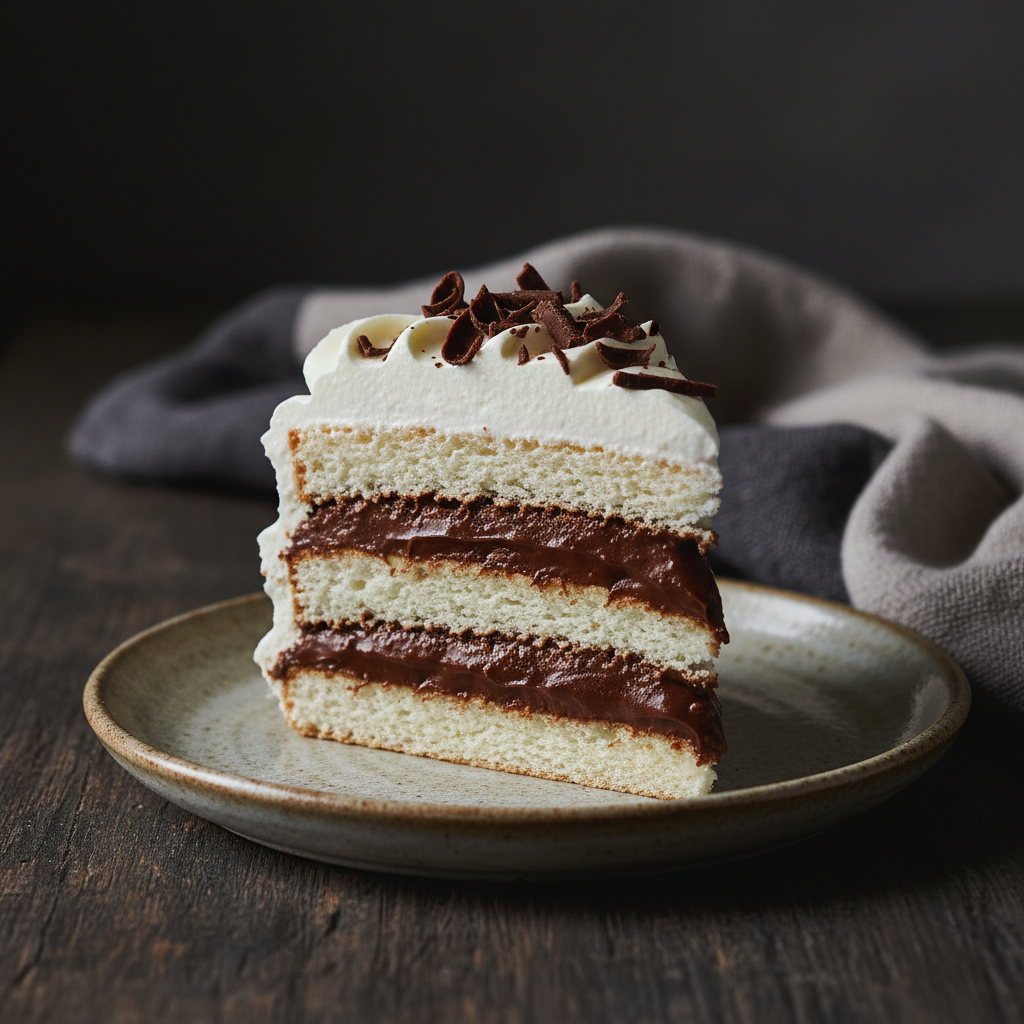
Classic Chocolate Meringue Cake
A stunning make-ahead dessert with crisp meringue layers, a rich chocolate crémeux filling, and a cloud of whipped cream. The perfect showstopper for any gathering.
Prep Time
45 min
Cook Time
2h
Total Time
2h 45m
Servings
10 servings
Ingredients
For 10 servings
- For the Meringue Layers:
- 6 large egg whites, at room temperature
- 1 1/2 cups (300g) superfine (caster) sugar
- 1 tsp white vinegar
- 1 tsp cornstarch
- 1/2 tsp pure vanilla extract
- For the Chocolate Crémeux:
- 7 oz (200g) dark chocolate (60-72% cacao), finely chopped
- 1 1/2 cups (360ml) heavy cream
- 4 large egg yolks
- 1/4 cup (50g) granulated sugar
- 1/4 tsp fine sea salt
- For the Whipped Cream Topping:
- 1 1/2 cups (360ml) cold heavy cream
- 2 tbsp powdered sugar
- 1 tsp pure vanilla extract
- Garnish: Chocolate shavings or cocoa powder
Instructions
- 1
Prepare Oven and Pans
Preheat your oven to 225°F (110°C). On two separate pieces of parchment paper, draw an 8-inch (20cm) circle on each. Place them on two large baking sheets.
- 2
Whip the Egg Whites
In the clean, dry bowl of a stand mixer fitted with the whisk attachment, beat the egg whites on medium speed until foamy. With the mixer running, slowly add the superfine sugar, one tablespoon at a time. This process should take several minutes to ensure the sugar fully dissolves.
- 3
Form Stiff Peaks
Once all the sugar is added, turn the mixer to high. Add the vinegar, cornstarch, and vanilla. Continue to beat for 5-7 minutes, or until the meringue is very thick, glossy, and holds stiff peaks when the whisk is lifted.
- 4
Shape and Bake Meringue
Divide the meringue evenly between the two prepared baking sheets. Using a spatula, spread the meringue to fill the drawn circles, creating two even discs. Bake for 2 hours, rotating the pans halfway through. The meringue should be dry to the touch and pale in color.
- 5
Cool the Meringue
Turn off the oven and prop the oven door open slightly with a wooden spoon. Let the meringue discs cool completely inside the oven for at least 2 hours, or overnight. This prevents them from cracking. Once cool, store in an airtight container at room temperature for up to 2 days.
- 6
Make the Chocolate Crémeux Base
Place the finely chopped dark chocolate in a medium heatproof bowl. In a saucepan, heat 1 1/2 cups of heavy cream over medium heat until it just begins to simmer. In a separate bowl, whisk the egg yolks, granulated sugar, and salt until pale and slightly thickened.
- 7
Temper and Cook the Custard
Slowly pour the hot cream into the egg yolk mixture while whisking constantly to temper the eggs. Pour the mixture back into the saucepan and cook over low heat, stirring constantly with a spatula, until it thickens enough to coat the back of the spatula (about 180°F or 82°C).
- 8
Finish and Chill the Crémeux
Immediately pour the hot custard through a fine-mesh sieve over the chopped chocolate. Let it sit for 1-2 minutes, then stir gently until smooth and fully combined. Cover with plastic wrap, pressing it directly onto the surface, and refrigerate for at least 4 hours, or preferably overnight, until firm.
- 9
Whip the Cream
Just before you are ready to assemble the cake, whip the cold heavy cream, powdered sugar, and vanilla in a chilled bowl until soft to medium peaks form. Be careful not to over-whip.
- 10
Assemble the First Layer
Place one meringue disc on your serving platter. Spread a generous layer of the chilled chocolate crémeux over the meringue, leaving a small border around the edge. Top the crémeux with a layer of whipped cream.
- 11
Finish the Cake
Gently place the second meringue disc on top. Cover the top with the remaining whipped cream, creating swirls with a spatula. Garnish with chocolate shavings or a dusting of cocoa powder. For best results, serve within a few hours of assembly.
Nutrition Facts
Per serving (estimated)
480 calories
Calories
45g
Carbs
7g
Protein
32g
Fat
3g
Fiber
150mg
Sodium
38g
Sugar