Perfect Mini Cheesecakes (Easy No-Water-Bath Recipe!)
Whip up these creamy, dreamy Mini Cheesecakes with a simple graham cracker crust. This no-fuss, no-water-bath recipe is perfect for any gathering!
cookwithyara.com/recipes/mini-cheesecakes
There are evenings when the craving for something truly special, something elegant and decadent, strikes. But then, reality sets in: the thought of a complicated, multi-hour baking project feels utterly exhausting. We’ve all been there. You want the reward without the ritual, the celebration without the ceremony. What if I told you that you could have the rich, creamy, tangy perfection of a classic cheesecake, but in a fraction of the time and with none of the usual stress? That’s the magic of these incredible Mini Cheesecakes.
This recipe is my answer to the call for a sophisticated dessert that respects your time and energy. It’s about creating individual moments of joy, perfectly portioned and ready to delight. Imagine a buttery, crisp graham cracker crust cradling a velvety smooth, rich cream cheese filling, baked to perfection without any fussy water baths. These little gems are everything you love about their full-sized counterpart, but wonderfully manageable and almost completely foolproof. From my kitchen to yours, this is how you get from a simple craving to a stunning dessert on the table, ready for sharing and savoring.
Why This Is Your New Go-To Dessert
When a recipe finds a permanent place in my collection, it has to earn it by being both delicious and practical. This Mini Cheesecakes recipe does exactly that, and I find myself turning to it again and again. It effortlessly bridges the gap between a simple weeknight treat and an elegant dessert for a special gathering. Here’s why I believe you’ll fall in love with it too.
Perfectly Portioned. There's an undeniable charm to individual desserts. No need for slicing, no messy serving—just perfect little cakes for everyone. This single-serving format makes them ideal for family dinners, potlucks, or any occasion where you want to serve with ease and elegance. Each person gets their own beautiful Mini Cheesecake, a personal bite of luxury.
Incredibly Simple (No Water Bath!). The number one fear for many home bakers when it comes to cheesecake is the dreaded water bath. It can be cumbersome and messy. Because these cheesecakes are small, they bake much more evenly, retaining moisture without the need for a steamy oven. This single step removal transforms the entire process, making it accessible and stress-free.
A Canvas for Creativity. While absolutely divine on their own, these Mini Cheesecakes are the perfect base for your favorite toppings. A swirl of fruit compote, a dollop of whipped cream, a drizzle of warm date syrup, or a sprinkle of toasted nuts—the possibilities are truly endless. You can customize them to suit any taste or season.
Make-Ahead Magic. Life is busy, and any dessert that can be prepared in advance is a winner in my book. These cheesecakes not only can be made ahead, but they actually taste better after a day in the refrigerator. The flavors meld and the texture becomes even creamier, making them the ultimate prepare-ahead dessert for stress-free hosting.
Foolproof for Beginners. If you've always wanted to bake a cheesecake but felt intimidated, this is your starting point. The techniques are straightforward, the baking time is short, and the risk of cracks is incredibly low. This recipe builds confidence and delivers a stunning result every single time, proving that you don't need to be a pastry chef to create something amazing.
Simple Ingredients, Big Flavor
The beauty of a truly great recipe often lies in its simplicity. You don’t need a long list of specialty ingredients to create something spectacular. These Mini Cheesecakes rely on a handful of humble, high-quality pantry and refrigerator staples that come together to create a flavor and texture that is anything but simple. Let's walk through the key players.
Full-Fat Block Cream Cheese: This is the heart and soul of your cheesecake. It is absolutely essential to use the block-style, full-fat variety. The kind sold in tubs is whipped and contains more water, which will result in a runny, disappointing filling. For the creamiest, lump-free texture, make sure your cream cheese is completely softened to room temperature before you begin.
Graham Crackers: The classic choice for a cheesecake crust, providing a sweet, slightly sandy, and wonderfully buttery base that complements the tangy filling. If you don't have graham crackers, digestive biscuits are a fantastic substitute. For a different flavor profile, you could even try cookies like Biscoff or shortbread.
Unsalted Butter: Melted butter is the glue that holds our crust together. It infuses the crumbs with richness and helps them crisp up beautifully during their brief pre-bake in the oven.
Granulated Sugar: This provides the necessary sweetness to balance the tang of the cream cheese and sour cream. It also contributes to the smooth, tender structure of the filling.
Eggs: Eggs are the primary binder here. They provide structure and richness, helping the filling set as it bakes. Like the cream cheese, your eggs must be at room temperature to ensure they incorporate seamlessly into the batter without curdling or creating lumps.
Sour Cream or Full-Fat Greek Yogurt: This is my secret to an ultra-creamy, moist cheesecake with a delightful tang. It adds a layer of flavor complexity and richness that takes the filling from good to great. Both work wonderfully, so use whichever you have on hand.
Fresh Lemon Juice: Just a teaspoon is all you need. It won't make the cheesecakes taste lemony, but it will brighten all the other flavors, cutting through the richness and making the entire dessert taste more vibrant and balanced.
Vanilla Extract: A non-negotiable for warmth and depth of flavor. It rounds out the tanginess of the dairy and enhances the overall aroma, making the cheesecake taste complete and beautifully fragrant.
Step-by-Step in Plain English
Baking should be a joyful process, not a stressful one. I’ve broken down this recipe for Mini Cheesecakes into a few simple, manageable stages. We'll move from creating the perfect crunchy base to whipping up a silky, smooth filling, and finally, baking them gently to perfection. Follow along, and I promise you’ll feel like a professional pastry chef.
Stage 1: Building the Foundation – The Crust. First things first, we create that irresistible buttery base. You’ll start by crushing your graham crackers into fine crumbs. A food processor makes quick work of this, but placing them in a sealed bag and using a rolling pin is just as effective (and a great way to release some stress!). Mix these crumbs with a little sugar and melted butter until the texture resembles damp sand. Then, you’ll press this mixture firmly into the bottom of paper-lined muffin cups. The key here is to create a compact, even layer. I like to use the bottom of a small spice jar to press it down tightly. A quick pre-bake for about 5 minutes sets the crust and ensures it stays crisp.
Stage 2: Creating the Velvety Filling. The secret to a lump-free cheesecake filling is starting with truly soft cream cheese and beating it alone first. In a large bowl, using an electric mixer, beat the room-temperature cream cheese on medium speed until it's completely smooth and creamy, with absolutely no lumps. Scrape down the sides of the bowl often. This initial step is the most important for achieving that signature silky texture.
Stage 3: Gently Combining the Ingredients. Once the cream cheese is smooth, you'll mix in the sugar, vanilla, and a pinch of salt. Now, it's time for the eggs. Add them one at a time, mixing on low speed just until the yellow yolk disappears. Over-mixing after adding eggs incorporates too much air, which is a primary cause of cracking. Finally, you’ll gently fold in the sour cream (or Greek yogurt) and lemon juice. The final batter should be smooth, thick, and luscious. That’s it, you’re more than halfway done!
Stage 4: The Gentle Bake and Slow Cool. Now, we fill. Evenly divide the beautiful cheesecake batter among your prepared crusts, filling them nearly to the top. The baking process is gentle—a moderate oven is all you need. You'll bake them until the edges are set but the centers still have a very slight jiggle to them. They will continue to set as they cool. The cooling process is just as important as the baking. To prevent cracks from sudden temperature changes, we'll let them cool gradually: first in the turned-off oven with the door cracked open, then on a wire rack at room temperature, and finally, in the refrigerator to chill completely. This patience is rewarded with perfectly smooth tops every single time.
Pro Shortcuts and Time-Savers
While this Mini Cheesecakes recipe is already quite straightforward, a few clever shortcuts can make the process even faster and more efficient. These are the little tricks I use when I’m short on time but not willing to compromise on a delicious, homemade dessert.
Use a Food Processor for the Crust. If you have a food processor, use it! It will turn your graham crackers into fine, uniform crumbs in less than 30 seconds. You can even add the sugar and melted butter directly to the processor bowl and pulse a few times to combine everything perfectly with minimal mess.
Buy Pre-Crushed Crumbs. For ultimate convenience, most grocery stores sell pre-made graham cracker crumbs. This completely eliminates a step and a bit of cleanup, getting you to the filling stage that much faster. It's a great option for last-minute baking sessions.
The Room Temperature Speed-Up. Forgot to take your cream cheese and eggs out of the fridge? Don't worry. To bring cream cheese to room temperature quickly, unwrap the blocks, cut them into small 1-inch cubes, and spread them on a plate. They’ll soften in about 20-30 minutes. For the eggs, simply place them in a bowl of warm (not hot) tap water for 5-10 minutes. They'll be ready to go when you are.
Prepare Components in Advance. You can make the crust mixture a day or two ahead of time. Simply press the crumbs into the muffin liners, cover the tin tightly, and store it in the refrigerator. When you’re ready to bake, just mix the filling and go. This breaks the process into two very small, manageable tasks.
Ways to Switch It Up
One of the best things about this Mini Cheesecakes recipe is how beautifully it adapts to different flavors and toppings. Think of the classic version as a perfect blank canvas. Once you’ve mastered the basic technique, you can get creative and tailor them to any occasion or craving. Here are a few of my favorite variations to inspire you.
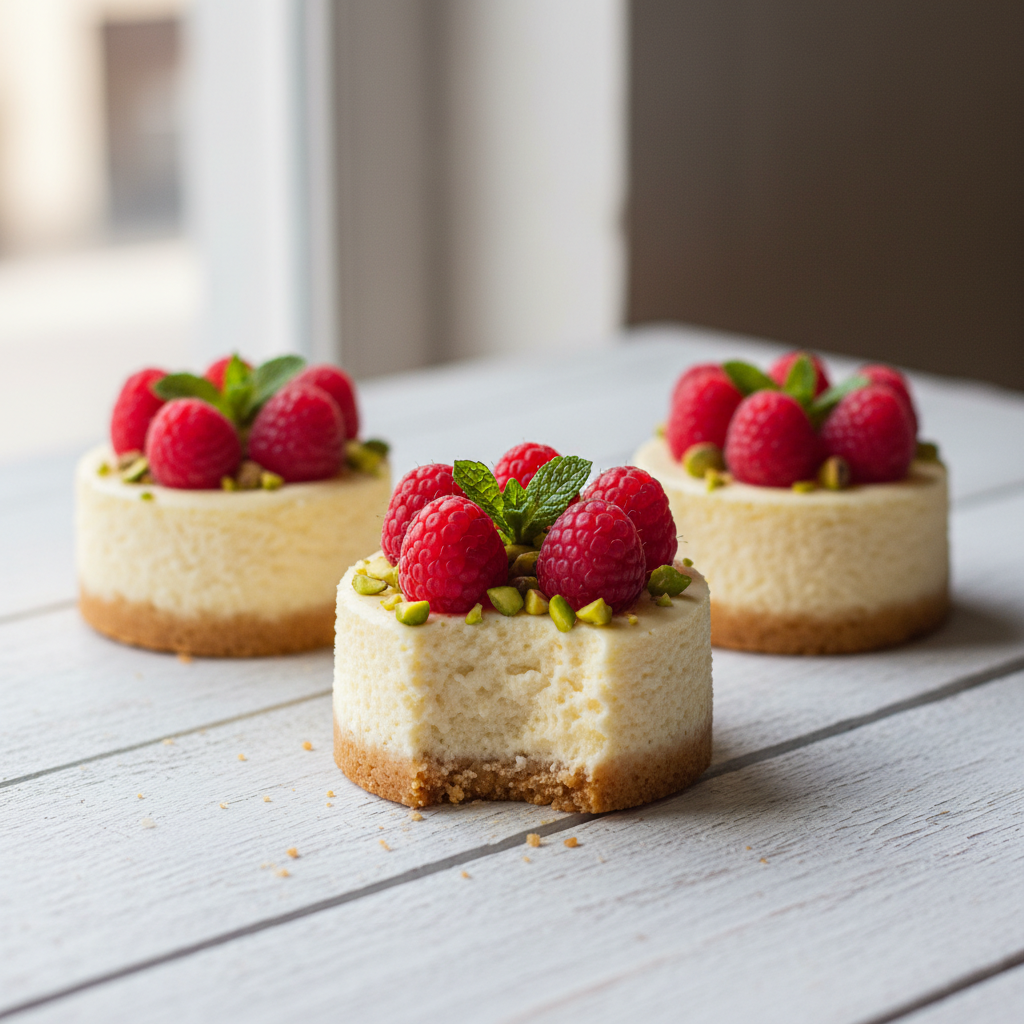
A Mediterranean Dream. For a touch of my beloved Levantine flavors, swirl a teaspoon of fig jam into the top of each cheesecake before baking. After they’ve chilled, top them with a generous sprinkle of roughly chopped pistachios and a delicate drizzle of honey or date molasses. The combination of sweet, nutty, and tangy is absolutely sublime.
Chocolate Lover's Delight. For a richer, more decadent version, add two tablespoons of unsweetened cocoa powder to the graham cracker crust mixture. For the filling, melt about 3 ounces of good-quality semi-sweet chocolate, let it cool slightly, and then beat it into the cream cheese after you’ve added the sugar. Top with chocolate shavings for a truly indulgent treat.
Bright Berry Compote. You can never go wrong with fruit. Make a simple berry compote by simmering one cup of fresh or frozen mixed berries with two tablespoons of sugar and a squeeze of lemon juice until thickened. Let it cool completely, then spoon it over the chilled Mini Cheesecakes just before serving. It adds a beautiful jewel-toned color and a burst of freshness.
Warmly Spiced. Infuse your cheesecakes with cozy, aromatic spices. Add half a teaspoon of ground cinnamon and a quarter teaspoon of ground cardamom to the crust. You can also add a pinch of cinnamon directly to the filling. This variation is especially wonderful in the cooler months and pairs beautifully with a cup of tea.
A Burst of Lemon. If you love bright, zesty desserts, amplify the citrus notes. Add the finely grated zest of one whole lemon to the filling along with the lemon juice. This creates a much more forward lemon flavor that is incredibly refreshing. Garnish with a small curl of lemon peel for a beautiful presentation.
Storing Leftovers the Right Way
Properly storing your beautifully baked Mini Cheesecakes is key to making sure they stay fresh, creamy, and delicious for as long as possible. In fact, their flavor and texture often improve after a night in the fridge, so don't hesitate to make them ahead of time! Here’s how to store them correctly.
In the Refrigerator: Once the cheesecakes have chilled completely, place them in an airtight container. This is important to prevent them from drying out or absorbing any other odors from the fridge. A container with a tall lid is ideal to avoid squishing any toppings. They will keep beautifully in the refrigerator for up to 5 days.
In the Freezer: Yes, these Mini Cheesecakes freeze exceptionally well! This is a fantastic option if you want to have a delicious dessert on hand for unexpected guests or future cravings. First, place the cheesecakes on a baking sheet and freeze them, uncovered, for about an hour until they are firm. This step prevents them from sticking together. Then, wrap each cheesecake individually in plastic wrap, and place them all in a freezer-safe bag or container. They can be frozen for up to 3 months.
Thawing and Reheating: For the best texture, thaw frozen cheesecakes in the refrigerator overnight. Never thaw them at room temperature or in the microwave, as this can cause condensation and make the crust soggy. Since cheesecakes are served chilled, no reheating is necessary. Simply thaw, top if desired, and serve.
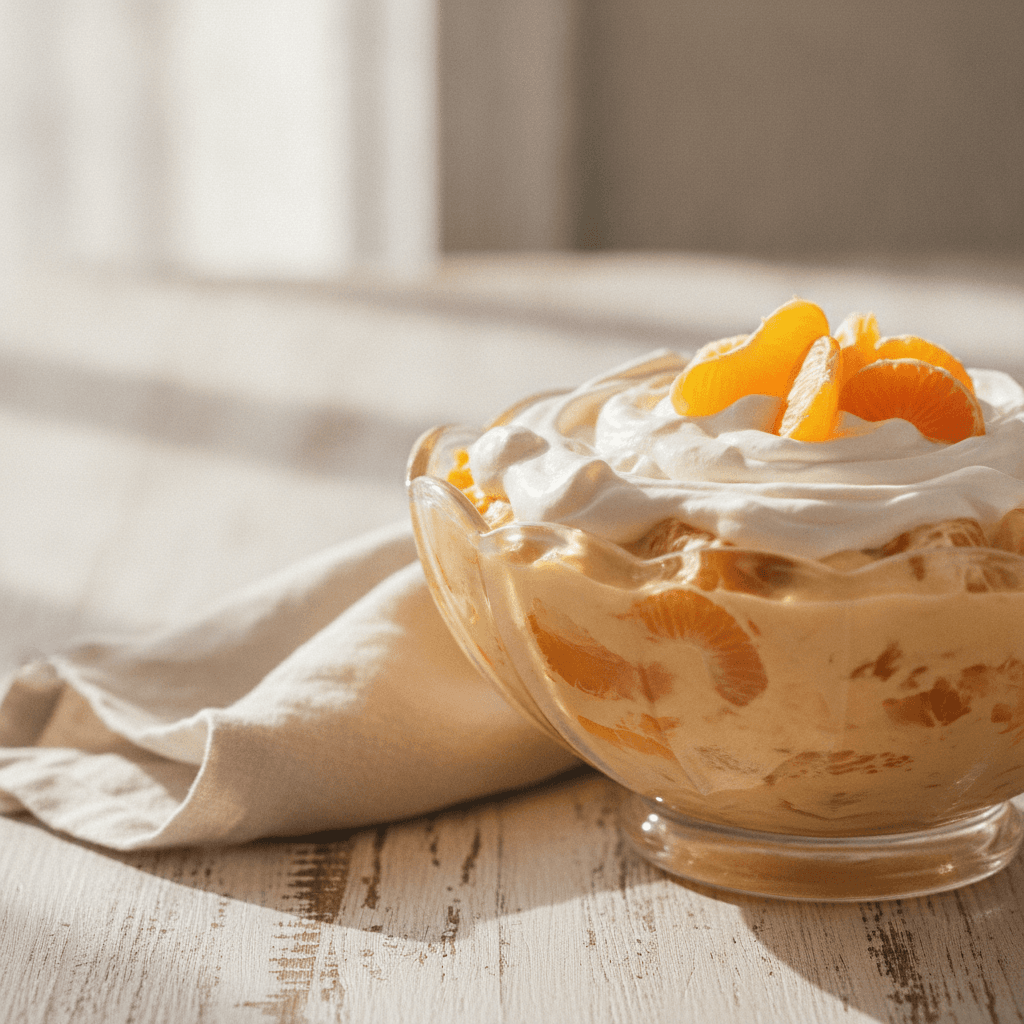
Repurposing Leftovers: If you have a few leftover cheesecakes, try crumbling one into a small glass and layering it with fresh berries and a dollop of whipped cream for an instant, deconstructed cheesecake trifle. It’s a fun and delicious way to enjoy the final few bites.
Quick Answers to Common Questions
Even with the simplest recipes, questions can pop up. Here are answers to some of the most common queries I receive about making these perfect Mini Cheesecakes.
Can I make these Mini Cheesecakes ahead of time?
Absolutely! In fact, I recommend it. They need at least 4 hours to chill and set properly, but they are even better when made a day in advance. This allows the flavors to meld and the texture to become even creamier. They are the perfect dessert for stress-free entertaining.
Why did my mini cheesecakes crack?
Cracking is much less common with mini cheesecakes, but it can still happen. The usual culprits are over-mixing the batter (especially after adding the eggs, which incorporates too much air), over-baking them, or cooling them too quickly. Be sure to mix on low speed and follow the gradual cooling instructions for perfectly smooth tops.
Can I make this recipe gluten-free?
Yes, very easily! The filling is naturally gluten-free. For the crust, simply substitute the graham crackers with your favorite gluten-free crunchy cookies or graham-style crackers. The results will be just as delicious.
I don't have a standard muffin tin. What else can I use?
While a standard 12-cup muffin tin is ideal, you have other options. Silicone muffin liners placed on a baking sheet work well. You can also bake them in small, oven-safe ramekins for a more rustic, crustless version (you may need to adjust the baking time slightly).
How do I know for sure when the cheesecakes are done baking?
The key is to not over-bake them. They are ready when the outer edges of the cheesecakes look set and matte, but the very center (about the size of a dime) still has a slight jiggle or wobble when you gently tap the side of the pan. They will finish setting up completely as they cool and chill.
Can I double this recipe?
Of course! This recipe doubles perfectly. Simply double all the ingredients and use two 12-cup muffin tins. Bake them in batches if they don't both fit on the same rack in your oven to ensure even heat circulation and proper baking.
Easy Mini Cheesecakes
A foolproof recipe for creamy, individual mini cheesecakes with a buttery graham cracker crust. No water bath required, making it perfect for beginners!
Prep Time
20 min
Cook Time
22 min
Total Time
42 min
Servings
12 mini cheesecakes
Ingredients
For 12 mini cheesecakes
- For the Crust:
- 1 1/2 cups (150g) graham cracker crumbs
- 1/4 cup (50g) granulated sugar
- 6 tablespoons (85g) unsalted butter, melted
- For the Filling:
- 2 (8-ounce / 226g) packages full-fat block cream cheese, softened to room temperature
- 3/4 cup (150g) granulated sugar
- 1/4 teaspoon salt
- 2 large eggs, at room temperature
- 1 teaspoon vanilla extract
- 1/4 cup (60g) full-fat sour cream or Greek yogurt, at room temperature
- 1 teaspoon fresh lemon juice
Instructions
- 1
Preheat Oven and Prepare Pan
Preheat your oven to 325°F (163°C). Line a standard 12-cup muffin tin with paper liners. Set aside.
- 2
Make the Graham Cracker Crust
In a medium bowl, combine the graham cracker crumbs, 1/4 cup of granulated sugar, and the melted butter. Stir with a fork until the mixture is evenly moistened and resembles damp sand.
- 3
Press Crusts into Liners
Distribute about 1 1/2 tablespoons of the crumb mixture into each paper liner. Use the bottom of a small glass or a spice jar to press the crumbs down firmly and evenly into the base.
- 4
Par-Bake the Crusts
Place the muffin tin in the preheated oven and bake the crusts for 5 minutes. This helps the crust set and stay crisp. Remove from the oven and set on a wire rack to cool slightly while you prepare the filling.
- 5
Beat the Cream Cheese
In a large bowl using a handheld electric mixer or a stand mixer with the paddle attachment, beat the softened cream cheese on medium speed for 2-3 minutes until completely smooth and free of lumps. Scrape down the sides and bottom of the bowl frequently.
- 6
Add Sugar and Vanilla
Add the 3/4 cup of granulated sugar and the salt to the cream cheese. Beat on medium-low speed until smooth and well combined. Mix in the vanilla extract.
- 7
Incorporate Eggs One by One
With the mixer on low speed, add the eggs one at a time, mixing just until the yolk disappears into the batter after each addition. Do not overmix, as this can cause the cheesecakes to crack.
- 8
Fold in Sour Cream and Lemon
Add the sour cream (or Greek yogurt) and fresh lemon juice. Mix on low speed just until combined and the batter is smooth and uniform. Scrape the bowl one last time to ensure everything is incorporated.
- 9
Fill the Liners
Divide the cheesecake filling evenly among the 12 prepared crusts. A large cookie scoop or a 1/4 cup measure works well for this. The filling should come up almost to the top of the paper liners.
- 10
Bake Until Set
Bake for 18-22 minutes, or until the edges are set and the center has only a very slight jiggle. Be careful not to over-bake. The cheesecakes will continue to set as they cool.
- 11
Cool Down Slowly
Turn off the oven and crack the door open, leaving the cheesecakes inside for 1 hour. This slow cooling process is crucial for preventing cracks. After an hour, remove the tin from the oven and let the cheesecakes cool completely to room temperature on a wire rack.
- 12
Chill Completely Before Serving
Once at room temperature, cover the muffin tin with plastic wrap and transfer to the refrigerator. Chill for at least 4 hours, or preferably overnight, before serving. Serve plain or with your favorite toppings.
Nutrition Facts
Per serving (estimated)
320 calories
Calories
25g
Carbs
5g
Protein
22g
Fat
1g
Fiber
250mg
Sodium
20g
Sugar