Easy Homemade Pepper Jelly Recipe
Discover how to make the best sweet and spicy pepper jelly from scratch! This easy-to-follow recipe is perfect for canning and creating a versatile condiment.
cookwithyara.com/recipes/pepper-jelly-recipe
There is a special kind of satisfaction that comes from preserving the harvest, capturing the vibrant essence of fresh produce in a jar to be enjoyed for months to come. It’s a tradition that connects us to the seasons and to the generations before us. In my own culinary journey, which is deeply rooted in the fresh, bold flavors of the Mediterranean and Levant, the art of making preserves, or murabba, is a cherished practice. While we often think of sweet fruit jams, there is a whole world of savory and spicy preserves that deserve a place in our pantries. The undisputed star of this category, for me, is a beautifully made pepper jelly. Its glistening, jewel-toned appearance and the perfect suspension of finely chopped peppers is a feast for the eyes before it even touches your lips.
My first taste of a truly exceptional, homemade pepper jelly was a revelation. It wasn't the overly sweet, one-note condiment I had occasionally seen in stores. This was a complex symphony of flavors—a bright, fruity sweetness from bell peppers, a clean, sharp tang from vinegar, and a wave of gentle, lingering warmth from chili peppers. It was a condiment that could do anything. I knew immediately that I needed to master the craft. This pepper jelly recipe is the culmination of that effort, a guide designed to demystify the process of jelly-making. It takes some care and attention, but the reward is a pantry stocked with liquid gold—a condiment that will elevate everything from a simple cheese board to a sophisticated glaze for grilled meats. This post is your comprehensive guide to mastering this delightful preserve.
The Origins and History
The story of pepper jelly is a beautiful example of culinary ingenuity, deeply rooted in the American South. While preserving peppers in vinegar has been a practice for centuries across many cultures, the specific creation of a sweet, gelled pepper condiment is a more recent innovation. It emerged from the Southern tradition of thriftiness and making the most of a bountiful garden harvest, particularly in places like Texas and Louisiana where peppers grow in abundance. In the mid-20th century, home cooks began experimenting with combining the sweet profile of fruit jellies with the savory heat of local chilies, using sugar and pectin to create a stable, spoonable preserve.
Originally, recipes were passed down through families, with each having its own secret ratio of sweet peppers to hot, or a preferred type of vinegar. The jelly was a staple at community gatherings and a popular canned good at local markets. As canning became more widespread and accessible with the popularization of brands like Ball and Kerr, so too did the fame of the pepper jelly recipe. Its popularity exploded as people discovered its incredible versatility. It wasn't just for toast; it was the perfect partner for cream cheese and crackers, a beloved appetizer that became a hallmark of Southern hospitality. Today, the classic has evolved, with artisans and home cooks creating endless variations using different peppers, fruits, and spices, but the core concept—that irresistible balance of sweet, tangy, and spicy—remains the heart and soul of this cherished American condiment.
Understanding the Flavor Profile
The magic of a perfect pepper jelly lies in its exquisite balance. It’s a culinary tightrope walk where sweetness, heat, and acidity play off each other in perfect harmony. When you taste it, the first note is a bright, clean sweetness from the sugar, which is quickly followed by the fruity, almost vegetal flavor of the bell peppers. This sweetness is not cloying; it's a foundation upon which the other flavors are built.
Next comes the tang from the apple cider vinegar. This acidic element is crucial; it cuts through the richness of the sugar, preventing the jelly from being one-dimensional and adding a refreshing sharpness that makes your palate want more. Finally, the warmth arrives. A good pepper jelly recipe doesn't assault you with overwhelming heat; instead, it delivers a gentle, blossoming warmth that lingers pleasantly on the back of your tongue. The level of heat can be customized, of course, but the goal is a glow, not a fire.
Beyond flavor, the texture is paramount. A perfectly set pepper jelly should be soft and spoonable, not stiff or rubbery like a hard candy. It should have a gentle quiver when moved. You want to see the finely minced pieces of red, green, and hot peppers suspended evenly throughout the translucent jelly, like colorful jewels in glass. This textural element adds a slight bite and visual appeal, ensuring every spoonful is as beautiful as it is delicious.
Essential Ingredients Explained
Great cooking starts with great ingredients, and a simple recipe like this one leaves no room for mediocre components. Each element plays a critical role in the final flavor, texture, and set of your homemade pepper jelly. Understanding why each one matters is the first step toward a perfect batch.
-
Bell Peppers: These form the base of the jelly, providing sweetness, fruity flavor, and beautiful color. I love using a combination of red and green bell peppers. The red peppers offer a sweeter, milder flavor and a vibrant ruby hue, while the green peppers add a slightly more vegetal, grassy note and classic visual contrast. When shopping, look for firm peppers with smooth, glossy skin and no soft spots.
-
Hot Peppers: This is where the personality of your jelly comes from. Jalapeños are a fantastic choice for a balanced, medium heat that most people enjoy. For a milder jelly, be sure to remove all the seeds and white membranes, as that's where most of the capsaicin (the compound that creates heat) is concentrated. For a spicier version, you could use serrano or even a small amount of habanero peppers, but use them judiciously. Always wear gloves when handling hot peppers!
-
Apple Cider Vinegar: Acidity is non-negotiable in jelly making. It balances the sugar, brightens the pepper flavor, and helps create a safe environment for preservation. I prefer apple cider vinegar over white vinegar because its fruity undertones complement the peppers beautifully. Ensure you are using a vinegar with at least 5% acidity, which is standard for most commercial brands.
-
Granulated Sugar: Sugar is more than just a sweetener here. It is essential for the structure of the jelly, interacting with the pectin to create the gel. It also acts as a preservative. It is crucial not to reduce the amount of sugar in this recipe unless you are specifically using a low-sugar or no-sugar-needed pectin, which requires a different preparation method.
-
Powdered Pectin: Pectin is a naturally occurring starch found in fruits and vegetables. When boiled with sugar and acid, it forms a gel. This recipe calls for regular powdered pectin, which is widely available. It's important to use the exact amount called for, as too little will result in a runny syrup and too much will create a rubbery, overly firm jelly.
-
A Pinch of Salt: This might seem like an odd addition to a jelly, but a tiny amount of salt doesn't make it salty. Instead, it acts as a flavor enhancer, sharpening the other tastes and making the sweetness and spice pop.
Mastering the Technique
Jelly making is a science, but it’s a beautiful and rewarding one. Following the steps in the right order and understanding the visual cues will ensure your success. Think of it as a culinary dance where temperature and timing are your partners. Here’s a breakdown of the key stages for this pepper jelly recipe.
-
Mise en Place and Sterilization: Before you begin, prepare everything. Finely chop your peppers (a food processor makes this quick work), measure your ingredients precisely, and most importantly, sterilize your jars and lids. Boiling them in water for 10 minutes ensures they are perfectly clean and ready, preventing any spoilage. This upfront preparation makes the entire process smooth and stress-free.
-
Activating the Pectin: The first cooking step involves combining the chopped peppers, vinegar, and powdered pectin in your pot. You will bring this mixture to a full boil over high heat, stirring constantly. This step is crucial because it dissolves the pectin and prepares it to bond with the sugar molecules.
-
The Sugar Addition: Once the pectin mixture is at a rolling boil, you’ll add all of the sugar at once. This will temporarily stop the boil. Your job is to stir continuously until the sugar is completely dissolved and the mixture comes back to a boil. Constant stirring prevents the sugar from scorching on the bottom of the pot.
-
The Critical Rolling Boil: This is the most important stage. Once the sugar is dissolved, you need to bring the jelly to a full, rolling boil that cannot be stirred down. This means when you stir it, the bubbles continue to break the surface vigorously. You will boil it this way for exactly one minute. This hard boil is what chemically activates the pectin, ensuring your jelly will set perfectly. Use a timer!
-
Skimming and Resting: After the one-minute boil, immediately remove the pot from the heat. You may see some foam on the surface; gently skim this off with a spoon for a clearer jelly. Let the mixture rest for about 5 minutes. This brief cooling period allows the jelly to thicken slightly, which helps keep the pepper pieces suspended evenly instead of floating to the top of the jars.
-
Jarring and Processing: Carefully ladle the hot jelly into your sterilized jars, leaving about ¼-inch of headspace at the top. Wipe the rims clean, apply the lids and bands until fingertip-tight, and process them in a boiling water bath for 10 minutes. This final step forces air out of the jars, creating a vacuum seal that makes your jelly shelf-stable for up to a year.
Common Pitfalls and How to Fix Them
Even with the best instructions, things can sometimes go sideways in the kitchen, especially with canning. The good news is that most issues with this pepper jelly recipe are easily fixable or preventable. Here are some common challenges and how to troubleshoot them.
-
"My jelly didn't set!" This is the most common fear. If after 24-48 hours your jelly is still a syrup, it's likely due to one of three things: the sugar-to-acid ratio was off, the mixture didn't reach a hard rolling boil, or it wasn't boiled for the full minute. The fix: you can pour the unset jelly back into a pot, add a bit more pectin (follow the package instructions for re-making jelly), and repeat the boiling process. It’s a saveable situation!
-
"My peppers all floated to the top." This happens when the jelly is still too thin when it's jarred, allowing the solids to float before the gel sets. To prevent this, let the jelly cool in the pot for 5-10 minutes after boiling and before ladling it into jars. Give it a gentle stir to redistribute the peppers, and then fill your jars. This slight cooling thickens it just enough to hold the peppers in suspension.
-
"My jelly is cloudy." Cloudiness can be caused by a few factors. Sometimes it’s from using underripe peppers, impurities in the sugar, or using water with a high mineral content. While it affects the appearance, a cloudy jelly is still perfectly safe and delicious to eat. To ensure a clear result next time, use ripe produce and filtered water if you have hard water.
-
"My jelly set up too hard." This means it was either boiled for too long or you used a little too much pectin. Unfortunately, this is harder to fix than runny jelly. The best way to use an over-set jelly is to treat it as a glaze. Gently warm a few spoonfuls in a saucepan until it loosens, then brush it over grilled chicken, fish, or roasted vegetables. It will still be delicious!
Regional Twists Worth Trying
Once you've mastered the classic pepper jelly recipe, you have a wonderful canvas for experimentation. Drawing inspiration from different culinary traditions can lead to some truly spectacular results. Here are a few variations to ignite your creativity:
-
A Levantine Touch: To give this jelly a Middle Eastern flair, which is dear to my heart, try adding a tablespoon of pomegranate molasses along with the vinegar. This adds a deep, tangy, almost tannic complexity that is wonderful with the sweetness. For heat, use a combination of jalapeños and a teaspoon of Aleppo pepper flakes, which provide a mild, smoky warmth rather than a sharp bite.
-
Tropical Sunshine: For a bright, fruity version, substitute one of the bell peppers with finely diced mango or pineapple. Pair this with a spicier pepper like a habanero or scotch bonnet (use with caution!). The tropical sweetness of the fruit is a perfect counterpoint to the intense floral heat of these chilies. This version is an incredible glaze for shrimp or fish.
-
Smoky and Savory: Create a deeper, smokier flavor profile by using chipotle peppers in adobo (the canned variety) instead of fresh jalapeños. Finely mince one or two chipotle peppers and add them to the mix. The smoky flavor is fantastic with grilled meats and heartier cheeses. You could also add a pinch of smoked paprika for color and aroma.
The Perfect Spread
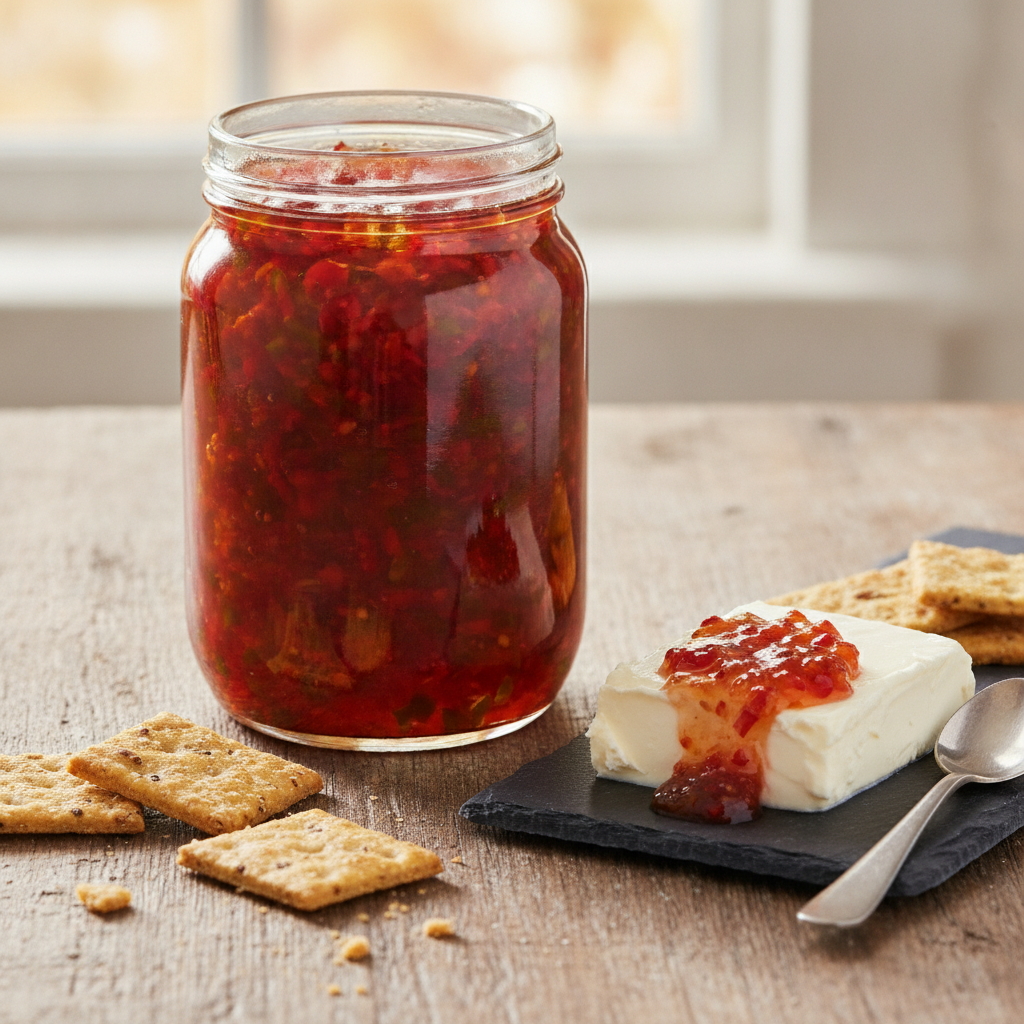
One of the greatest joys of making this pepper jelly recipe is dreaming up all the wonderful ways to serve it. It’s a true culinary chameleon. For a simple and timeless crowd-pleaser, serve it poured over a block of cream cheese or a log of soft goat cheese, surrounded by an assortment of crackers and toasted baguette slices. The creamy, tangy cheese is the perfect foil for the sweet heat of the jelly.
But don't stop there! Think of it as a finishing condiment. A dollop on top of a lamb burger or alongside grilled chicken kebabs adds a burst of flavor and a beautiful sheen. Whisk a spoonful into a simple vinaigrette with olive oil and lime juice to dress a sturdy green salad. It’s also a fantastic accompaniment to a cheese board, pairing especially well with sharp cheddar, salty halloumi, or a creamy brie.
For a complete meal, imagine a beautiful platter of grilled chicken skewers glazed with the pepper jelly, served alongside a fluffy couscous salad with fresh herbs and a simple dish of labneh drizzled with olive oil. The jelly ties everything together, providing a sweet and spicy counterpoint to the savory and fresh elements on the plate.
Keeping and Reheating
Properly stored, your homemade pepper jelly is a gift that keeps on giving. If you've followed the water bath canning process correctly, the sealed jars will be shelf-stable in a cool, dark place (like a pantry or cupboard) for up to one year. You'll know the seal is good if the lid is concave (curved down in the center) and doesn't pop when you press it.
Once a jar is opened, it must be stored in the refrigerator. An opened jar of pepper jelly will last for several months in the fridge, thanks to the high sugar and acid content which act as natural preservatives. The flavor of the jelly often improves after a week or two in the jar, as the flavors meld and mature, so don't be afraid to make it ahead of a gathering.
Unlike some dishes, pepper jelly doesn't require reheating. It is served at room temperature or chilled. If you're using it as a glaze, you'll gently warm it in a saucepan to loosen its consistency for brushing, but for all other uses as a condiment, simply spoon it straight from the jar.
Your Questions Answered
How can I adjust the spice level of my pepper jelly?
Controlling the heat is easy! The spice is concentrated in the seeds and white membranes of the hot peppers. For a very mild jelly, use only jalapeños and meticulously remove every seed and all the pith. For medium heat, leave a few seeds in. For a spicier result, you can add more jalapeños, leave in more seeds, or substitute with a hotter pepper like a serrano.
Can I use a different kind of pectin for this pepper jelly recipe?
Yes, but you must adjust the recipe accordingly. This recipe is formulated for classic powdered pectin. If you use liquid pectin or a low-sugar pectin, you must follow the instructions on that specific package. The order of operations often changes; for example, with liquid pectin, you typically add it at the very end of the cooking process.
Is it safe to double this recipe?
I strongly advise against doubling this pepper jelly recipe, especially if you are new to canning. In larger batches, it becomes much more difficult to ensure the mixture heats evenly and reaches the correct temperature for the pectin to set properly. It’s much safer and more reliable to make two separate, back-to-back batches.
How do I know when the jelly has reached the right stage without a candy thermometer?
You can use the classic “spoon test.” Before you start cooking, place a few small metal spoons in your freezer. When you think the jelly is ready, take it off the heat, dip a cold spoon into the mixture, and pull it out. Hold it horizontally and let the jelly drip off. If it runs off in thin streams, it's not ready. If the drops are thick and two drops merge together to fall off the spoon as a single “sheet,” it's done.
Can I use frozen peppers instead of fresh?
Absolutely. If you have a surplus of peppers from your garden, freezing them is a great way to preserve them for making jelly later. Thaw the peppers completely and drain any excess liquid before chopping and proceeding with the recipe. The final texture of the jelly will be virtually identical.
Homemade Sweet & Spicy Pepper Jelly
A classic homemade pepper jelly recipe balancing sweet, tangy, and spicy flavors. Perfect for canning, this versatile condiment is delicious with cheese, as a glaze, or on its own.
Prep Time
20 min
Cook Time
25 min
Total Time
45 min
Servings
5 half-pint jars
Ingredients
For 5 half-pint jars
- 1 cup finely chopped green bell pepper (about 1 large)
- 1 cup finely chopped red bell pepper (about 1 large)
- 1/2 cup finely chopped jalapeño peppers, seeds and membranes removed for mild heat (about 4-5 jalapeños)
- 1 1/2 cups apple cider vinegar (5% acidity)
- 5 cups granulated sugar
- 1 (1.75 ounce) package powdered fruit pectin
- 1/2 teaspoon fine sea salt
Instructions
- 1
Prepare Canning Equipment
Before starting, sterilize 5 half-pint jars, lids, and bands. Wash them in hot, soapy water, rinse well, and then place the jars and lids (not the bands) in a large pot of simmering water until ready to use. This step is crucial for safe, long-term storage.
- 2
Chop the Peppers
Wearing gloves to protect your hands, finely chop all the peppers. A food processor works wonderfully for this; pulse until the pieces are very fine, like confetti, but not puréed. You should have about 2 1/2 cups of chopped peppers in total.
- 3
Combine Peppers, Vinegar, and Pectin
In a large, heavy-bottomed pot or Dutch oven, combine the finely chopped peppers, apple cider vinegar, salt, and the entire packet of powdered pectin. Stir everything together well to ensure the pectin is evenly distributed.
- 4
Bring to a Boil
Place the pot over high heat. Bring the mixture to a full, rolling boil, stirring constantly to prevent the pectin from clumping and to ensure it dissolves completely.
- 5
Add the Sugar
Once the mixture is at a hard boil, pour in all 5 cups of sugar at once. Stir continuously until the sugar is fully dissolved. The mixture will stop boiling temporarily; keep stirring over high heat until it returns to a boil.
- 6
Achieve a Rolling Boil
Bring the mixture back to a full, rolling boil that cannot be stirred down. This is the most critical step for the jelly to set. Once it reaches this stage, set a timer and boil for exactly 1 minute, stirring constantly.
- 7
Rest and Skim
Immediately remove the pot from the heat. If any foam has formed on the surface, use a metal spoon to gently skim it off and discard it. Let the jelly rest in the pot for 5-7 minutes without stirring; this helps the pepper pieces stay suspended in the jelly.
- 8
Fill the Jars
Give the jelly one last gentle stir to distribute the peppers. Carefully ladle the hot jelly into the prepared hot, sterilized jars, leaving 1/4-inch of headspace at the top of each jar.
- 9
Seal the Jars
Wipe the rims of the jars with a clean, damp cloth to remove any drips. Center the lids on the jars and screw on the bands until they are 'fingertip-tight'—secure, but not overly tight.
- 10
Process in Water Bath
Place the filled jars into a water bath canner with simmering water, ensuring the jars are covered by at least 1-2 inches of water. Bring the water to a full boil, then cover the canner and process the jars for 10 minutes.
- 11
Cool and Check Seals
Turn off the heat, remove the canner lid, and let the jars stand in the hot water for 5 minutes. Then, carefully remove the jars and place them on a towel-lined countertop. Let them cool, undisturbed, for 12-24 hours. You will hear popping sounds as the jars seal. Check seals by pressing on the center of the lids; they should not flex.
Nutrition Facts
Per serving (estimated)
50 calories
Calories
13g
Carbs
0g
Protein
0g
Fat
0.1g
Fiber
20mg
Sodium
12g
Sugar