Creamy 15-Minute Hummus Recipe (Easy & Authentic)
Whip up the creamiest, dreamiest hummus in just 15 minutes! My authentic, easy hummus recipe uses simple pantry staples for a healthy, delicious dip.
cookwithyara.com/recipes/15-minute-hummus-recipe
There’s a certain magic in the kitchen that goes beyond just cooking. It’s the whir of a food processor starting up, a sound that promises something delicious is just moments away. For me, that sound is often the precursor to a fresh batch of hummus, and the aroma that follows—the bright zest of lemon, the pungent warmth of garlic, the nutty depth of tahini—is the scent of comfort, of gathering, of simple, good food. It’s a sensory experience that instantly transports me to a table laden with small plates, ready for sharing.
For years, I believed that truly exceptional, silky-smooth hummus was the result of a long, laborious process. I thought it required soaking chickpeas overnight, boiling them for hours, and other time-consuming rituals. But I was determined to capture that authentic, luscious texture without the wait. I wanted a go-to recipe for those moments when you need a beautiful, nourishing dip right now. This journey led me to test every variable—the brand of tahini, the temperature of the water, the order of ingredients—to perfect what I can now confidently call the ultimate 15-minute hummus recipe.
What sets this recipe apart is a technique that creates an impossibly creamy, whipped texture in minutes, a texture so light and airy it will rival any restaurant's. It proves that you don’t have to choose between speed and quality. In this post, I'm not just sharing a list of ingredients; I'm sharing the secrets and techniques that will empower you to make a truly stunning hummus every single time. You’ll walk away with a recipe that is not only quick but deeply satisfying, ready to become a staple in your kitchen.
The Story Behind This Dish
Hummus is more than just a dip; it's a cornerstone of Levantine cuisine, a culinary treasure with roots stretching back centuries across the sun-drenched landscapes of regions we know today as Lebanon, Syria, Palestine, and Jordan. The word 'hummus' itself is the Arabic word for chickpeas, a humble legume that forms the heart and soul of this beloved dish. Its history is a bit hazy, with various cultures laying claim to its creation, but its enduring presence on tables throughout the Middle East is a testament to its timeless appeal. Traditionally, making hummus was an act of patience. It involved carefully selecting dried chickpeas, soaking them overnight to soften, and then simmering them for hours with aromatics until they were fall-apart tender before being mashed into a paste.
Each region, and indeed each family, has its own subtle variation—some prefer it heavy on the garlic, others add a touch of warm cumin, and the amount of tahini can be a point of passionate debate. This beautiful tapestry of traditions is what makes hummus so special. It’s a dish that has been passed down through generations, adapted by home cooks to suit their family's palate and the ingredients available to them. It connects people to their heritage and to the simple, profound joy of sharing food.
While traditional methods are beautiful, the modern kitchen has given us tools that allow us to honor the spirit of the dish while fitting it into our busy lives. This is where the magic of a good food processor and high-quality canned chickpeas comes in, making a truly wonderful 15-minute hummus recipe an achievable reality. The homemade version, even this quick one, is a world away from the tubs you find at the supermarket. It sings with the fresh, vibrant flavors of its core components, unmasked by preservatives or stabilizers. It’s a taste of history, made for today.
What Makes This Recipe Special
In a world filled with countless hummus recipes, this one truly stands out for its ability to deliver authentic, top-tier results with minimal effort. It’s the recipe I turn to for impromptu gatherings, quick weeknight snacks, and satisfying lunches. Here’s exactly what makes this 15-minute hummus recipe so exceptional:
Incredibly Fast, Genuinely Creamy The number one goal was to achieve that coveted, velvety texture without the hours of prep. The secret lies in a few key techniques: using canned chickpeas for speed, taking a moment to peel them (a game-changing step!), and whipping the tahini with lemon juice before adding anything else. The final touch—streaming in ice-cold water—emulsifies the mixture into a light, airy, and unbelievably smooth dip. It’s a scientific approach that yields magical results in minutes.
Unbeatable Fresh Flavor Store-bought hummus can often taste flat or overly acidic from preservatives. This recipe, however, is a celebration of fresh ingredients at their peak. The zesty brightness of freshly squeezed lemon juice, the sharp, pungent bite of a single clove of raw garlic, and the nutty depth of a high-quality tahini all shine through. You control the ingredients, so you control the flavor, and the difference is truly night and day. It tastes alive, vibrant, and deeply satisfying.
A Pantry-Staple Wonder The beauty of this recipe is that it’s built on a foundation of simple pantry items. Canned chickpeas, a jar of good tahini, a lemon, a head of garlic, and some olive oil are all you need. This means you’re never more than 15 minutes away from a wholesome, delicious snack or appetizer. It’s the perfect recipe for those moments when guests drop by unexpectedly or when you need to pull together a quick and healthy meal component.
Completely Customizable Think of this 15-minute hummus recipe as your perfect blank canvas. It’s absolutely delicious on its own, but it also welcomes creativity. Swirl in some roasted red pepper puree for a smoky sweetness, add a handful of fresh cilantro or parsley for an herby lift, or top it with sumac and toasted pine nuts for texture and tang. You can adjust the garlic, lemon, and salt to perfectly suit your taste, making it truly your own.
Naturally Healthy and Nourishing This isn't just fast food; it's good food, fast. Hummus is naturally packed with plant-based protein and fiber from the chickpeas, healthy fats and calcium from the tahini, and antioxidants from the olive oil and garlic. It's a nourishing dish that fits seamlessly into a balanced diet, keeping you full and satisfied. It is naturally halal, gluten-free, and vegan, making it an inclusive and wonderful option for everyone at the table.
Breaking Down the Ingredients
A truly great dish is always a sum of its parts, and in a recipe as simple as hummus, the quality of each ingredient is paramount. Let’s take a closer look at the key players that come together to create this spectacular 15-minute hummus recipe.
Chickpeas: These are the heart of our hummus. For a 15-minute recipe, canned chickpeas are our best friend. They are already cooked and ready to go, saving us hours of prep time. Look for organic, low-sodium options if you can. The absolute secret to the smoothest hummus is to take a few extra minutes to peel the chickpeas. The skins are slightly tough and fibrous and removing them makes a world of difference in the final texture. Simply pinch each chickpea gently, and the skin will slip right off. It’s a meditative little task that pays off handsomely. Don’t forget to reserve the liquid from the can, known as aquafaba—it can be used to thin the hummus if needed.
Tahini: If chickpeas are the heart, tahini is the soul. This rich, nutty paste made from ground sesame seeds gives hummus its characteristic flavor and creamy consistency. The quality of your tahini will make or break your hummus. Avoid the thick, clumpy, and often bitter pastes you might find at the bottom of a jar. Look for a high-quality brand, often from Lebanon or Palestine, that is smooth, runny, and pourable. A good tahini should taste nutty and rich, with just a pleasant hint of bitterness. It’s worth seeking out a good one at a specialty food store or online.
Fresh Lemon Juice: This is the brightness, the element that cuts through the richness and lifts all the other flavors. It absolutely must be freshly squeezed. Bottled lemon juice has a dull, often metallic taste that can ruin the fresh profile of your hummus. One large, juicy lemon is usually enough to provide the perfect acidic balance to the creamy tahini and earthy chickpeas.
Garlic: Garlic provides that essential pungent kick. However, raw garlic can be quite potent and can easily overpower the other ingredients. My method calls for just one large clove, which I recommend mincing and letting it sit in the lemon juice for a few minutes. This little trick helps to mellow its sharpest bite while still infusing the hummus with its wonderful flavor. If you're a garlic lover, feel free to add more, but start with one and taste as you go.
Ice-Cold Water: This is the secret weapon for texture. While many recipes call for regular water or aquafaba, using ice-cold water is a technique that helps create an almost whipped, fluffy texture. As you stream it into the food processor, it helps the tahini and chickpea mixture emulsify into a lighter, paler, and incredibly smooth dip. It prevents the hummus from becoming dense or heavy.
Cumin and Salt: Salt is a non-negotiable flavor enhancer; it awakens all the other ingredients and brings them into harmony. A pinch of ground cumin is my preferred spice for classic hummus. It adds a subtle earthy warmth that beautifully complements the chickpeas without being overwhelming. Start with a small amount, as its flavor can bloom over time.
Extra Virgin Olive Oil: In my recipe, olive oil is not for blending—it’s for finishing. Blending olive oil into the hummus can sometimes alter its flavor, making it slightly bitter, and can weigh down the texture. Instead, a generous drizzle of a high-quality, fruity extra virgin olive oil over the finished hummus adds richness, flavor, and that classic, beautiful presentation.
The Cooking Process Explained
The magic of this 15-minute hummus recipe lies in its method. While the ingredients are simple, the order and technique in which they are combined are what elevates the final product from good to extraordinary. Follow these stages closely, paying attention to the sensory cues, and you'll be rewarded with the creamiest hummus of your life.
Stage 1: Building the Creamy Base We begin not with the chickpeas, but with the tahini. This is a critical step that many recipes miss. In the bowl of your food processor, combine the high-quality tahini, freshly squeezed lemon juice, and minced garlic. Secure the lid and blend for about 60-90 seconds. You will witness a fascinating transformation. At first, the mixture will seize up and become thick and pasty. Don't panic! This is supposed to happen. Continue blending, and it will soon smooth out, becoming pale, airy, and creamy. This process, sometimes called 'whipping the tahini,' aerates the base and is the first secret to a fluffy final texture. Scrape down the sides and bottom of the bowl to ensure everything is evenly incorporated.
Stage 2: Incorporating the Chickpeas Now it's time for the star ingredient. Add the drained and peeled canned chickpeas to the whipped tahini mixture in the food processor. Add the ground cumin and salt at this stage as well. Secure the lid again and blend continuously for about 2-3 minutes. The mixture will be very thick at this point, resembling a stiff paste. This long initial blend is crucial for breaking down the chickpeas as much as possible before we add any liquid. You'll need to stop the processor two or three times to scrape down the sides and bottom of the bowl, ensuring there are no stubborn, unblended chickpeas hiding.
Stage 3: The Ice Water Emulsion This is where the true transformation occurs. With the food processor motor running, begin to slowly stream in the ice-cold water. Add it one tablespoon at a time through the feed tube. You will see the hummus instantly change. The thick paste will loosen, lighten in color, and transform into a vortex of creamy, velvety dip. Continue adding water until you reach your desired consistency. I find that about 4-6 tablespoons is perfect for a dip that is scoopable but not runny. The final texture should be incredibly smooth, light, and almost cloud-like.
Stage 4: The Final Blend and Taste Test Once you’ve achieved the perfect consistency, let the food processor run for another full minute. This final, uninterrupted blend ensures any remaining tiny bits of chickpea are pulverized, resulting in the silkiest possible finish. Now, stop the machine and give it a final taste. This is your moment to adjust. Does it need another pinch of salt? A tiny bit more lemon juice for brightness? Adjust as needed, give it one last quick pulse to combine, and your perfect hummus is ready.
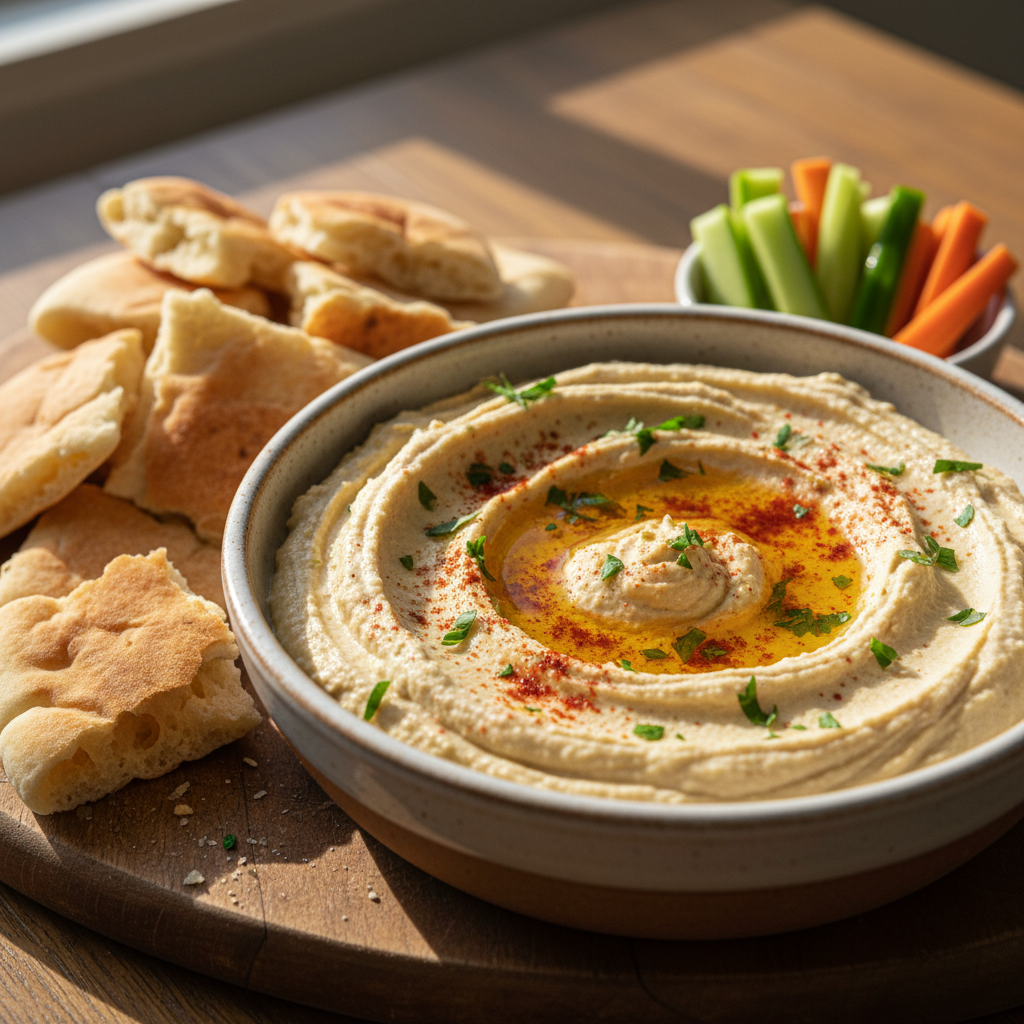
Stage 5: Plating and Garnishing To serve, spoon the hummus into a shallow bowl. Use the back of the spoon to create an elegant swirl in the center, forming a well. This little crater is the perfect vessel for a generous drizzle of your best extra virgin olive oil. Finish with a sprinkle of paprika or sumac for color and a scattering of fresh, chopped parsley. Your stunning, homemade 15-minute hummus recipe is now ready to be devoured.
Mistakes to Avoid
Even a simple recipe can have a few pitfalls. Making this 15-minute hummus recipe is straightforward, but avoiding these common mistakes will guarantee a perfect, creamy result every single time. Think of this as friendly advice from my kitchen to yours!
1. Using Low-Quality or Old Tahini: This is perhaps the most critical mistake you can make. Tahini is a primary flavor component, and if you use a brand that is thick, gritty, bitter, or tastes stale, your hummus will inherit those undesirable qualities. Good tahini should be smooth, pourable (after a good stir), and have a rich, nutty flavor. Invest in a good jar; it will elevate not just your hummus but many other dishes as well.
2. Not Blending Long Enough: Patience is a virtue, even with a 15-minute recipe. The key to a creamy texture is giving the food processor enough time to do its job. Don't just blend until the ingredients are combined. Blend for the full time recommended in each stage—whip the tahini for a full minute, blend the chickpeas into a paste for 2-3 minutes, and give it a final long blend at the end. This sustained blending is what breaks down the fibers and creates that signature silky mouthfeel.
3. Adding Olive Oil to the Blender: It may seem intuitive to add all the ingredients at once, but adding olive oil directly into the food processor is a mistake. The aggressive blades of the machine can actually break down the polyphenols in the oil, causing it to develop a bitter taste. Furthermore, it creates a denser, heavier hummus. Olive oil is best used as a finishing touch, drizzled on top right before serving, where its fruity flavor can truly shine.
4. Skipping the Ice-Cold Water: Using room temperature water or even the aquafaba from the can will work, but it won't produce the same magical, fluffy texture. The cold temperature of the ice water reacts with the tahini to create a lighter, almost whipped emulsion. It’s a small detail that makes a significant difference in the final product, turning a good hummus into a great one.
5. Forgetting to Scrape Down the Bowl: A food processor blade spins in the center, often flinging ingredients to the sides of the bowl where they can get stuck. If you don't periodically stop the machine and scrape down the sides and bottom with a spatula, you'll end up with unblended chunks of chickpeas or a rogue piece of garlic, resulting in a lumpy, inconsistent texture. Diligent scraping ensures everything is uniformly smooth.
How to Serve This
Once you've created your beautiful bowl of creamy hummus, the fun of serving it begins! This versatile dip can be the star of a show-stopping mezze platter or a humble, satisfying snack. Here are some of my favorite ways to serve this 15-minute hummus recipe.
The Classic Mezze Platter: This is the most traditional and celebratory way to enjoy hummus. Arrange your bowl of hummus in the center of a large platter. Surround it with an abundance of textures and flavors. Include warm, fluffy pita bread cut into wedges for dipping, and crunchy pita chips. Add some crisp, fresh vegetables like cucumber spears, carrot sticks, sliced bell peppers, and cherry tomatoes. A small bowl of briny olives, some tangy pickles, and a few perfectly crisp falafel balls complete the spread. It’s a feast for the eyes and the palate, perfect for gatherings.
As a Wholesome Sandwich Spread: Elevate your everyday lunch by swapping out mayonnaise or other spreads for a generous schmear of this hummus. It’s absolutely fantastic in a wrap with falafel, fresh greens, and a drizzle of tahini sauce. It also pairs beautifully with grilled chicken or roasted vegetables in a pita pocket. It adds moisture, a huge boost of flavor, and a healthy dose of protein and fiber to any sandwich.
The Foundation for a Nourishing Bowl: Create a quick and satisfying meal by using hummus as the base of a 'hummus bowl.' Spread a thick layer in the bottom of a bowl and top it with your favorite protein and vegetables. Some wonderful combinations include spiced halal ground lamb with toasted pine nuts, chicken shawarma with a fresh tomato-and-cucumber salad, or roasted cauliflower and chickpeas with a sprinkle of za'atar. It’s a complete, balanced meal that is both healthy and incredibly delicious.
Garnishes That Wow: Presentation makes everything taste a little better. Don't just scoop the hummus into a bowl—make it beautiful! The classic 'swirl and pool' of extra virgin olive oil is a must. Beyond that, consider a vibrant sprinkle of spices like paprika for color, sumac for a tangy kick, or za'atar for an herby, savory note. A handful of whole chickpeas reserved from the can, a scattering of toasted pine nuts or sesame seeds for crunch, and a generous shower of finely chopped fresh parsley will turn your simple dip into a work of art.
Make-Ahead and Storage Guide
One of the best things about this 15-minute hummus recipe is that it stores beautifully, and the flavors often get even better as they have time to meld. Here’s everything you need to know about making it ahead and storing it properly to enjoy throughout the week.
In the Refrigerator: Your fresh hummus can be stored in an airtight container in the refrigerator for up to 5 days. To keep it as fresh as possible, I recommend drizzling a very thin layer of olive oil over the surface before sealing the container. This creates a barrier that helps prevent the top from drying out or forming a skin. Keep in mind that the flavor of the garlic will intensify slightly as it sits, which many people (including myself) enjoy! When you're ready to serve, give it a good stir to loosen it up, as it will thicken when chilled. For the best flavor and texture, let it sit at room temperature for about 20-30 minutes before serving.
In the Freezer: Yes, you can absolutely freeze hummus! It’s a fantastic way to have a delicious, healthy snack on hand at all times. To freeze, spoon the hummus into a freezer-safe, airtight container. Leave about half an inch of headspace at the top to allow for expansion as it freezes. Drizzle a layer of olive oil over the surface—this helps prevent freezer burn and preserves the texture. Seal it tightly and it will keep well in the freezer for up to 4 months.
Thawing and Reviving: The best way to thaw frozen hummus is to transfer it to the refrigerator and let it thaw overnight. It will likely separate a bit and may not be as perfectly smooth as when it was fresh. But don't worry, it's easy to revive! Simply give it a very vigorous stir with a spoon or whisk. You can also add a squeeze of fresh lemon juice or a tablespoon of cold water to help bring it back to a creamy consistency. For the best results, you can even give it a quick 30-second pulse in your food processor to make it smooth and fluffy again. Once revived, serve it as you normally would.
Reader Questions Answered
Can I make this 15-minute hummus recipe without a food processor?
Yes, you certainly can. A high-powered blender is an excellent alternative and can often produce an even smoother result. If you don't have either, you can make a more rustic-style hummus by using a potato masher and a lot of effort. It won't be as silky smooth, but the delicious, fresh flavors will still be there!
My hummus is too thick/thin. How do I fix it?
This is an easy fix! If your hummus is thicker than you'd like, simply add more ice-cold water, one tablespoon at a time, with the food processor running until you reach the desired consistency. If it's too thin, you can thicken it by adding a few more chickpeas from another can or another tablespoon of tahini and blending again.
Is it really necessary to peel the chickpeas?
For the absolute creamiest, most velvety hummus, I highly recommend it. The skins are the main culprit behind a grainy or slightly coarse texture. However, if you are truly pressed for time and can't spare the 5-7 minutes it takes, you can skip this step. Your 15-minute hummus recipe will still be incredibly delicious, just with a slightly more rustic texture.
How can I make this recipe without tahini?
While tahini is the classic ingredient that gives hummus its signature nutty flavor, you can make a tasty chickpea dip without it if you have an allergy or don't have it on hand. You can substitute a similar amount of creamy, unsweetened cashew butter or sunflower seed butter. The flavor profile will be different, but it will still provide the necessary creaminess and richness.
How can I make this more kid-friendly?
The potent flavor of raw garlic can sometimes be too strong for younger palates. You can easily make this recipe more kid-friendly by reducing the garlic to just a tiny sliver, or by using a clove of roasted garlic instead, which is much milder and sweeter. Serving it with fun dippers like pretzel sticks or colorful bell pepper strips also helps!
Can I use dried chickpeas for this recipe?
Absolutely! Using dried chickpeas that you've cooked yourself will result in an even more flavorful and delicious hummus. However, it will no longer be a 15-minute hummus recipe. You'll need to soak the dried chickpeas overnight, then simmer them for 1.5 to 2 hours (or until they are very tender and falling apart) before you can proceed with the first step of this recipe. It's a wonderful option for a weekend cooking project when you have more time.
15-Minute Hummus Recipe
An incredibly fast and easy recipe for authentic, silky-smooth hummus made with canned chickpeas, quality tahini, and a few secret tricks for the best texture.
Prep Time
10 min
Cook Time
5 min
Total Time
15 min
Servings
6 servings
Ingredients
For 6 servings
- 1 (15-ounce) can chickpeas, rinsed and drained
- 1/2 cup high-quality tahini, well-stirred
- 1/4 cup freshly squeezed lemon juice (from 1 large lemon)
- 1 large clove garlic, minced
- 1/2 teaspoon ground cumin
- 1/2 teaspoon fine sea salt, or to taste
- 4-6 tablespoons ice-cold water
- 2 tablespoons extra virgin olive oil, for serving
- 1/4 teaspoon paprika or sumac, for serving
- 1 tablespoon chopped fresh parsley, for serving
Instructions
- 1
Peel the Chickpeas (Optional)
For the smoothest hummus, take 5-7 minutes to peel the chickpeas. Gently pinch each chickpea between your thumb and forefinger and the skin will slip right off. Discard the skins. This step is optional but highly recommended for a velvety texture.
- 2
Whip the Tahini Base
In the bowl of a food processor, combine the tahini, fresh lemon juice, and minced garlic. Secure the lid and blend for 60-90 seconds until the mixture is thick, pale, and creamy. Scrape down the sides and bottom of the bowl with a spatula.
- 3
Add Chickpeas and Spices
Add the drained and peeled chickpeas to the food processor along with the ground cumin and salt. Secure the lid and blend continuously for 2-3 minutes until a very thick, smooth paste forms. Stop to scrape down the sides of the bowl a couple of times.
- 4
Stream in Ice Water
With the food processor motor running, slowly stream the ice-cold water through the feed tube, one tablespoon at a time. Continue blending until the hummus becomes light, airy, and reaches your desired creamy consistency. You will likely need 4 to 6 tablespoons.
- 5
Final Blend for Smoothness
Once the hummus has reached the perfect texture, let the food processor run continuously for one more full minute. This final blend ensures it is impeccably smooth and aerated.
- 6
Taste and Adjust Seasoning
Stop the processor and taste the hummus. Adjust the seasoning if necessary, adding another pinch of salt or a small squeeze of lemon juice to suit your preference. Give it one last pulse to combine.
- 7
Plate the Hummus
Spoon the finished hummus into a shallow serving bowl. Use the back of a spoon to create an elegant swirl in the center, which will create a well for the olive oil.
- 8
Garnish and Serve
Drizzle the extra virgin olive oil generously into the swirl. Sprinkle with paprika or sumac and top with fresh chopped parsley. Serve immediately with warm pita bread, and fresh vegetables, or as part of a larger meal.
Nutrition Facts
Per serving (estimated)
185 calories
Calories
14g
Carbs
6g
Protein
12g
Fat
4g
Fiber
310mg
Sodium
1g
Sugar