Easy Cake Pops Recipe for Perfect Batch Baking
Learn how to make the best cake pops with this detailed, step-by-step recipe. Perfect for making ahead, storing, and sharing with loved ones!
cookwithyara.com/recipes/cake-pops-recipe
There's a special kind of calm that settles in the kitchen when you know you're prepared. The usual weekday rush to put something together, whether for a meal or a small, sweet treat, can feel overwhelming. But imagine, for a moment, opening your refrigerator to find a row of perfectly crafted, delicious little morsels waiting for you. This is the magic of what I like to call 'dessert prep'—the art of investing a little time on a quiet afternoon to create moments of joy for the week ahead. The constant question of 'what can I bring?' or 'what sweet snack can the kids have?' simply vanishes. Instead, there is a quiet confidence, a readiness to share and delight.
This is precisely the feeling our delightful cake pops recipe is designed to give you. It transforms a baking project that might seem elaborate into a manageable, rewarding process. By breaking it down, you can spend a focused session in your kitchen, surrounded by the warm aromas of vanilla and chocolate, and end up with a treasure trove of treats. Think of a quiet Sunday, music playing softly, as you methodically roll, dip, and decorate. That single session of creative focus yields a week's worth of smiles, whether it's a simple after-dinner indulgence, a surprise for a neighbor, or a beautiful addition to a family gathering. This isn't just about baking; it's about investing in future moments of happiness, one delicious cake pop at a time.
Why This Cake Pops Recipe Is Perfect for Dessert Prep
Not all baked goods are created equal when it comes to making them ahead of time. Some lose their texture, others their flavor. But this cake pops recipe is uniquely suited for advance preparation, a characteristic that makes it a true kitchen hero. The secret lies in the very structure of the cake pop itself. The core, a blend of moist cake crumbs and rich frosting, is naturally protected from drying out. In fact, allowing the cake balls to rest and chill in the refrigerator actually helps the flavors mel गुड (meld) and deepen, resulting in a more delicious and cohesive bite.
Furthermore, the crisp chocolate shell isn't just for decoration; it acts as a perfect, edible seal. This coating locks in the moisture of the cake, ensuring that a cake pop enjoyed on day four is just as tender and flavorful as one eaten on day one. The textures are also incredibly resilient. The soft, tender interior provides a wonderful contrast to the satisfying snap of the hard chocolate exterior, a delightful combination that holds up beautifully under refrigeration. You don't have to worry about sogginess or staleness creeping in.
From a nutritional standpoint, while these are certainly a treat, their small, portion-controlled size makes them a wonderful option for a planned indulgence. Having a batch ready means you can satisfy a sweet craving with a single, satisfying portion without the temptation of a whole cake sitting on the counter. It's a balanced approach to enjoying homemade sweets throughout the week, making this cake pops recipe a smart and delicious project for any home baker.
What You'll Need for This Project
Gathering your ingredients and tools is the first step in any successful baking adventure, and for this project, thinking with a prep mindset is key. Let's walk through the essential components for our cake pops recipe. For the cake itself, a simple, sturdy vanilla or chocolate cake is best. I recommend using all-purpose flour as it provides the perfect crumb that’s neither too delicate nor too tough. You'll also need basic baking staples: granulated sugar, large eggs at room temperature, unsalted butter, whole milk, and a high-quality, non-alcoholic vanilla extract. The quality of your vanilla will truly shine through, so it's worth using the best you can find.
For the binding and coating, the ingredients are just as important. A simple buttercream frosting, made with softened butter and powdered sugar, is perfect for mixing with the cake crumbs. For the outer shell, you'll want high-quality melting wafers or a good baking chocolate. Candy melts, which come in a variety of colors, are fantastic for beginners as they are designed to melt smoothly and set hard without any complex tempering. Ensure any coloring or sprinkles you choose are halal-certified. You will also need about 4-dozen 6-inch lollipop sticks and a stand to hold the pops while they set—a block of styrofoam or even a sturdy cardboard box with small holes poked in it works wonderfully.
When it comes to storage, airtight containers are your best friend. I prefer shallow glass containers, as they don't hold onto odors and allow you to see your beautiful creations. If you need to stack the finished cake pops, place a sheet of parchment paper between the layers to prevent sticking. For bulk prep, consider investing in a few large containers specifically for your treats, keeping them separate from savory items in the fridge.
The Batch Cooking Method Explained
Approaching this cake pops recipe with a batch-cooking mindset is all about efficiency and flow. The process can be broken down into three main stages: baking, mixing and rolling, and dipping and decorating. By creating an assembly line for yourself, you can make dozens of these treats without feeling overwhelmed. First, focus on the cake. The entire baking process—mixing the batter, baking the cake, and letting it cool completely—is stage one. You can do this up to a day in advance. A fully cooled cake is crucial; a warm cake will turn into a greasy, unworkable mush when crumbled.
Once your cake is cool, stage two begins: creating the cake pop filling. Crumble the cake into a large bowl until it reaches a fine, sandy texture. Then, add your frosting one tablespoon at a time, mixing until the consistency is similar to play-doh. It should be moist enough to hold its shape but not overly wet or sticky. Use a small cookie scoop to portion out uniform balls, which ensures they all look professional and cook (or in this case, chill) evenly. Roll each portion between your palms until perfectly smooth and place them on a parchment-lined baking sheet. This entire sheet of cake balls then goes into the refrigerator to chill and firm up for at least an hour, or even overnight.
Stage three is the final, creative step: dipping. This is where your assembly line really comes into play. Set up a station with your melted chocolate or candy melts in a deep, narrow cup (which makes for easier dipping), your chilled cake balls, your lollipop sticks, and your sprinkle station. Dip the tip of a stick into the melted chocolate and insert it halfway into a cake ball. This acts as a glue. Once you've done this for all the balls, you can begin dipping. Submerge one cake pop completely in the chocolate, lift it out, and gently tap the stick on the side of the cup to allow excess chocolate to drip off. Add sprinkles immediately, before the chocolate sets, and then place the finished pop in your stand to dry completely. Working in small batches of 5-6 at a time keeps the process organized and prevents the chocolate from hardening too quickly.
The Weekly Game Plan
A great cake pops recipe becomes even better when you have a strategic plan to tackle it. Instead of dedicating one long day, you can break up the process over a weekend or a couple of evenings, making it feel less like a chore and more like a relaxing, creative outlet. Here’s a sample game plan for a relaxed and successful dessert prep session.
Day 1 (e.g., Friday Evening): The Foundation. This is your baking day. Mix and bake your chosen cake. Once it's baked, let it cool on a wire rack completely. Once fully cooled, you can wrap the cake tightly in plastic wrap and leave it on the counter overnight. This not only saves time but also makes the cake slightly easier to crumble the next day.
Day 2 (e.g., Saturday Morning): The Assembly. Today, you'll create the core of your cake pops. Crumble the cake into a large bowl. Prepare your frosting and mix it into the crumbs until you have the right consistency. Use a cookie scoop to portion the mixture, roll the balls until smooth, and place them on your parchment-lined baking sheet. Cover the sheet with plastic wrap and let the cake balls chill in the refrigerator for at least a few hours, or even until the next day. This chilling step is non-negotiable—it’s what prevents them from falling apart during dipping.
Day 3 (e.g., Sunday Afternoon): The Finishing Touches. This is the fun part! Set up your dipping and decorating station. Melt your chocolate, insert the sticks, and begin the dipping process. This is a wonderful, almost meditative activity. As each cake pop is decorated, place it in your stand to set completely. Once they are all firm, you can transfer them to your airtight container for storage in the refrigerator. Your week of delicious, ready-to-eat treats is now complete, thanks to a well-planned execution of this versatile cake pops recipe.
Smart Storage and Serving
Properly storing your beautifully made cake pops is essential to ensure they remain fresh, delicious, and intact all week long. Once the chocolate shell has completely hardened, the best place for them is in an airtight container in the refrigerator. This keeps the cake interior moist and the chocolate shell crisp and firm. I recommend a single layer if possible, but if you need to stack them, always place a sheet of parchment or wax paper between the layers to prevent the decorations from smudging or the pops from sticking together.
When choosing a container, glass is often superior to plastic because it doesn't retain odors and provides a more stable temperature environment. A flat, rectangular glass dish with a tight-fitting lid is ideal. Stored this way, your cake pops will easily last for up to a week. For longer-term storage, you can freeze them. The best way to do this is to freeze the undipped cake balls. Place the rolled balls on a baking sheet and freeze until solid, then transfer them to a freezer-safe bag or container. They can be frozen for up to two months. When you're ready to use them, let them thaw in the refrigerator before dipping and decorating as usual. You can also freeze the finished cake pops, but be aware that condensation can sometimes form on the chocolate shell as they thaw, which might affect the appearance of some sprinkles.
When it's time to serve, I recommend taking the cake pops out of the refrigerator about 15-20 minutes beforehand. This allows the cake to soften slightly and the flavors to become more pronounced, offering the best possible eating experience. It’s the small details like this that elevate a simple treat into something truly special. This careful approach to storage makes our cake pops recipe a reliable choice for any occasion.
Customization Ideas
One of the most joyful aspects of this cake pops recipe is its infinite capacity for customization. The basic formula—cake, binder, coating—is a blank canvas for your creativity. Let's start with the base. While a classic vanilla or chocolate cake is always a winner, don't hesitate to experiment. A rich red velvet cake with a cream cheese frosting binder is a classic for a reason. You could also try a lemon cake with a lemon-zest-infused frosting for a bright, zesty flavor, or even a spice cake for a warm, comforting treat perfect for cooler evenings.
Protein swaps aren't typical here, but you can certainly adjust for dietary needs. Gluten-free all-purpose flour blends can be substituted one-for-one to make the cake base. For the coating, the world is your oyster. White, milk, or dark chocolate all provide different flavor profiles. Candy melts offer a rainbow of colors without any extra effort, allowing you to match your cake pops to a theme for a special gathering. You can infuse the melted chocolate with oil-based flavorings (water-based will cause it to seize) like peppermint or orange for an extra layer of complexity. For toppings, think beyond simple sprinkles: crushed pistachios, almonds, toasted coconut flakes, or finely crushed freeze-dried raspberries all add wonderful flavor and texture. This adaptability is what makes this cake pops recipe a go-to for any creative baker.
Cake Pop Prep FAQ
How long will these cake pops really stay fresh?
When stored properly in an airtight container in the refrigerator, these cake pops will stay wonderfully fresh for up to 7 days. The chocolate shell does a fantastic job of sealing in the moisture of the cake, so they won't dry out. The texture remains soft and delicious.
What's the best way to transport cake pops to a family gathering?
Transportation requires a bit of care to keep them looking perfect. The best method is to place them upright in your cake pop stand and secure the stand in a box so it can't slide around. If you don't have a stand, you can carefully lay them in a single layer in a sturdy, shallow container, using some scrunched parchment paper to cushion them.
Can I use a boxed cake mix for this recipe?
Absolutely! Using a high-quality boxed cake mix is a fantastic time-saver and works perfectly for this cake pops recipe. Simply prepare the cake according to the package directions, let it cool completely, and then proceed with the crumbling and mixing steps as outlined.
How do I prevent the chocolate shell from cracking?
Cracking usually happens when the temperature difference between the chilled cake balls and the warm chocolate is too extreme. To prevent this, let your cake balls sit at room temperature for about 10-15 minutes before dipping. This slight temperature adjustment makes a huge difference.
How can I avoid my cake balls falling off the stick?
This is a common issue! The key is to first dip the very tip of the lollipop stick into the melted chocolate before inserting it into the cake ball. This acts as a strong glue. Also, ensure your cake balls are thoroughly chilled and firm before you even think about dipping them.
Any tips for avoiding 'dessert fatigue' when you've prepped a big batch?
Variety is key! If you make a large batch, consider using two or three different types of coatings or toppings. Dipping half in dark chocolate with crushed nuts and the other half in white chocolate with colorful sprinkles makes the batch feel more diverse and exciting throughout the week.
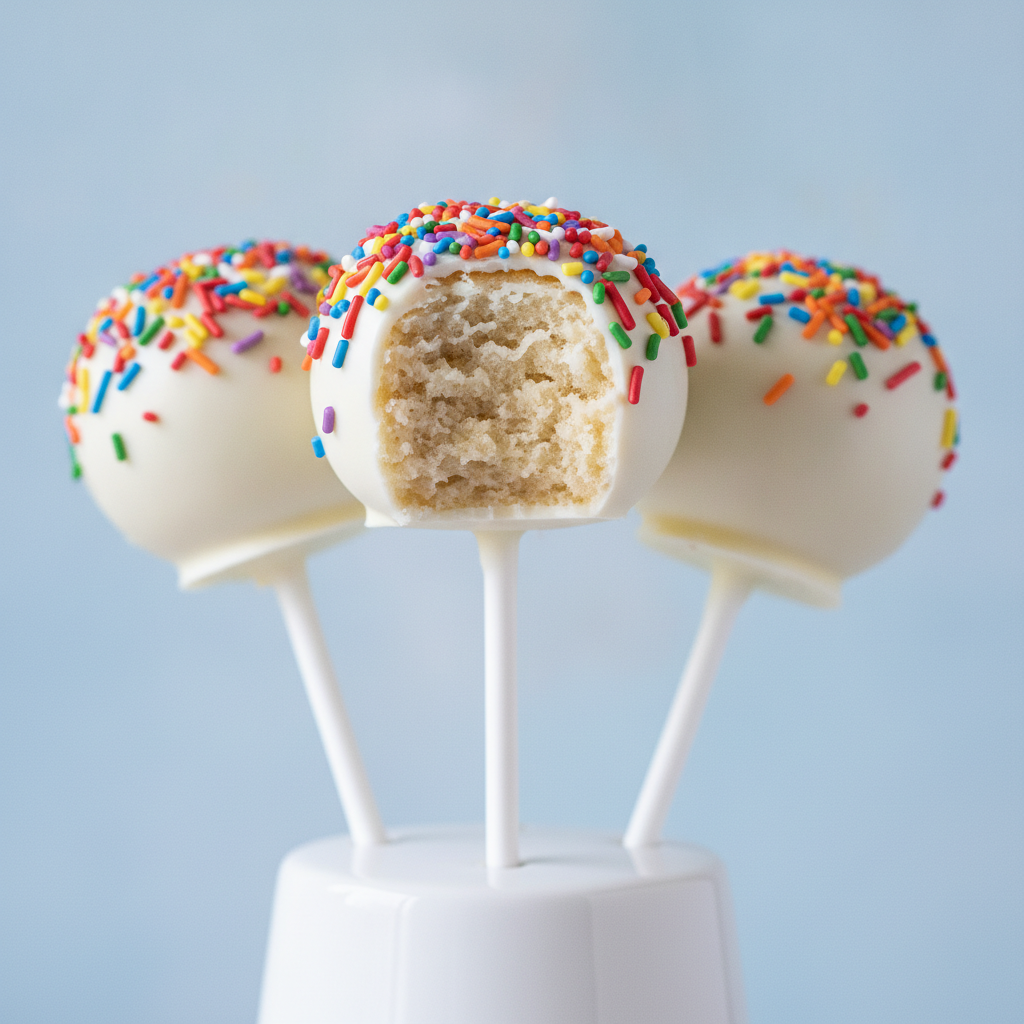
Classic Vanilla Cake Pops Recipe
A detailed, step-by-step recipe for making perfect, delicious vanilla cake pops from scratch. Ideal for making ahead for parties, gatherings, or a week of sweet treats.
Prep Time
1h 30m
Cook Time
35 min
Total Time
2h 5m
Servings
48 cake pops
Ingredients
For 48 cake pops
- 2 1/2 cups all-purpose flour
- 2 1/2 teaspoons baking powder
- 1/2 teaspoon salt
- 3/4 cup unsalted butter, softened
- 1 1/2 cups granulated sugar
- 3 large eggs, room temperature
- 2 teaspoons non-alcoholic vanilla extract
- 1 1/4 cups whole milk, room temperature
- 1 cup vanilla frosting (store-bought or homemade)
- 24 ounces white candy melts or white baking chocolate
- 2 tablespoons coconut oil or vegetable shortening (optional, for thinning chocolate)
- 48 lollipop sticks (6-inch)
- Assorted halal-certified sprinkles for decoration
Instructions
- 1
Prepare Cake Batter
Preheat your oven to 350°F (175°C). Grease and flour a 9x13 inch baking pan. In a medium bowl, whisk together the all-purpose flour, baking powder, and salt. Set aside.
- 2
Cream Butter and Sugar
In a large bowl, using an electric mixer, beat the softened unsalted butter and granulated sugar on medium-high speed until light and fluffy, about 3-4 minutes. This step incorporates air, which is key for a tender cake.
- 3
Incorporate Eggs and Vanilla
Add the room temperature eggs one at a time, beating well after each addition to ensure they are fully incorporated. Scrape down the sides of the bowl as needed. Beat in the non-alcoholic vanilla extract.
- 4
Combine Wet and Dry Ingredients
Reduce the mixer speed to low. Add the dry flour mixture in three parts, alternating with the whole milk in two parts, beginning and ending with the dry ingredients. Mix only until just combined to avoid overworking the gluten.
- 5
Bake and Cool the Cake
Pour the batter into your prepared pan and spread evenly. Bake for 30-35 minutes, or until a wooden skewer inserted into the center comes out clean. Let the cake cool completely in the pan on a wire rack.
- 6
Crumble the Cake
Once the cake is completely cool, crumble it into a large bowl. You can use your hands or a fork. Your goal is to break it down into fine, uniform crumbs with no large chunks remaining.
- 7
Mix and Form Cake Balls
Add 3/4 cup of the vanilla frosting to the cake crumbs and mix thoroughly with your hands or a spatula until the mixture resembles damp dough. If needed, add the remaining 1/4 cup of frosting. Use a small cookie scoop (about 1.5 tablespoons) to portion the mixture, then roll each portion into a smooth, compact ball.
- 8
Chill the Cake Balls
Place the rolled cake balls on a baking sheet lined with parchment paper. Cover with plastic wrap and refrigerate for at least 2 hours, or freeze for 30-40 minutes, until they are very firm. This step is crucial to prevent them from falling apart.
- 9
Melt the Coating
Just before you're ready to dip, melt the candy melts or white chocolate in a microwave-safe bowl in 30-second intervals, stirring in between, until smooth. If the coating is too thick, stir in the coconut oil or shortening to thin it out. Pour it into a deep, narrow glass for easier dipping.
- 10
Prepare Sticks for Dipping
Remove the chilled cake balls from the refrigerator. Dip the tip of a lollipop stick about 1/2 inch into the melted candy coating, and then insert it into the center of a cake ball, pushing it about halfway through. Repeat for all cake balls.
- 11
Dip the Cake Pops
Hold the stick and submerge one cake pop completely into the melted coating. Do not stir it around. Lift it straight out and allow the excess coating to drip back into the glass, gently tapping the stick on the rim.
- 12
Decorate and Set
While the coating is still wet, immediately add your desired sprinkles. Place the finished cake pop upright in a styrofoam block or a cake pop stand to dry completely. Do not touch them until the coating is fully hardened.
- 13
Store Your Finished Cake Pops
Once all cake pops are completely set, they can be enjoyed immediately. To store them, place them in an airtight container in the refrigerator for up to one week.
Nutrition Facts
Per serving (estimated)
180 calories
Calories
25g
Carbs
2g
Protein
8g
Fat
0.5g
Fiber
95mg
Sodium
18g
Sugar