Perfectly Preserved: A Guide to Canning Peaches at Home
Learn the simple, safe way to can peaches. My step-by-step guide helps you preserve summer's golden fruit for year-round enjoyment. Perfect for beginners!
cookwithyara.com/recipes/canning-peaches
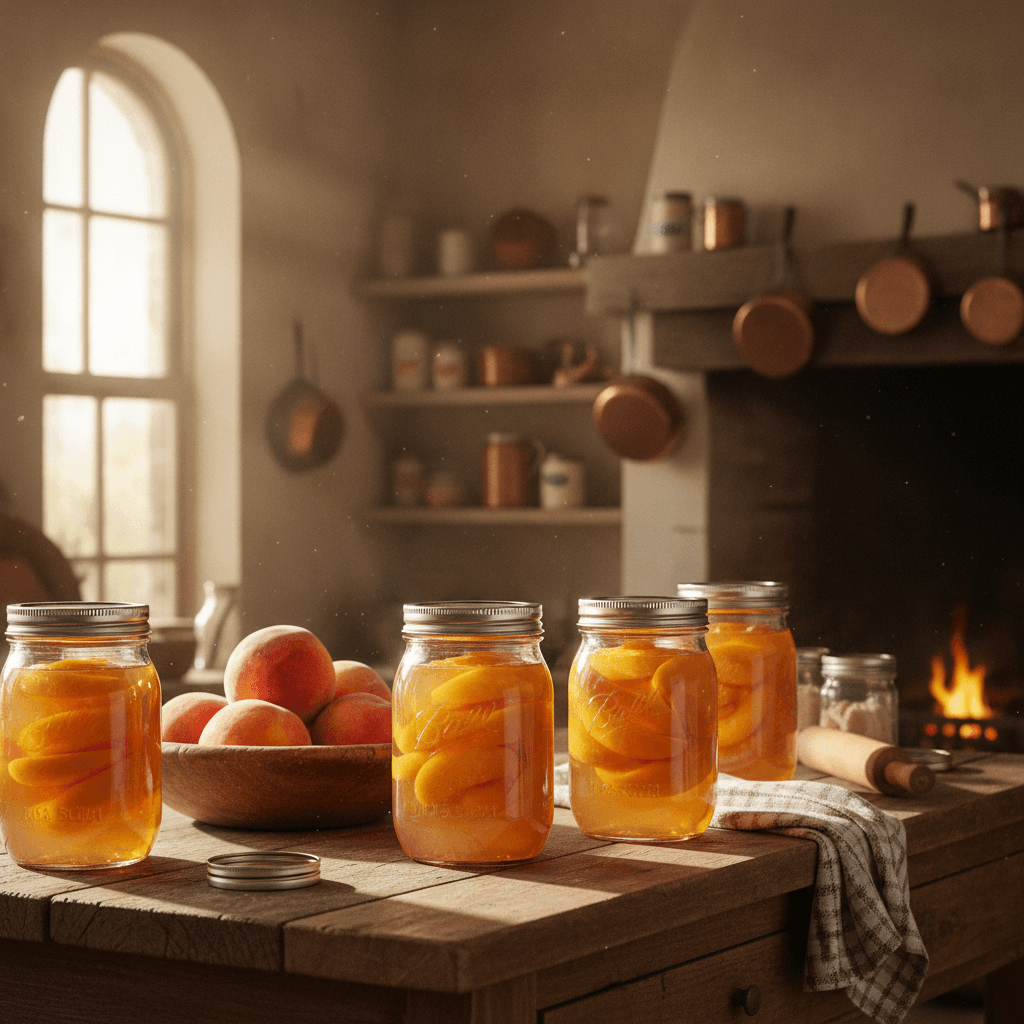
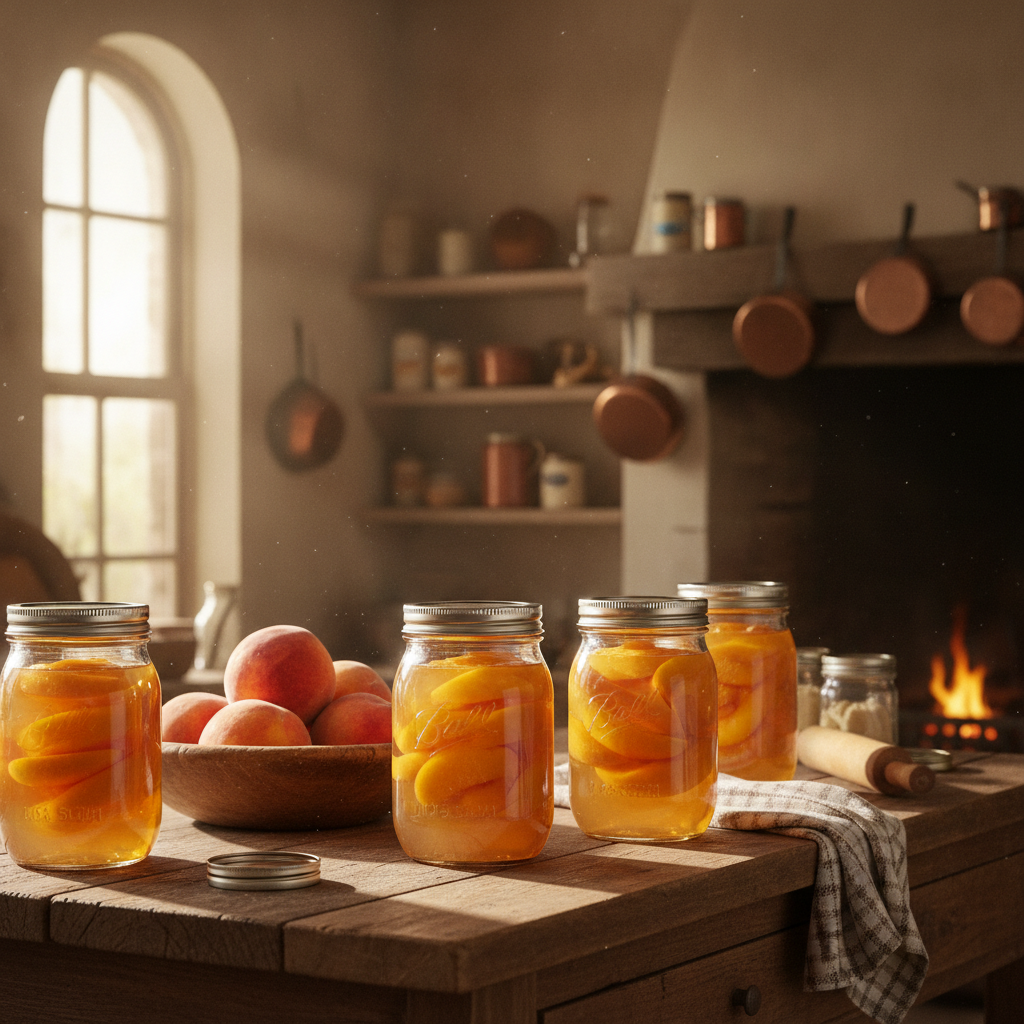
There's a quiet magic that happens in the kitchen when the seasons turn. It’s the desire to hold onto the warmth and sweetness of summer just a little bit longer. For me, nothing captures that feeling quite like a row of glowing, jewel-toned jars on the pantry shelf. And at the heart of that collection, you’ll always find my homemade canned peaches. This isn't just about food preservation; it's about bottling sunshine. It’s a promise to yourself that even on the coldest winter day, you can unscrew a lid and be transported back to a warm afternoon, the scent of ripe peaches filling the air. Many people feel intimidated by the idea of canning peaches, imagining complicated equipment and arcane processes. I'm here to assure you that it’s one of the most rewarding and straightforward kitchen projects you can undertake. The process is a beautiful, meditative rhythm of washing, peeling, and packing. The standout element is the transformation itself—watching firm, fuzzy fruit soften into tender, golden slices, suspended in a simple, sweet syrup that amplifies their natural flavor without overpowering it. This guide is my promise to you: a clear, reliable, and safe method for canning peaches that will fill your home with a beautiful aroma and your pantry with treasures that taste of pure summer.
Why This Recipe Works for Your Pantry
In a world of instant gratification, taking the time for canning peaches feels like a revolutionary act of care for your home and family. This practice isn't just about nostalgia; it’s an incredibly practical and beneficial skill that aligns perfectly with a thoughtful, wholesome lifestyle. The most significant advantage is control. When you make your own canned peaches, you decide exactly what goes into the jar. You can say goodbye to the high-fructose corn syrup and artificial preservatives found in many store-bought versions. You choose the sweetness level, from a barely-there light syrup to a richer, more traditional one, ensuring the final product suits your family's tastes and dietary preferences.
Beyond ingredient control, home canning is a powerful tool against food waste. When you find a fantastic deal on a bushel of peaches at the market, or if your own tree provides an overabundant harvest, canning allows you to save every last piece of that beautiful fruit. Instead of watching them over-ripen on the counter, you transform them into a shelf-stable ingredient you can enjoy for months, even a year or more. This is true kitchen economy, respecting the food and the resources that went into growing it.
There's also a deep sense of security and satisfaction that comes from a well-stocked pantry. Knowing you have these beautiful jars ready to be used for a quick dessert, a special breakfast topping, or a simple snack provides a unique kind of comfort. It connects you more deeply to the food cycle and the seasons. The process of canning peaches itself is a rewarding experience, a quiet afternoon project that results in a tangible, delicious, and beautiful product. It's an investment of time that pays dividends in flavor and preparedness, making your kitchen a more resilient and resourceful space.
The Ingredient Lineup
The beauty of canning peaches lies in its simplicity. You only need a few core ingredients to create something truly special, and understanding their roles is key to success. The star, of course, is the peaches. For canning, you'll want to choose freestone varieties like Redhaven, Elberta, or O'Henry. Freestone means the pit pulls away easily from the flesh, which makes preparation infinitely easier. Look for peaches that are ripe and fragrant but still firm to the touch. A soft, mushy peach won't hold its shape during the canning process. The perfect canning peach has a vibrant color and yields just slightly to gentle pressure.
Next up is the sugar. Sugar in canning does more than just add sweetness; it helps preserve the texture, color, and flavor of the fruit. You'll be making a simple syrup, and you can control its concentration. A light syrup, which is what my recipe calls for, allows the natural flavor of the peaches to shine through. You can also make a medium or heavy syrup for a sweeter result. Simple granulated sugar is all you need. While some alternative sweeteners can be used, their preservation qualities can differ, so it's best to stick to tested recipes when you're starting out.
To ensure safety, we use bottled lemon juice. This is not for flavor, but for acidity. Peaches are a high-acid fruit, but their acidity can vary depending on the variety and ripeness. Adding a measured amount of bottled lemon juice (which has a consistent acidity level, unlike fresh lemons) ensures the overall pH of the jar's contents is low enough to prevent the growth of harmful bacteria. This is a non-negotiable step for safe water bath canning.
Finally, there’s water. Pure, clean water is used to create the syrup that will fill your jars and surround the fruit. And that’s it! Of course, you can introduce other flavors. A single cinnamon stick, a split vanilla bean, or a few whole cloves added to each jar can introduce a warm, spiced note that is absolutely divine in the winter. These additions are optional but offer a wonderful way to customize your canned peaches.
Putting It Together: The Canning Process Explained
The journey of canning peaches is a series of simple, deliberate steps that flow one into the next. Think of it as an assembly line you create in your own kitchen. The first stage is all about preparation. You’ll begin by preparing your water bath canner, filling it with water and setting it on the stove to heat. At the same time, you'll wash and inspect your jars and lids, ensuring they are perfectly clean and ready to be filled. This initial setup is crucial for a smooth and safe process.
Next, you'll create the simple syrup. This involves gently heating water and sugar in a saucepan until the sugar is completely dissolved. Keeping this syrup hot is key, as you'll be adding hot syrup to packed jars to ensure the temperature remains consistent, which is important for safe processing. While the syrup is coming together, you can turn your attention to the fruit. The peaches need to be blanched—a quick dip in boiling water followed by a shock in an ice bath. This simple trick makes the fuzzy skins slip off with incredible ease, revealing the beautiful golden flesh underneath.
Once peeled, the peaches are halved or sliced and their pits removed. To prevent them from browning while you work, the slices take a dip in water treated with a bit of lemon juice. Then comes the most satisfying part: packing the jars. You’ll artfully arrange the peach slices into your clean jars, packing them tightly without crushing them. The goal is to get as much fruit in as possible while leaving enough room for the syrup to circulate.
Finally, the hot syrup is ladled over the peaches, covering them completely. You'll carefully remove any trapped air bubbles, wipe the jar rims clean to ensure a perfect seal, and secure the two-part lids until just fingertip-tight. The filled jars are then lowered into the gently boiling water of your canner for a specific amount of time. This processing step is what makes the food shelf-stable. After their hot bath, the jars are removed and left to cool, and you get to listen for the rewarding “ping” sound that tells you each jar has sealed successfully. This methodical process makes the art of canning peaches accessible to everyone.
Customizing Your Canned Peaches
Once you've mastered the basic technique for canning peaches, a world of delicious customization opens up. The simplest way to tailor your canned peaches to your liking is by adjusting the sweetness of the syrup. My recipe uses a light syrup, which I find perfectly complements the fruit's natural sugars. However, you have options! For a medium syrup, you can use a ratio of about 3 cups of sugar to 5 1/4 cups of water. For a classic, heavy syrup that results in a more dessert-like product, you would use a ratio of 4 3/4 cups of sugar to 5 cups of water. You can even can peaches in plain water or fruit juice, though the texture and color may not hold up quite as well over time.
Beyond sweetness, infusing your syrup with spices is where you can truly get creative and add a signature touch, which is something I absolutely love to do. Think of the warm, comforting spices of the Levant. Adding a single high-quality cinnamon stick to each jar before processing imparts a gentle, woody warmth that is incredible with peaches. A split vanilla bean will infuse the syrup with its floral, creamy aroma, making the peaches feel luxurious. For a more unique flavor, try adding one or two whole cloves or a single star anise per jar. You could even add a few green cardamom pods for a fragrant, slightly citrusy note.
Don't be afraid to mix and match. A combination of cinnamon and vanilla is a timeless classic. Ginger is another wonderful pairing; a thin slice of fresh ginger in each jar can add a lovely, zesty heat that cuts through the sweetness beautifully. The key is to use whole spices rather than ground ones, as ground spices will make your syrup cloudy. These small additions transform a simple jar of canned peaches into a gourmet pantry staple, perfect for gifting or for elevating your own meals.
Canning Like a Pro: Tips for Success
Achieving canning success is all about understanding a few key principles and paying attention to detail. These professional tips will help ensure your efforts result in safely sealed, beautiful jars every time you set out on a canning peaches adventure. First and foremost, always use recipes from trusted, modern sources. Canning science has evolved, and it's crucial to use up-to-date processing times and methods to ensure food safety. Don't rely on old, inherited recipes unless you can verify them against current guidelines.
One of the most critical factors for a good seal is managing headspace. Headspace is the empty space between the top of the food (the peaches and syrup) and the rim of the jar. For canning peaches, you'll typically want to leave a 1/2-inch headspace. This space is essential because as the jar heats up in the canner, the contents expand. The air in the headspace is pushed out, creating a vacuum as the jar cools, which pulls the lid down and seals it tight. Too little headspace, and food might bubble out and prevent a seal. Too much, and you might not drive enough air out to form a strong vacuum.
Another pro tip is to always remove air bubbles before sealing the jars. After you ladle the hot syrup over your peaches, you'll notice tiny air pockets trapped between the fruit slices. Use a non-metallic tool—a plastic bubble popper, a thin silicone spatula, or even a simple wooden chopstick—to run along the inside of the jar, gently releasing these bubbles. Trapped air can affect the color of the fruit over time and, more importantly, can interfere with proper sealing and processing.
Finally, treat your equipment with care. Always inspect your jars for nicks or cracks before you begin, as a compromised jar can break in the canner. Use new lids every single time; the sealing compound on lids is designed for one-time use. When you place the lids on, tighten the screw band only to “fingertip-tight.” This means tightening it until you feel resistance, then stopping. The band's job is just to hold the lid in place during processing; over-tightening can prevent air from escaping and cause the seal to fail. By following these key tips for canning peaches, you'll build confidence and enjoy consistently perfect results.
Serving Suggestions and Ways to Enjoy
Once you have a pantry lined with your beautiful homemade canned peaches, the fun truly begins. These jars of preserved summer are incredibly versatile, ready to brighten meals from morning to night. For a simple and wholesome breakfast, spoon the peaches and a little of their syrup over a warm bowl of oatmeal, creamy yogurt, or cottage cheese. The tender fruit provides a lovely contrast in texture and a burst of natural sweetness to start your day.
At lunchtime or for a light dinner, they can add a surprising and delicious element to savory dishes. Try dicing some canned peaches and tossing them into a grain salad with quinoa, fresh mint, and a lemon-tahini dressing. The sweet and tangy combination is fantastic. For a truly Mediterranean-inspired pairing, serve the peach slices alongside grilled halloumi cheese. The warm, salty cheese with the sweet, cool fruit is a flavor combination you won't soon forget.
Of course, canned peaches shine in desserts. They are the perfect shortcut to a classic peach cobbler or crumble—simply drain them and use them in place of fresh fruit. You can also gently warm them and serve them over a scoop of vanilla bean ice cream or alongside a simple slice of pound cake. For an elegant and effortless dessert, puree the peaches with their syrup to create a beautiful coulis to drizzle over cheesecake or panna cotta. Having these jars on hand means a beautiful, home-cooked dessert is never more than a few minutes away.
Frequently Asked Questions
Do I really have to peel the peaches?
While it's technically safe to can peaches with the skins on, the texture can become tough and papery after processing and storage. The fuzzy skin tends to detach from the flesh, floating unpleasantly in the syrup. Blanching and peeling results in a much better final product with a silky, pleasant texture.
Can I reduce the sugar or use a sugar substitute?
Yes, you can reduce the sugar or even can peaches in plain water. Sugar helps preserve texture and color, so a lower-sugar version might be softer and less vibrant, but it is safe. For sugar substitutes, you must use one specifically formulated for canning, as not all hold up to the heat of processing. Always follow the manufacturer's instructions for substitution.
How do I know for sure if my jars have sealed properly?
After the jars have cooled completely for 12-24 hours, you can check the seal in three ways. First, the lid should be concave (curved downward) and not move when pressed. Second, you can remove the screw band and gently try to lift the jar by the lid's edges; it should hold fast. Third, tapping the lid with a spoon should produce a high-pitched ringing sound, not a dull thud.
How long will my homemade canned peaches last?
When properly sealed and stored in a cool, dark, and dry place, your canned peaches will be safe to eat indefinitely. However, for the best quality in terms of flavor, color, and texture, it is recommended to consume them within one year. Always inspect the jar before opening for any signs of spoilage.
Why is using bottled lemon juice so important?
Food safety in canning is all about controlling acidity (pH). While peaches are naturally acidic, their pH can vary. Bottled lemon juice has a standardized, reliable acidity level. Using it ensures that the overall environment inside the jar is acidic enough to prevent the growth of C. botulinum spores, which is critical for the water bath canning method's safety.
Homemade Canned Peaches in Light Syrup
A simple and reliable recipe for canning fresh peaches using a water bath method, preserving their sweet, summery flavor in a delicate light syrup.
Prep Time
1h
Cook Time
30 min
Total Time
1h 30m
Servings
4 quart jars
Ingredients
For 4 quart jars
- 8 lbs ripe but firm freestone peaches (about 16-20 medium)
- 9 cups water, for syrup
- 2 1/4 cups granulated sugar
- 1/2 cup bottled lemon juice, divided
- Large bowl of ice water
- Optional: 4 small cinnamon sticks or 1 split vanilla bean
Instructions
- 1
Prepare Canner and Jars
Place a rack in the bottom of a large water bath canner and place 4 clean quart jars on top. Fill the canner and jars with hot water until the jars are covered. Bring to a simmer (180°F) over medium-high heat. Do not boil. Place the lids in a small saucepan of hot water; keep warm but do not boil.
- 2
Make the Light Syrup
In a separate large saucepan, combine the 9 cups of water and 2 1/4 cups of sugar. Bring to a boil over medium-high heat, stirring until the sugar is completely dissolved. Reduce heat to low to keep the syrup hot while you prepare the fruit.
- 3
Prepare an Ice Bath
Fill a large bowl or a clean sink with ice and cold water. This ice bath will be used to shock the peaches after blanching, which makes their skins easy to remove. Have it ready and nearby your stovetop.
- 4
Blanch the Peaches
Bring a separate large pot of water to a rolling boil. Carefully lower a few peaches at a time into the boiling water for 30-60 seconds. Immediately remove them with a slotted spoon and plunge them into the prepared ice bath to stop the cooking process.
- 5
Peel, Pit, and Slice Peaches
Remove the peaches from the ice bath. The skins should now slip off easily with your fingers or a small knife. Cut the peaches in half along the seam and remove the pits. You can leave them in halves or cut them into thick slices, as desired.
- 6
Treat the Peaches
As you work, place the peeled and sliced peaches into another large bowl filled with cool water and 1/4 cup of the bottled lemon juice. This will help prevent the fruit from browning while you prepare the remaining peaches.
- 7
Pack Jars with Peaches
Carefully remove one hot jar from your canner, pouring the water back in. Drain the peach slices and pack them firmly into the hot jar, cavity-side down if using halves. Add 1 tablespoon of bottled lemon juice to each quart jar for safety. If using, add a cinnamon stick or piece of vanilla bean.
- 8
Add Hot Syrup
Ladle the hot syrup over the peaches in the jar, leaving a 1/2-inch headspace from the top rim. The headspace is crucial for creating a vacuum seal during processing. Ensure the peaches are fully submerged in the syrup.
- 9
Remove Air Bubbles and Seal
Slide a non-metallic spatula or bubble remover tool around the inside of the jar to release any trapped air bubbles. Wipe the rim of the jar with a clean, damp cloth. Center a hot lid on the jar and screw on the band until it is just fingertip-tight.
- 10
Process in Water Bath
Carefully place the filled jar back into the canner using a jar lifter. Repeat for the remaining jars. Ensure water covers the jars by at least 1-2 inches. Cover the canner and bring to a rolling boil. Process the quart jars for 30 minutes (adjust for altitude if necessary).
- 11
Cool and Check Seals
Turn off the heat, remove the canner lid, and let the jars stand in the hot water for 5 minutes. Carefully remove the jars and place them on a towel-lined counter. Leave them undisturbed for 12-24 hours. You should hear popping sounds as the lids seal. Do not retighten bands.
- 12
Store Properly
After 24 hours, check the seals. The lids should be firm and curved downwards. Remove the screw bands, wipe the jars clean, label them with the date, and store in a cool, dark, dry place for up to one year for best quality.
Nutrition Facts
Per serving (estimated)
150 calories
Calories
38g
Carbs
1g
Protein
0g
Fat
2g
Fiber
5mg
Sodium
35g
Sugar