Creamy Jalapeño Popper Dip: The Ultimate Meal Prep Recipe
Discover how to make the best creamy, cheesy jalapeño popper dip for a week of delicious lunches. Easy, make-ahead, and absolutely irresistible!
cookwithyara.com/recipes/jalapeo-popper-dip
There's a certain magic that happens on a Sunday afternoon when you dedicate just an hour or two to the kitchen. It’s a quiet investment in your future self—the person who, on a busy Tuesday, will be so grateful for a delicious, ready-made meal. We all know the feeling of a frantic weekday lunch scramble, the temptation of less-than-ideal takeout, or the monotony of another sad desk salad. Meal prepping is the beautiful solution, a way to cook once and eat beautifully all week long. It transforms the daily question of “What’s for lunch?” from a source of stress into a moment of genuine pleasure.
But meal prep doesn’t have to mean endless containers of plain grilled chicken and steamed broccoli. It can be exciting, flavorful, and something you actually look forward to eating. That’s where this incredible Jalapeño Popper Dip comes in. I know what you might be thinking—a dip for meal prep? Absolutely. This isn't just an appetizer for gatherings; it's a versatile, protein-packed, and deeply satisfying base for a week of fantastic meals. Imagine a creamy, cheesy dip, studded with the bright, mild heat of jalapeños and savory bits of halal beef 'bacon', all ready to be deployed for your midday meal. This recipe is your ticket to a week of lunches that feel like a treat, not a chore.
Why This Recipe Is Perfect for Meal Prep
Not every recipe is suited for the make-ahead lifestyle. Some dishes wilt, others get soggy, and many lose their vibrant flavor after a day in the fridge. But this Jalapeño Popper Dip is different; it seems almost designed for meal prep, with qualities that make it a reliable and delicious choice for your weekly rotation. The secret lies in its foundational ingredients and the way their flavors interact over time.
The base of this dip is a rich blend of cream cheese and Greek yogurt, which are incredibly stable. Unlike more delicate sauces, this creamy foundation holds its texture beautifully. It won't separate or become watery upon refrigeration. In fact, the opposite happens. As the dip rests, the flavors have a chance to meld and deepen. The smoky notes, the tang of the cheese, and the gentle heat of the jalapeños infuse the entire mixture, meaning the dip you eat on Wednesday might taste even better than it did on Sunday. This flavor development is a key advantage for any meal prep recipe.
Furthermore, the textures are robust enough to withstand reheating. The creaminess remains, the cheese becomes gooey and satisfying again, and the key components don’t turn to mush. We also build this dip to be a balanced meal component. It's packed with protein from the Greek yogurt, cheese, and savory halal beef 'bacon', ensuring it keeps you full and energized through the afternoon. It's the perfect savory, satisfying core around which you can build a variety of quick and healthy lunches, making this Jalapeño Popper Dip a true meal prep champion.
What You'll Need
Gathering your ingredients for a batch cooking session is like assembling a toolkit for a successful week. For this Jalapeño Popper Dip meal prep, we're focusing on high-quality, sturdy ingredients that will taste just as good on day five as they do on day one. Let’s walk through the key players.
First, the creamy base: full-fat block cream cheese and plain whole-milk Greek yogurt. It's crucial to use block cream cheese, not the whipped kind in a tub, as it provides the thick, stable structure we need. The Greek yogurt adds a lovely tang and a boost of protein, lightening the richness of the cream cheese. For the cheesy element, a block of sharp cheddar cheese you grate yourself is non-negotiable. Pre-shredded cheeses are often coated in anti-caking agents that can make the dip greasy when reheated.
Of course, the star is the jalapeño. You'll want fresh, firm jalapeños. We'll be using some in the dip itself and saving some to slice fresh as a garnish, which adds a wonderful crunch and vibrancy later in the week. For that classic smoky, savory flavor, we're using halal beef 'bacon', cooked until crisp and crumbled. This provides a fantastic textural contrast and deep flavor. If you prefer, a good quality smoked paprika can also lend a beautiful smoky note. Green onions, or scallions, provide a mild, fresh oniony bite. You'll mix some in and reserve some for topping.
When it comes to storage, I am a firm believer in glass containers with airtight lids. Glass is non-porous, so it won’t absorb odors or stains, and it’s perfect for reheating directly in the microwave or oven. I recommend portioning the Jalapeño Popper Dip into individual 1-cup glass containers. This makes grab-and-go lunches effortless. If you're thinking about bulk buying, cream cheese and cheddar cheese often have long shelf lives, making them great candidates to buy on sale.
The Batch Cooking Method
The true beauty of meal prep is an efficient workflow. Our goal here isn't to spend all day in the kitchen, but to have a focused, productive session that sets us up for the week. The batch cooking method for this Jalapeño Popper Dip is designed to be a streamlined process, minimizing active time and maximizing flavor. Let's create an assembly line for a week of deliciousness.
First, begin with the task that takes the longest: cooking the halal beef 'bacon'. While it’s crisping up in a skillet over medium heat, you can multitask. This is the perfect time to prep your vegetables. Finely dice your jalapeños (remember to remove the seeds and membranes for less heat), slice your green onions, and grate your block of sharp cheddar cheese. By the time your beef 'bacon' is perfectly crisp and draining on a paper towel, your other components will be ready to go. This is what we call simultaneous cooking, and it's the key to efficiency.
Next, in a large mixing bowl, you’ll combine the softened cream cheese and Greek yogurt. It’s important that your cream cheese is at room temperature to ensure a smooth, lump-free base. Use a hand mixer or a sturdy spatula to beat them together until creamy. Now, it's time to build the flavor. Fold in the majority of the grated cheddar (saving some for the topping), the diced jalapeños, the crumbled beef 'bacon', and the sliced green onions. Season it well with garlic powder, onion powder, and a touch of salt. Mix until everything is just combined; be careful not to overmix.
Now for the portioning. Divide the Jalapeño Popper Dip mixture evenly among four or five individual oven-safe glass containers. Top each portion with the reserved shredded cheddar. At this point, you have a choice: you can bake them all now for about 20 minutes until hot and bubbly, then let them cool completely before refrigerating. Or, you can refrigerate the unbaked portions and bake each one fresh throughout the week. I prefer the first method, as it deepens the flavors and makes reheating even quicker. Your total active time should be no more than 25 minutes, with about 20 minutes of passive baking time—a small price for a week of amazing lunches.
The Weekly Game Plan
Having five containers of delicious Jalapeño Popper Dip in your fridge is a fantastic start, but the real secret to avoiding meal prep fatigue is variety. The dip is your flavorful base, a canvas you can present in different ways each day. Here is a simple game plan to keep your lunches exciting from Monday to Friday.
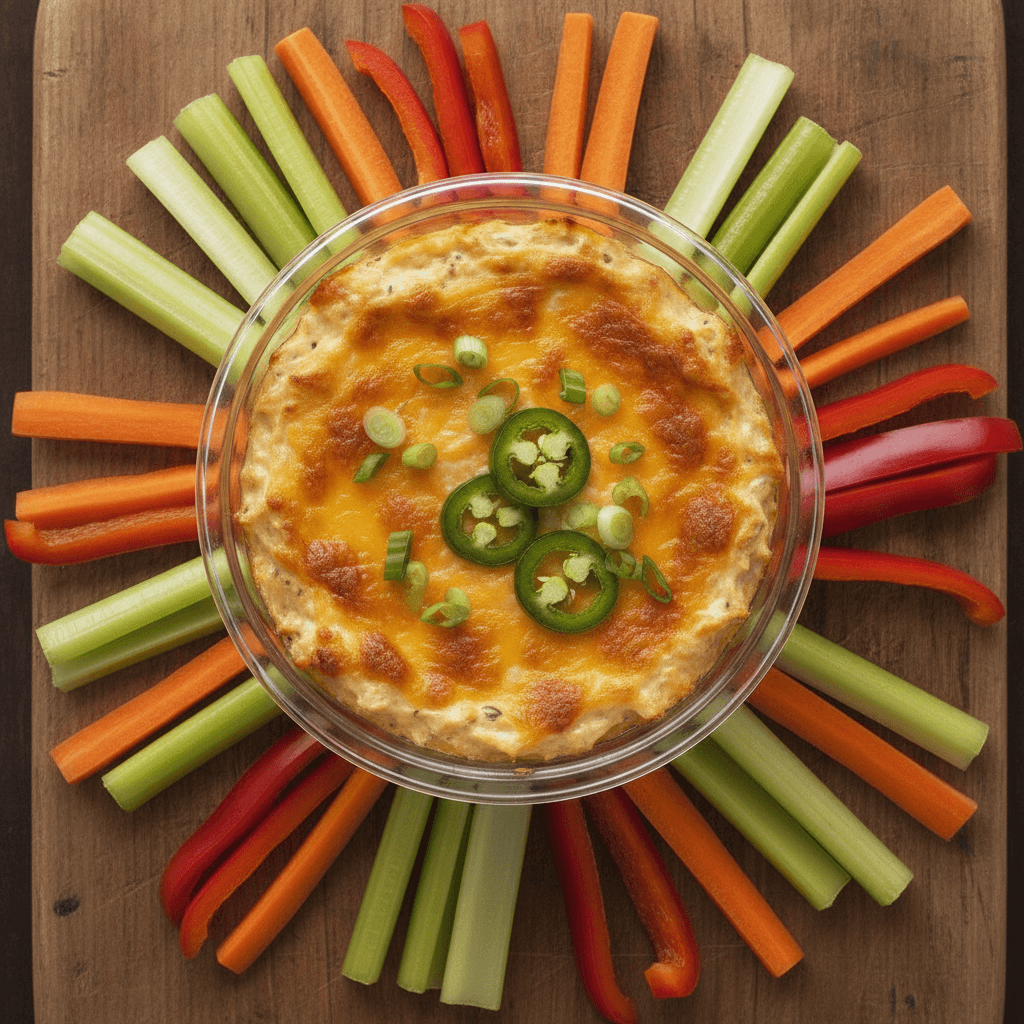
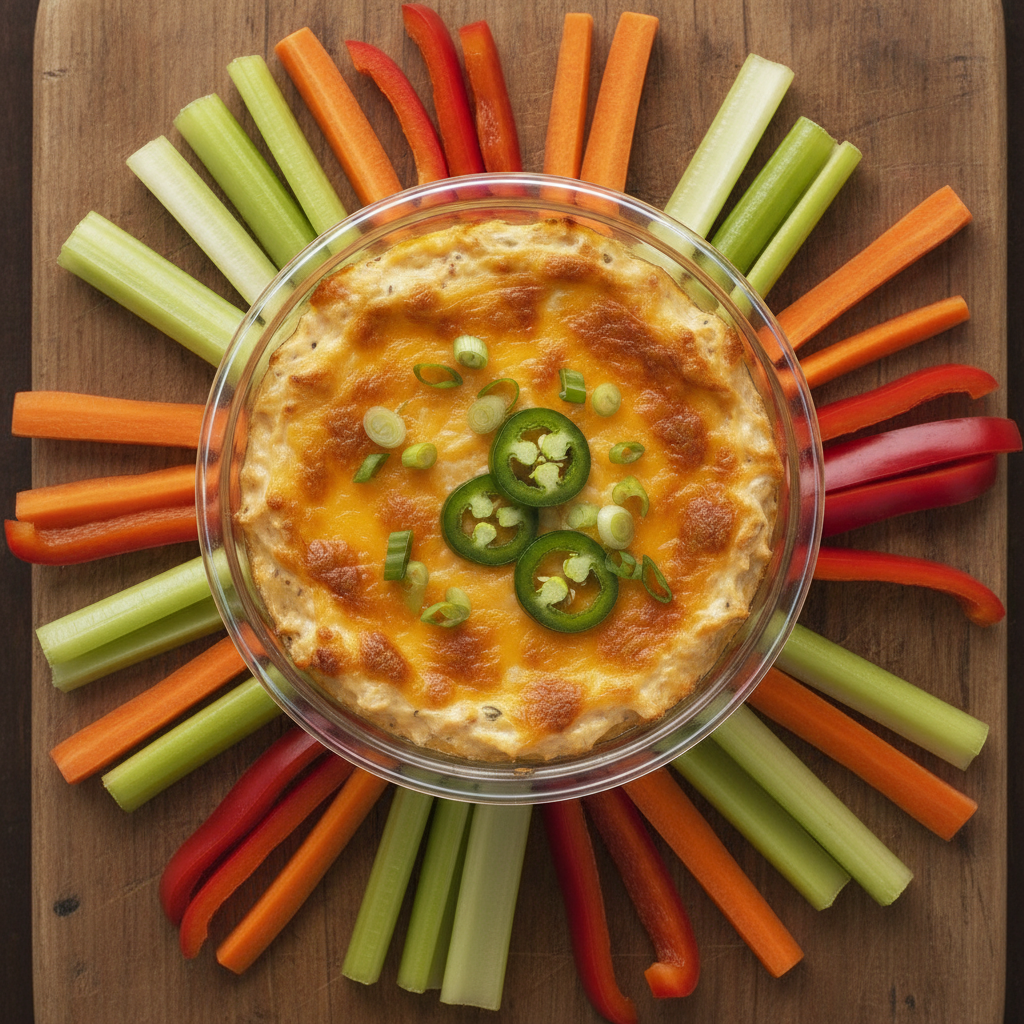
Monday: Keep it simple and classic. Pack your container of dip with a side of sturdy dippers. Think celery sticks, carrot sticks, bell pepper strips, and cucumber slices. The cool crunch of the fresh vegetables is a perfect contrast to the warm, creamy dip. It’s a low-carb, satisfying start to the week.
Tuesday: Let's turn it into a hearty, comforting meal. Reheat your Jalapeño Popper Dip and serve it generously dolloped over a hot baked sweet potato. The sweetness of the potato paired with the savory, spicy, cheesy dip is an unbelievable combination. It feels indulgent but is packed with nutrients.
Wednesday: Wrap it up. Gently warm the dip and spread it inside a large whole-wheat tortilla or a piece of flatbread. Add some protein like shredded rotisserie chicken or chickpeas, and a handful of fresh spinach or arugula. Roll it up for a fantastic, portable lunch that’s bursting with flavor and texture.
Thursday: Sauce it. Reheat the dip until it's easily pourable (you can add a splash of milk if needed to thin it out slightly) and use it as a rich, cheesy sauce. Pour it over a bowl of steamed broccoli, cauliflower, or a mix of roasted vegetables. It’s a brilliant way to make a simple bowl of veggies feel like a decadent treat.
Friday: Celebrate the end of the week with a loaded bowl. Reheat your final portion of Jalapeño Popper Dip, and top it with a few extra fresh jalapeño slices, a sprinkle of fresh cilantro, and a scoop of leftover rice or quinoa from another dinner. It’s a complete, satisfying meal-in-a-bowl that properly rewards you for a week of smart eating.
Smart Storage and Reheating
Proper storage and reheating are the final, crucial steps in a successful meal prep journey. How you store your food determines its freshness and longevity, and how you reheat it determines whether it tastes just as good as the day it was made. For our Jalapeño Popper Dip, we have a few best practices to ensure every serving is perfect.
For storage containers, glass is truly king. I recommend single-serving, oven-safe glass containers with locking, airtight lids. Glass is non-reactive, meaning it won’t hold onto flavors or stains from previous meals. It also allows you to go directly from the fridge to the microwave or even the oven (just be sure your container is rated for it), which means fewer dishes to wash. Portioning into individual containers right after cooking prevents you from having to scoop from a large batch all week, which helps maintain freshness and prevents contamination. Your prepared Jalapeño Popper Dip will last beautifully in these airtight containers in the refrigerator for up to 5 days.
When it comes to reheating, you have options. The microwave is the quickest method, perfect for a busy workday. Remove the lid and heat your individual portion on high in 30-second intervals, stirring in between, until it’s hot and bubbly. This usually takes about 60-90 seconds. Stirring is key to prevent hot spots and ensure it heats evenly. For the best texture, the oven or a toaster oven is superior. If you’re at home, preheat your oven to 375°F (190°C) and bake the dip in its glass container for 10-15 minutes, until the cheese is melted and the edges are bubbling. This method re-melts the cheese topping perfectly, giving you that fresh-from-the-oven experience.
To refresh the textures after reheating, always add a fresh component. A sprinkle of freshly sliced green onions, a few rings of raw jalapeño, or some chopped cilantro can bring a wonderful brightness and crunch that makes the dish feel brand new. If you've frozen any portions (which you can do for up to 2 months!), let them thaw in the refrigerator overnight before reheating using your preferred method.
Customization Ideas
One of the best things about a foundational recipe like this Jalapeño Popper Dip is how easily it can be adapted to your personal tastes or what you have on hand. Think of this recipe as a blueprint for you to customize and make your own. There are so many simple swaps and additions you can make.
For protein variations, the options are plentiful. If you're not using beef 'bacon', try adding shredded cooked chicken to the mix for a heartier, more substantial dip. A can of drained black beans or chickpeas could also be stirred in for a vegetarian protein boost. These additions make the dip even more of a complete meal on its own.
Feel free to play with the cheese! While sharp cheddar provides a classic, tangy flavor, you could easily substitute it with Monterey Jack for a milder, meltier experience, or use a blend of both. A little bit of smoked gouda could also be grated in to amplify the smoky notes. For serving, don't limit yourself. Alongside veggie sticks, try whole-grain crackers, pita chips, or even spread it on toasted sourdough for an open-faced melt.
If you need to adjust for dietary preferences, this recipe is quite flexible. For a lighter version, you can use Neufchâtel cheese and low-fat Greek yogurt, though the texture will be slightly less rich. To control the spice level, be meticulous about removing all seeds and white membranes from the jalapeños for a mild heat, or leave a few in if you prefer a spicier kick. The beauty of this Jalapeño Popper Dip lies in its versatility, so feel empowered to experiment.
Meal Prep FAQ
How long does this jalapeño popper dip actually last in the fridge?
When stored correctly in individual airtight containers, the dip will stay fresh and delicious for up to 5 days. Portioning it out right after cooking is key, as this minimizes its exposure to air each time you grab a meal, maintaining its quality throughout the week.
What are the absolute best containers for this meal prep?
I strongly recommend oven-safe, single-serving glass containers with airtight locking lids. Glass is superior because it doesn't stain or absorb odors, and you can reheat the dip directly in the container in either the microwave or the oven, which simplifies the process and reduces cleanup.
I have to reheat my lunch at work. What's the best way?
The microwave is your best friend for workplace reheating. To avoid a mess, cover the container with a paper towel. Heat in 30-second increments, stirring between each one, until it's warmed through. This prevents the dip from getting too hot in one spot and ensures the cheese melts evenly.
Can I pack this for my kids' lunch?
Absolutely! To make it kid-friendly, ensure you've removed all jalapeño seeds and membranes for a very mild flavor. You can even use mini sweet bell peppers instead of jalapeños. Pack it with their favorite dippers like pretzel thins, whole-grain crackers, or sweet pepper strips for a fun, interactive lunch.
How do I avoid getting bored of eating the same thing all week?
Variety is everything! Don't just eat it as a dip every day. Use the 'Weekly Game Plan' as a guide: serve it over a baked potato one day, use it as a sauce for vegetables the next, and tuck it into a wrap on another. Adding a different fresh topping each day—like cilantro, extra green onions, or a squeeze of lime—also makes a huge difference.
Meal Prep Jalapeño Popper Dip (Halal)
A creamy, cheesy, and perfectly spicy jalapeño popper dip designed for meal prep. This make-ahead recipe is perfect for a week of delicious and easy lunches.
Prep Time
20 min
Cook Time
25 min
Total Time
45 min
Servings
4 servings
Ingredients
For 4 servings
- 8 oz halal beef 'bacon', chopped
- 16 oz (2 blocks) cream cheese, softened to room temperature
- 1 cup plain whole-milk Greek yogurt
- 4-5 fresh jalapeños, finely diced (seeds and membranes removed for less heat)
- 1 cup shredded sharp cheddar cheese, plus 1/2 cup for topping
- 1/2 cup sliced green onions, plus more for garnish
- 1 tsp garlic powder
- 1/2 tsp onion powder
- 1/2 tsp salt, or to taste
- 1/4 tsp black pepper
Instructions
- 1
Cook the Beef 'Bacon'
In a large skillet over medium heat, cook the chopped halal beef 'bacon' until it reaches your desired level of crispiness, about 8-10 minutes. Use a slotted spoon to transfer it to a paper towel-lined plate to drain excess fat. Let it cool slightly.
- 2
Prepare the Vegetables
While the beef 'bacon' is cooking, prepare your vegetables. Carefully dice the jalapeños, making sure to remove the seeds and white membranes to control the heat. Finely slice the green onions and grate the cheddar cheese if you bought it in a block.
- 3
Create the Creamy Base
In a large mixing bowl, combine the softened cream cheese and Greek yogurt. Using a hand mixer on low or a sturdy spatula, mix until the base is smooth and no lumps of cream cheese remain. Starting with room temperature cream cheese is essential for a silky texture.
- 4
Combine the Ingredients
To the cream cheese mixture, add the crumbled beef 'bacon', diced jalapeños, 1 cup of shredded cheddar, and the sliced green onions. Reserve about a tablespoon of each for topping later if desired.
- 5
Season the Dip
Sprinkle the garlic powder, onion powder, salt, and black pepper over the mixture. Gently fold all the ingredients together until they are evenly distributed. Be careful not to overmix, as this can make the dip dense.
- 6
Portion for Meal Prep
Divide the dip mixture evenly among 4 single-serving (about 1.5 cup capacity) oven-safe glass containers. Smooth the top of each portion with the back of a spoon.
- 7
Add the Topping
Sprinkle the remaining 1/2 cup of shredded cheddar cheese evenly over the tops of the four portions. This will create a delicious, golden-brown cheesy crust when baked.
- 8
Bake the Dip
Preheat your oven to 375°F (190°C). Place the glass containers on a baking sheet and bake for 20-25 minutes, or until the dip is hot and the cheese on top is bubbly and lightly browned.
- 9
Cool and Store
Remove the containers from the oven and let them cool completely on a wire rack. This is a crucial step before refrigerating. Once completely cool, secure the airtight lids and store them in the refrigerator for up to 5 days.
- 10
Reheat and Serve
To reheat, remove the lid and microwave a single portion in 30-second intervals, stirring in between, until hot (about 90 seconds total). Alternatively, bake in a 375°F (190°C) oven for 10-15 minutes. Garnish with fresh green onions before serving.
Nutrition Facts
Per serving (estimated)
450 calories
Calories
8g
Carbs
18g
Protein
39g
Fat
1g
Fiber
750mg
Sodium
4g
Sugar