Perfect Skillet Cornbread Recipe (Crispy Edges!)
Learn how to make the best skillet cornbread with crispy edges and a moist, tender crumb. This easy, foolproof recipe is a must-try for any occasion.
cookwithyara.com/recipes/cornbread
There’s a unique kind of magic that happens in a kitchen when simple ingredients come together to create something profoundly comforting. For me, one of the most powerful examples of this alchemy is pulling a heavy, black cast-iron skillet from the oven, revealing a landscape of golden-brown cornbread, its top crackled and its aroma filling the air with the scent of toasted corn and warm butter. It’s a dish that speaks of hearth and home, a simple bread that feels both humble and celebratory all at once.
The beauty of a truly great cornbread lies in its contrasts. It’s all about that textural journey: the shatter of a crisp, buttery crust giving way to a crumb that is pillowy soft, tender, and moist. So many of us have memories of cornbread that was sadly one-note—either dry and crumbly or dense and heavy. The perfect skillet cornbread, however, is a masterclass in balance.
I know that for some, the idea of achieving that perfect crust can seem intimidating, a secret held by grandmothers and seasoned Southern cooks. But I’m here to tell you that it’s not a secret at all; it’s a technique rooted in simple science. Once you understand the why behind each step—why we preheat the skillet, why we use buttermilk, why we don't overmix—the how becomes second nature. This isn't just a recipe; it's a lesson in creating comfort, a foundational skill that will serve you well in your culinary journey. So let’s demystify the process and bake a cornbread that’s not just good, but truly memorable.
The Science Behind Perfect Cornbread
To become a truly intuitive cook, it helps to peek behind the curtain and understand what’s happening on a chemical level. Making fantastic cornbread isn't about luck; it's about facilitating a few key scientific reactions that guarantee a tender crumb and a spectacular crust. When you grasp these concepts, you're no longer just following steps—you're conducting an orchestra of flavor and texture.
First, let's talk about the lift and tenderness. The primary magic here comes from a classic acid-base reaction. We use buttermilk, which is acidic, and combine it with baking soda, a base. When they meet in the batter, they react to create tiny bubbles of carbon dioxide gas. These bubbles get trapped within the batter's structure, causing it to rise beautifully in the oven’s heat. We also add baking powder, which is a “double-acting” leavener. It gives a little boost when it gets wet and another, more powerful one when it heats up, providing a bit of insurance for a light, airy crumb.
Next is the crucial element of texture. Cornbread should be tender, not tough. The enemy of tenderness is gluten, a protein network that forms when flour is mixed with liquid. While essential for chewy breads, too much gluten makes cornbread dense and rubbery. Cornmeal itself is gluten-free, but the all-purpose flour in our recipe is not. This is why the instruction to “mix only until just combined” is paramount. A few lumps are your friends! They are a sign that you haven’t overworked the batter, keeping the gluten development to a minimum and ensuring a delicate, melt-in-your-mouth result.
Finally, the star of the show: that incredible crust. This is achieved through the Maillard reaction, a beautiful process that occurs when sugars and proteins are exposed to high heat. By preheating your cast-iron skillet with fat, you create an intensely hot surface. When you pour the cool batter into the pan, the immediate, sizzling contact jump-starts the Maillard reaction on the bottom and sides of the cornbread. This reaction creates hundreds of new aromatic compounds and deep browning, resulting in that unmistakably crisp, flavorful, and golden crust that makes skillet cornbread so special.
Essential Tools and Ingredients for Cornbread
While this skillet cornbread recipe is built on pantry staples, the quality of your ingredients and the choice of your tools can elevate the final product from simply good to absolutely unforgettable. Think of these as your building blocks for success.
The most important tool in our arsenal is, without a doubt, a well-seasoned 9- or 10-inch cast-iron skillet. Its ability to retain and distribute heat evenly is unmatched, and it's the true secret to achieving that signature crispy crust. If you don't have one, don't worry! You can still make a delicious cornbread. An oven-safe stainless steel skillet, a 9-inch round metal cake pan, or even a glass pie dish can work. Just be aware that the crust may not be quite as deeply browned or crisp, as these materials don't hold heat in the same way. For a glass dish, you may need to lower the oven temperature by about 25°F (15°C).
When it comes to ingredients, let’s start with the heart of the dish: the cornmeal. I prefer a medium-grind yellow cornmeal for a classic texture that’s neither too fine nor too gritty. Stone-ground varieties offer a more rustic texture and deeper corn flavor. The most important thing is freshness; cornmeal contains natural oils that can go rancid, so store it in an airtight container in a cool, dark place, or even in the freezer to prolong its life.
Buttermilk is our next non-negotiable. Its tangy flavor beautifully complements the sweetness of the corn, and its acidity is vital for activating the baking soda to create a light, tender crumb. If you're in a pinch, you can make a substitute by adding a tablespoon of lemon juice or white vinegar to regular milk and letting it sit for 10 minutes. However, the thickness and cultured flavor of real buttermilk truly yield the best results. For the rest of our foundation, we rely on all-purpose flour for structure, eggs for binding and richness (be sure they are at room temperature!), and both melted butter and a neutral oil. The butter provides that classic, rich flavor, while the oil contributes to a wonderfully moist crumb that stays tender for days.
The Method: Crafting Skillet Cornbread, Step by Step
The process of making skillet cornbread is a beautiful sensory experience. It’s about more than just combining ingredients; it’s about observing the changes, listening for cues, and anticipating the delicious result. Let’s walk through the journey together, from a quiet kitchen to a golden, fragrant loaf.
Our first stage is all about preparation and anticipation. We begin by awakening the oven, setting it to a high heat of 425°F (220°C). Inside, we place our cast-iron skillet with a generous pat of butter or a slick of oil. This preheating step is the most critical part of the entire process. We are essentially turning the skillet into its own mini-oven, ensuring every surface that touches the batter is searingly hot from the moment they meet. This is how the legendary crust is born.
While the oven and skillet are heating, we turn our attention to the components. In a large bowl, we create our dry foundation. Whisk together the cornmeal, all-purpose flour, a touch of sugar for balance, baking powder, baking soda, and salt. Whisking is important here; it's not just about mixing, it's about evenly distributing the leavening agents so that every single bite of the finished cornbread rises evenly and beautifully. In a separate, medium bowl, we create our liquid heart. Whisk the room-temperature buttermilk and eggs until they are smooth and unified, then slowly stream in the melted butter and oil, whisking constantly to create a rich, emulsified mixture.
Now comes the moment of union. Pour the wet ingredients into the dry. Using a spatula, fold the two together with gentle, deliberate strokes. This is where restraint is your greatest asset. Mix only until the streaks of flour have just disappeared. The batter should look imperfect—a bit lumpy, a little rustic, and decidedly not smooth. This is the visual cue that you’ve successfully avoided over-mixing, preserving the future tenderness of your cornbread.
Carefully remove the blazing hot skillet from the oven. The fat inside should be shimmering. Pour the batter directly into the center of the hot skillet. You should be rewarded with an immediate, satisfying sizzle. This is the sound of your crust beginning to form, a promise of the crisp, golden edges to come. Spread the batter evenly and place the skillet back into the hot oven to bake. After about 20-25 minutes, the cornbread will be gloriously golden, puffed in the center, and its edges will have just begun to pull away from the sides of the skillet. A wooden skewer inserted into the center should come out clean. Let it rest in the skillet for a few minutes before slicing and serving warm. This brief rest allows the crumb to set, making for cleaner slices and a perfect texture.
Troubleshooting Your Cornbread
Even with the most straightforward recipes, things can sometimes go slightly off track. But the wonderful thing about baking is that every attempt is a learning experience. Most common cornbread issues are easily diagnosed and even more easily prevented next time. Let's break down a few common problems so you can bake with complete confidence.
The Problem: My cornbread is dry and overly crumbly. This is perhaps the most common cornbread complaint. The likely culprits are usually over-baking or an imbalance in the wet-to-dry ingredients. An oven that runs hot can bake the cornbread much faster than the recipe states, drying it out before you know it. Similarly, scooping flour directly from the bag can compact it, meaning you add more flour than intended. For next time, consider checking your oven's accuracy with an oven thermometer. Always spoon your flour into the measuring cup and level it off. And begin checking for doneness about 5 minutes before the recipe suggests; you want a clean skewer, but you don't want to leave it in a moment longer than necessary.
The Problem: My cornbread is dense, gummy, or tough. If your cornbread has a texture closer to a rubber ball than a tender bread, the cause is almost certainly over-mixing. When you stirred the wet and dry ingredients together, you likely developed too much gluten in the all-purpose flour. Remember, a lumpy batter is a good batter! Next time, mix with a light hand and stop as soon as the last streak of flour disappears. Another potential cause is an oven that wasn't fully preheated, which doesn't allow the leaveners to work their magic quickly enough.
The Problem: The crust wasn't crispy. A soft, pale crust is a clear sign that your skillet wasn't hot enough when the batter went in. The sizzle is not optional! It's the entire secret to that delightful crunch. Make sure your skillet preheats in the oven for at least 10 minutes and that the fat inside is shimmering hot before you pour in the batter. Do not skip this step!
The Problem: It stuck to the pan! There's nothing more frustrating than baking a beautiful loaf only to have half of it remain in the pan. This usually happens for one of two reasons: your cast-iron skillet is not well-seasoned, or you didn't use enough fat in the preheating stage. A well-seasoned skillet has a natural non-stick coating. If your pan is new or needs re-seasoning, give it some care. And always be generous with the butter or oil you heat in the pan; it should coat the bottom and sides completely.
Taking Your Cornbread to the Next Level
Once you’ve mastered the classic skillet cornbread, you have a perfect canvas for creativity. This recipe is wonderfully adaptable and serves as a fantastic base for a world of flavor variations. Think of the original recipe as the foundational melody; now, let’s add some harmony.
For a savory, aromatic twist that feels right at home in my Mediterranean kitchen, try folding in a cup of shredded sharp cheddar cheese and a handful of finely chopped scallions or chives into the batter. For a bit of warmth, a few finely chopped jalapeños (with seeds removed for less heat) can add a lovely, gentle spice that plays beautifully against the sweet corn.
You can also introduce flavor through herbs and spices. A tablespoon of fresh, chopped rosemary or thyme can lend an elegant, woodsy note. Or, for a true Levantine-inspired touch, try sprinkling the top of the batter with a generous dusting of za’atar just before it goes into the oven. The toasted sesame seeds, tangy sumac, and earthy herbs create a fragrant crust that is absolutely irresistible.
Don’t forget about what you serve alongside your cornbread. While a simple pat of butter is classic, imagine a warm slice served with a generous dollop of thick, tangy labneh and a drizzle of golden honey. The coolness of the labneh against the warm, tender bread is a divine contrast. This beautiful skillet cornbread is also the perfect companion for hearty stews, bean dishes, or a vibrant shakshuka, ready to sop up every last drop of delicious sauce.
Storing and Reheating Your Cornbread
While skillet cornbread is undeniably at its peak perfection when served warm from the oven, with its crust at maximum crispiness, proper storage can ensure it remains a delicious treat for days to come. The key is to protect it from drying out.
Once the cornbread has cooled completely to room temperature, you can store it right in the skillet. Simply cover the skillet tightly with aluminum foil or a reusable wrap. It will keep well on the countertop for up to two days. If you prefer, you can remove the cornbread from the skillet, slice it into individual portions, and store them in an airtight container. Storing it pre-sliced makes it easy to grab a piece whenever you like.
For longer storage, cornbread freezes beautifully. Wrap individual slices tightly in plastic wrap, then place them in a zip-top freezer bag or airtight container. They will keep well in the freezer for up to three months. This is a wonderful way to have a comforting snack ready at a moment's notice.
When it comes to reheating, avoid the microwave if you can. It tends to make the bread tough and steams away the crispy crust we worked so hard to create. The best method is to use your oven or a toaster oven. Simply warm the slices on a baking sheet at 350°F (175°C) for about 5-10 minutes, or until warmed through. This gentle heat will revive the crumb and help re-crisp the edges, bringing it back to life beautifully.
Common Questions About Making Cornbread
Can I make this recipe without a cast-iron skillet?
Absolutely! While cast iron gives the best crust, you can certainly use other oven-safe pans. A 9-inch round cake pan or a pie plate will work well. Just be sure to grease it thoroughly. The crust will be softer and more cake-like, but the interior crumb will still be wonderfully tender and delicious.
How can I make a dairy-free version of this cornbread?
You can easily adapt this recipe. For the buttermilk, use a plant-based milk like almond or soy and add one tablespoon of lemon juice or apple cider vinegar. Let it sit for 10 minutes to curdle. For the fat, replace the butter with a high-quality vegan butter substitute or use all olive oil for a lovely, fruity flavor profile.
My cornbread didn't rise properly. What went wrong?
This is usually due to an issue with the leavening agents. Your baking powder or baking soda might be expired, as they lose their potency over time. Always check the dates! Another culprit could be over-mixing the batter, which can deflate the air bubbles you want to create. Mix gently and only until the ingredients are just combined.
Can I make the batter ahead of time?
Unfortunately, this is not recommended. The chemical reaction between the buttermilk and baking soda begins the moment they are mixed. If you let the batter sit for too long before baking, the leavening agents will lose their power, and you'll end up with a flat, dense cornbread. It's best to mix the batter right before you're ready to bake.
Is this cornbread supposed to be sweet or savory?
This recipe strikes a lovely balance right in the middle, which is my personal preference. It has just enough sugar to enhance the natural sweetness of the corn without tasting like a dessert cake. This makes it versatile enough to be enjoyed with butter and honey or as a savory side dish for a hearty meal. You can adjust the sugar slightly to your own taste if you prefer it more savory or a bit sweeter.
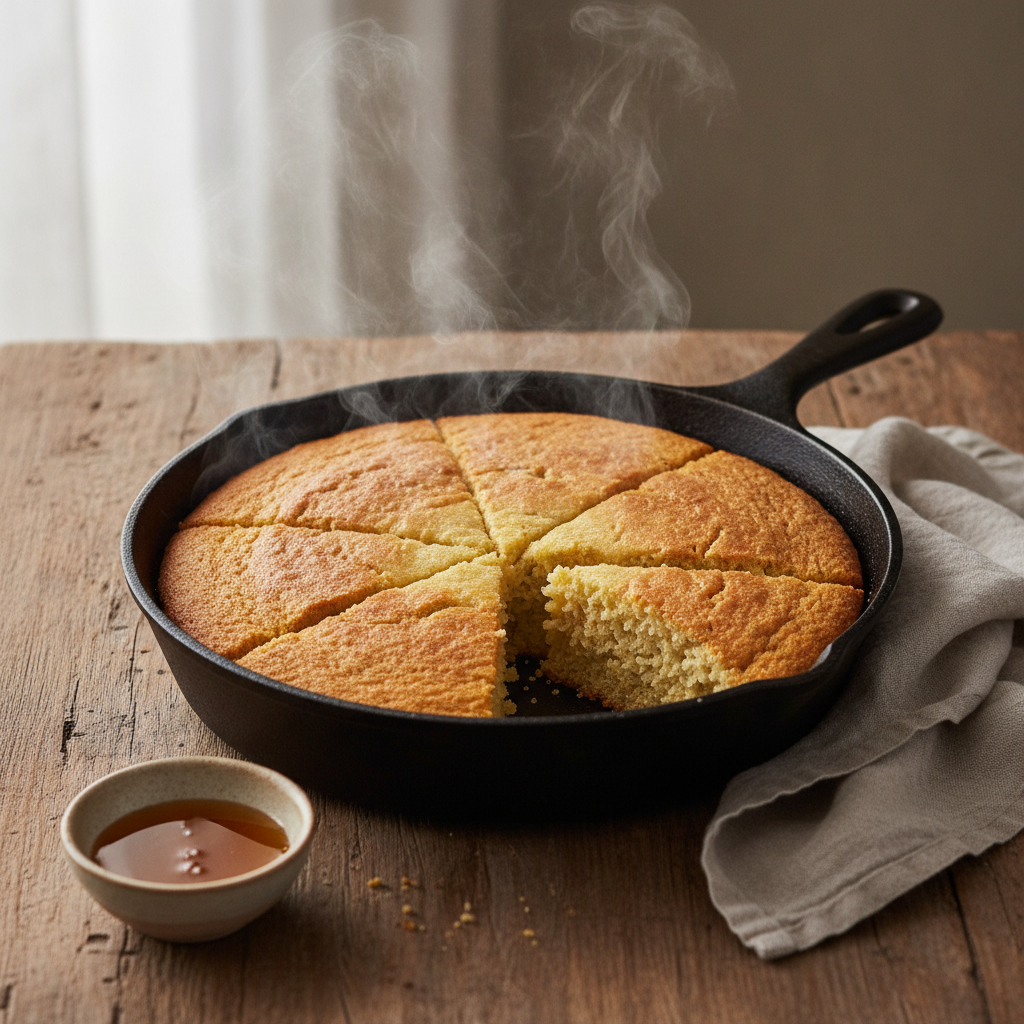
Classic Skillet Cornbread
A simple yet delicious recipe for skillet cornbread with a perfectly crispy, golden-brown crust and a tender, moist crumb. Easy to make and a perfect side for any meal.
Prep Time
15 min
Cook Time
25 min
Total Time
40 min
Servings
8 servings
Ingredients
For 8 servings
- 2 tablespoons unsalted butter or neutral oil, for the skillet
- 1 1/4 cups medium-grind yellow cornmeal
- 1 cup all-purpose flour, spooned and leveled
- 1/4 cup granulated sugar
- 2 teaspoons baking powder
- 1/2 teaspoon baking soda
- 1 teaspoon fine sea salt
- 1 1/3 cups buttermilk, at room temperature
- 2 large eggs, at room temperature, lightly beaten
- 6 tablespoons unsalted butter, melted and slightly cooled
Instructions
- 1
Preheat Oven and Skillet
Place a 9- or 10-inch cast-iron skillet on the middle rack of your oven. Preheat the oven with the skillet inside to 425°F (220°C). This step is crucial for a crispy crust.
- 2
Whisk Dry Ingredients
In a large mixing bowl, add the cornmeal, all-purpose flour, sugar, baking powder, baking soda, and salt. Whisk everything together for about 30 seconds to ensure the leavening agents are evenly distributed.
- 3
Combine Wet Ingredients
In a separate medium bowl, add the room-temperature buttermilk and the lightly beaten eggs. Whisk until they are smooth and fully combined. Slowly stream in the melted butter while whisking continuously to emulsify.
- 4
Merge Wet and Dry
Pour the wet buttermilk mixture into the bowl with the dry ingredients. Using a rubber spatula, gently fold the ingredients together until just combined. Do not over-mix; a few lumps in the batter are perfectly fine and desirable for a tender crumb.
- 5
Heat the Skillet Fat
Carefully remove the hot skillet from the oven using oven mitts. Add the 2 tablespoons of butter or oil to the skillet. Swirl the pan to ensure the fat coats the entire bottom and creeps up the sides.
- 6
Pour and Sizzle
Immediately pour the cornbread batter into the hot, greased skillet. It should sizzle upon contact. Use your spatula to quickly and gently spread the batter into an even layer.
- 7
Bake Until Golden
Return the skillet to the oven and bake for 20-25 minutes. The cornbread is done when it's golden brown, the center is firm to the touch, and a wooden skewer or toothpick inserted into the center comes out clean.
- 8
Cool and Serve
Remove the cornbread from the oven and let it cool in the skillet on a wire rack for 10-15 minutes. This allows the crumb to set, making it easier to slice. Cut into wedges and serve warm with butter or honey.
Nutrition Facts
Per serving (estimated)
285 calories
Calories
38g
Carbs
7g
Protein
12g
Fat
2g
Fiber
550mg
Sodium
9g
Sugar