
Classic Pineapple Upside Down Cake Recipe (Easy!)
My classic pineapple upside down cake recipe features a buttery brown sugar topping and a tender, moist crumb. Get perfect results every time with my tips!
cookwithyara.com/recipes/pineapple-upside-down-cake-recipe
There is a special kind of kitchen magic that happens when sugar and butter meet heat. It’s a transformation that speaks to the heart of baking—simple ingredients creating something truly extraordinary. That magic is the soul of this classic pineapple upside down cake recipe. It’s a dessert that feels both nostalgic and timeless, with its glistening, jewel-like topping of caramelized pineapple and ruby-red cherries giving way to a wonderfully tender, vanilla-scented cake. The moment of the “flip,” when you invert the cake to reveal the beautiful pattern, is a moment of pure culinary triumph.
Many bakers, especially those new to the craft, feel a little intimidated by this cake. The idea of the topping sticking, the cake being too dry, or the flip going wrong can be daunting. I am here to assure you that these fears will melt away once you understand the process. My goal is to not just give you a list of instructions, but to explain the why behind each step. When you understand how caramelization works, why room temperature ingredients are key, and what the batter should feel like, the how becomes second nature. This isn't just about baking a cake; it's about building your confidence and intuition in the kitchen. Mastering this pineapple upside down cake recipe will unlock a new level of baking for you, I promise.

The Science Behind the Method
To truly master this pineapple upside down cake recipe, it helps to understand the beautiful science at play. It’s not complex chemistry, but rather a series of simple reactions that create the textures and flavors we love. The star of the show is, of course, the topping, which is a perfect example of caramelization. When we melt butter and brown sugar, the heat breaks down the sucrose molecules into fructose and glucose. As they continue to heat, these simpler sugars begin to brown and develop hundreds of new aromatic compounds, resulting in that deep, amber color and complex, slightly nutty flavor that is so much more than just sweetness. This is what makes the topping so irresistible.
Beneath that glorious topping, we are creating a delicate crumb through the power of leavening and emulsification. Baking powder is our leavening agent here. It’s a mix of an acid and a base that, when moistened and heated, reacts to create tiny bubbles of carbon dioxide gas. These bubbles get trapped within the batter’s structure, causing the cake to rise and creating a light, airy texture. That structure is built through emulsification. By creaming the butter and sugar together, we are not just mixing them; we are whipping tiny air pockets into the fat. When we add the eggs, their lecithin content helps to bind the fats and water-based ingredients (like milk) into a stable, smooth batter. The final piece of the puzzle is gluten development. We mix the flour just until combined to keep the gluten strands short and tender, which is the secret to a melt-in-your-mouth cake rather than a tough, chewy one. Understanding these principles makes you a more intuitive and successful baker.
Tools and Ingredients You'll Need
One of the joys of a pineapple upside down cake recipe is its reliance on simple, accessible pantry staples. However, the quality of your ingredients and the right tools will elevate your final result from good to truly spectacular. Let’s start with the pan. The traditional choice is a 10-inch well-seasoned cast-iron skillet. Its ability to retain and distribute heat evenly is unparalleled, creating a perfectly uniform caramel topping. If you don’t have one, don't worry! A 9-inch round cake pan with sides that are at least 2 inches high is a fantastic substitute. Just be sure it’s a solid, light-colored metal pan, as dark pans can cause the edges to cook too quickly.
For your topping, you’ll need unsalted butter, which allows you to control the salt content, and light brown sugar for a classic, honey-toned caramel. Canned pineapple rings packed in 100% juice are your best friend here; avoid those in heavy syrup, which can make the topping too sweet and watery. Pat them very dry before using. For the cherries, seek out halal-certified maraschino cherries that are free from artificial colors if you can. As a lovely alternative, a fresh cranberry or a few raspberries placed in the center of each ring offers a beautiful color and a tart counterpoint. For the cake itself, all-purpose flour provides the right structure, while granulated sugar adds sweetness. Ensure your baking powder is fresh by testing a little in hot water—it should fizz vigorously. Room temperature large eggs, whole milk (or buttermilk for extra tang and tenderness), and pure vanilla extract are essential for a moist and flavorful crumb. A touch of neutral oil in addition to the butter guarantees a cake that stays soft for days.
The Method, Step by Step
Let's walk through the creation of this stunning pineapple upside down cake, focusing on the sensory cues at each stage. This isn't just about following a recipe; it's about engaging with the process and understanding how the ingredients transform.
First, we prepare our canvas. Begin by preheating your oven to 350°F (175°C) and placing a rack in the center. If you're using a cast-iron skillet, you can create the topping directly within it. For a standard cake pan, you'll melt the butter in a separate small saucepan. The goal is to melt 1/2 cup of unsalted butter and combine it with 1 cup of packed light brown sugar, stirring until it's a smooth, bubbling, semi-liquid slurry. Pour this into your pan and spread it evenly across the bottom. This is the foundation of your cake’s beautiful crown.
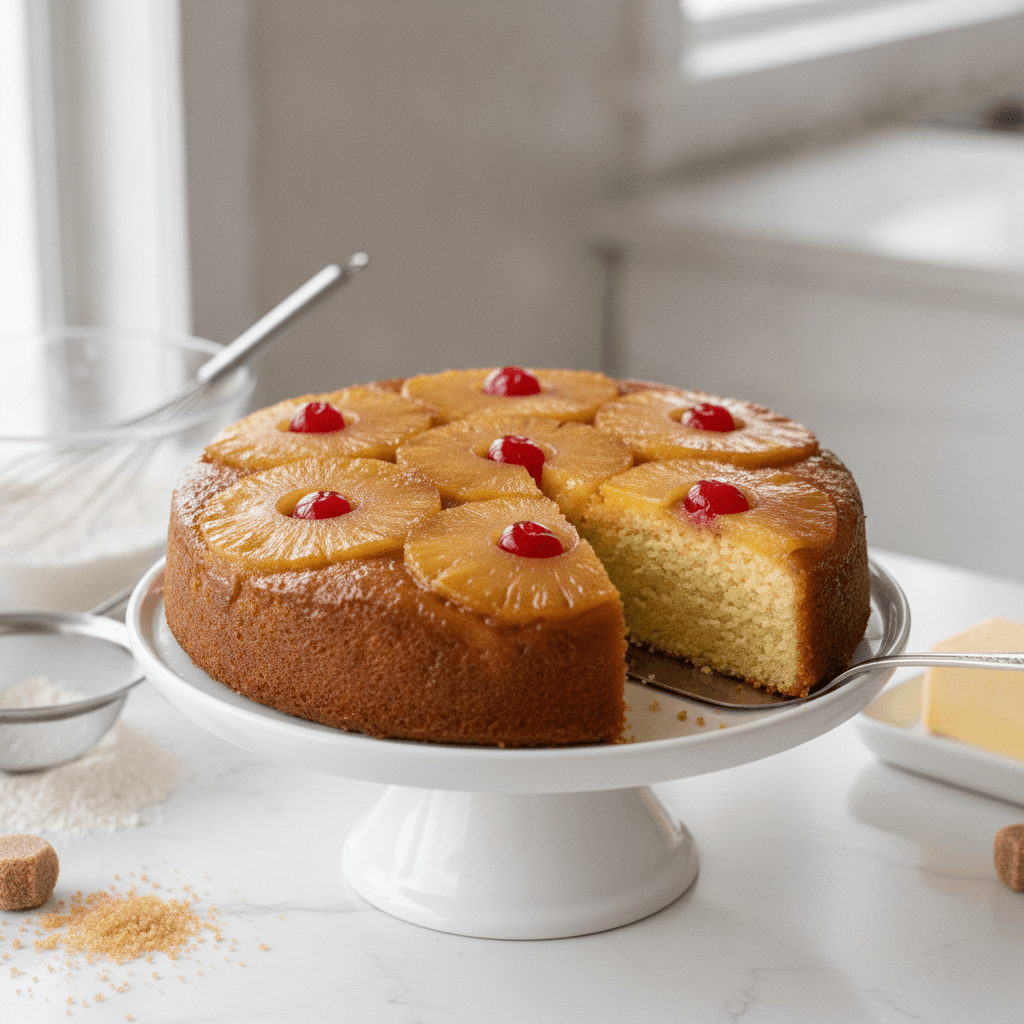
Next comes the artistry. Carefully arrange your well-drained pineapple rings over the sugar mixture. You can fit about 7 rings snugly in a 9-inch pan—one in the center and six surrounding it. Place a cherry in the center of each ring and, if you like, in the gaps between them. This is your chance to create the iconic pattern. Now, set this aside and turn your attention to the cake batter. In a medium bowl, whisk together your dry ingredients: flour, baking powder, and a pinch of salt. This simple step aerates the flour and ensures the leavening is evenly distributed.
In a larger bowl, using a hand mixer or stand mixer, we begin the creaming process. Beat the softened butter and granulated sugar on medium-high speed for a full 3-4 minutes. The mixture should transform in color and texture, becoming pale, light, and fluffy. This step is crucial, as it whips air into the batter, which is key to a tender crumb. Scrape down the bowl, then add the eggs one at a time, beating well after each addition until fully incorporated. Follow this with the vanilla extract. Your mixture should look smooth and emulsified.
Now, we combine everything gently. Add one-third of the dry ingredients to the wet ingredients, mixing on low speed just until combined. Pour in half of the milk, mixing again. Repeat with another third of the flour, the rest of the milk, and finally the last of the flour. The golden rule here is to not overmix. A few streaks of flour are perfectly fine. Over-mixing develops gluten and will make your beautiful pineapple upside down cake tough. Gently pour this luscious batter over the fruit in the pan, using a spatula to spread it evenly all the way to the edges. Bake for 35-45 minutes, or until a wooden skewer inserted into the center of the cake comes out clean. The cake will be golden brown and pulling away slightly from the sides of the pan. Let it cool on a wire rack for exactly 10 minutes—no more, no less—before the final, triumphant flip.
Troubleshooting Guide
Even the most carefully followed pineapple upside down cake recipe can sometimes present a challenge. But don't worry, nearly every issue is fixable or a valuable lesson for next time. Let's break down some common problems.
If your topping gets stuck to the bottom of the pan... This is the most common fear! It usually happens for one of two reasons: you let the cake cool for too long in the pan (more than 15 minutes), allowing the caramel to solidify and act like glue, or the pan wasn't sufficiently greased by the butter and sugar mixture. To fix it, you can try placing the pan back on a very low-heat burner for 30-60 seconds to gently re-melt the sugar, which should release the cake. Next time, be sure to flip after the crucial 10-minute rest.
If your cake turns out dry... A dry cake is often the result of over-baking or measuring flour incorrectly. Ovens can run hot, so an oven thermometer is a baker's best friend. Start checking for doneness a few minutes before the recipe suggests. Also, be sure to spoon your flour into the measuring cup and level it off, rather than scooping directly from the bag, which can compact the flour and lead to using too much.
If the cake is dense and heavy... This typically points to either an under-creamed butter and sugar mixture or an over-mixed batter. Don't rush the creaming step; those 3-4 minutes of whipping air into the fat are essential for a light texture. When adding the flour and milk, mix only until the ingredients are just barely combined. A tender touch is the secret to a tender crumb for any pineapple upside down cake recipe.
If the caramel topping seems watery or runny... The culprit here is usually excess moisture from the pineapple. Canned pineapple packed in heavy syrup can contribute to this, as can failing to pat the pineapple rings thoroughly dry with a paper towel before arranging them in the pan. Releasing that excess water prevents the sugar from caramelizing properly, leading to a soggier top.
Taking It to the Next Level
Once you've mastered the classic pineapple upside down cake recipe, there are so many wonderful ways to add your own creative signature. Think of the original recipe as a perfect canvas waiting for your personal touch. One of my favorite techniques is to brown the butter for the topping. By melting the butter and cooking it until the milk solids toast and turn a nutty brown, you introduce an incredible depth and complexity of flavor that beautifully complements the sweet pineapple.
Don’t be afraid to play with spices. A pinch of ground cardamom or cinnamon whisked into the dry ingredients for the cake batter adds a warm, aromatic layer that feels incredibly cozy. You could even place a star anise in the center of the pan while making the caramel, removing it before pouring the batter, to infuse the topping with a subtle, sophisticated scent. A bit of fresh citrus zest, like orange or lime, folded into the cake batter at the end can also brighten all the flavors immensely.
While pineapple is classic, this cake is a fantastic way to celebrate seasonal fruits. In the summer, try it with sliced peaches or plums. In the fall, thinly sliced apples or pears, arranged in a fanned-out pattern, create a stunning and delicious variation. Finally, for a touch of texture, consider sprinkling a handful of chopped pecans or walnuts over the butter and sugar mixture before you arrange the fruit. Their toasted crunch provides a delightful contrast to the soft fruit and tender cake.
Storing Your Results
Properly storing your beautifully baked pineapple upside down cake is key to enjoying it for a few days after it’s made. Because of the high moisture content in the fruit topping, this is one cake that benefits from refrigeration after the first day. For the first 24 hours, the cake is perfectly fine left at room temperature. The best way to store it is under a glass cake dome or in a dedicated cake keeper. This protects it from dust and air without trapping too much moisture, which could make the top weepy.
If you don't have a cake dome, you can cover it loosely with foil or place a large, overturned bowl over it on a plate. Try to avoid using plastic wrap pressed directly against the surface, as the sticky, caramelized topping will cling to it and ruin your beautiful presentation when you remove it. After the first day, transfer the cake to the refrigerator, where it will keep well for another 2 to 3 days. The cake will become firmer when chilled, so I recommend letting a slice sit at room temperature for about 20-30 minutes before serving. Alternatively, a quick 15-20 seconds in the microwave will restore its tender, moist texture and bring back that wonderful just-baked warmth.
Common Questions
Can I use fresh pineapple for this recipe?
Yes, you absolutely can use fresh pineapple, and it can be delicious! However, it requires a bit more prep. You'll need to peel, core, and slice the pineapple into even rings, about 1/4-inch thick. The key benefit of using canned pineapple is the uniformity in size and moisture content, which leads to very consistent results, making it a great choice for this particular pineapple upside down cake recipe.
Do I have to use a cast iron skillet?
A cast iron skillet is the traditional and, in my opinion, best vessel for its even heating, but it is by no means a requirement. A standard 9-inch round cake pan with sides that are at least 2 inches tall will work beautifully. If using a regular cake pan, you'll prepare the caramel topping in a small saucepan first, then pour it into the pan before arranging the fruit.
How can I make this pineapple upside down cake ahead of time?
The cake is truly at its best the day it is baked. However, you can do some prep in advance. You can prepare the topping and arrange the fruit in the bottom of the pan a few hours ahead; just cover and keep it at room temperature. The cake batter should be mixed and baked right away for the best rise. The finished cake also stores well for a day at room temperature or a few days in the fridge.
My cake seems a bit greasy. What happened?
A greasy texture can sometimes happen if the butter was too soft or melted when you started the creaming process, causing it to separate rather than emulsify. It can also happen if the eggs were added too quickly. Ensure your butter is softened but still cool to the touch, and add your room-temperature eggs one by one, allowing each to fully incorporate before adding the next.
Can I use a different size pan?
You can, but you'll need to adjust the recipe quantities and baking time. For a 9x13-inch rectangular pan, you would typically increase the recipe by 50% (multiply all ingredients by 1.5). The baking time may be similar or slightly longer, so you’ll need to watch it closely and rely on the skewer test for doneness.
Classic Pineapple Upside Down Cake
A truly classic dessert, this pineapple upside down cake recipe features a perfectly caramelized brown sugar and pineapple topping with a moist, tender vanilla cake crumb.
Prep Time
20 min
Cook Time
45 min
Total Time
1h 5m
Servings
8 servings
Ingredients
For 8 servings
- For the Topping:
- 1/2 cup (113g) unsalted butter
- 1 cup (220g) packed light brown sugar
- 1 can (20 ounces) pineapple rings in juice, drained well
- 8-10 halal-certified maraschino cherries
- For the Cake:
- 1 1/2 cups (190g) all-purpose flour
- 1 1/2 teaspoons baking powder
- 1/4 teaspoon salt
- 1/2 cup (113g) unsalted butter, softened to room temperature
- 3/4 cup (150g) granulated sugar
- 2 large eggs, at room temperature
- 1 teaspoon pure vanilla extract
- 1/2 cup whole milk, at room temperature
Instructions
- 1
Preheat and Prepare Pan
Preheat your oven to 350°F (175°C). Place an oven rack in the center position. You will need a 9-inch round cake pan or a 10-inch cast iron skillet.
- 2
Create the Caramel Topping
In a small saucepan over medium heat, melt 1/2 cup of unsalted butter. Stir in the 1 cup of brown sugar until smooth and slightly bubbly. Immediately pour the mixture into your ungreased cake pan or skillet and spread evenly to cover the bottom.
- 3
Arrange the Fruit
Drain the pineapple rings very well and pat them dry with paper towels to remove excess moisture. Arrange the pineapple rings in a single layer on top of the brown sugar mixture. Place one maraschino cherry in the center of each pineapple ring and in any gaps between them.
- 4
Combine Dry Ingredients
In a medium bowl, whisk together the 1 1/2 cups of all-purpose flour, 1 1/2 teaspoons of baking powder, and 1/4 teaspoon of salt. Whisking helps to aerate the flour and distribute the leavening agent evenly.
- 5
Cream Butter and Sugar
In a large bowl using a hand mixer or a stand mixer with the paddle attachment, beat the 1/2 cup of softened unsalted butter and 3/4 cup of granulated sugar on medium-high speed for 3-4 minutes, until the mixture is pale, light, and fluffy. Scrape down the sides of the bowl as needed.
- 6
Add Eggs and Vanilla
Add the 2 room-temperature eggs, one at a time, beating well after each addition until fully incorporated. Beat in the 1 teaspoon of vanilla extract. The mixture should be smooth and well-emulsified.
- 7
Alternate Dry and Wet Ingredients
With the mixer on low speed, add about one-third of the flour mixture to the butter mixture, followed by half of the milk. Repeat the process, ending with the last third of the flour mixture. Mix only until just combined; do not overmix.
- 8
Add Batter and Bake
Carefully spoon the batter over the fruit in the pan. Use an offset spatula to gently spread it into an even layer, making sure it reaches the edges of the pan. Bake for 35-45 minutes, or until the top is golden brown and a wooden skewer inserted into the center comes out clean.
- 9
Cool and Invert the Cake
Remove the cake from the oven and place it on a wire cooling rack. Let the cake cool in the pan for exactly 10 minutes. This allows it to set slightly but keeps the caramel liquid enough to release.
- 10
The Final Flip
Run a thin knife around the edge of the cake to loosen it. Place a large serving platter or cake stand upside down over the pan. Using oven mitts, confidently and quickly flip the pan and platter together. Lift the pan away carefully. If any fruit sticks, gently lift it off the pan and place it back on the cake. Let it cool slightly before serving.
Nutrition Facts
Per serving (estimated)
410 calories
Calories
60g
Carbs
4g
Protein
18g
Fat
1g
Fiber
250mg
Sodium
45g
Sugar


