

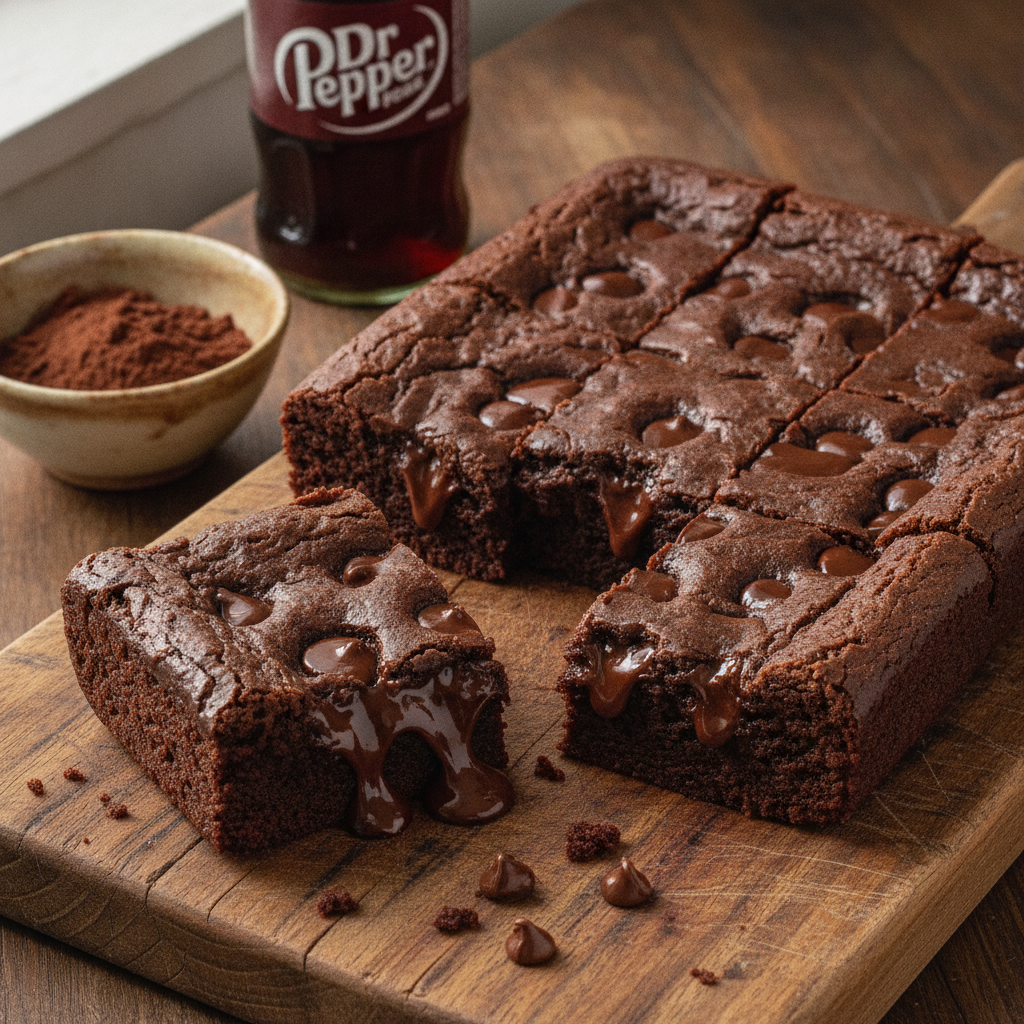
Fudgy Dr Pepper Brownies (Easy One-Bowl Recipe)
Discover the secret to ultra-fudgy Dr Pepper Brownies! This easy one-bowl recipe creates a rich, chewy dessert with a unique, delicious flavor.
cookwithyara.com/recipes/dr-pepper-brownies
There are days when the world seems to spin just a little too fast. Between work, family, and the endless list of to-dos, the thought of unwinding in the kitchen can feel less like a joy and more like another chore. Yet, it’s on these very days that we crave comfort the most—a moment of sweetness, a bite of something deeply satisfying that makes the hustle feel worthwhile. We need a recipe that understands our schedule, respects our energy levels, and delivers a spectacular reward with minimal effort. This is that recipe.
I want you to imagine a brownie so decadent and fudgy it melts the moment it touches your tongue. It boasts a beautifully crackly, paper-thin top that gives way to a dense, chewy, and intensely chocolatey interior, studded with glorious pockets of melted chocolate. But there's a secret, a subtle note of something special that makes you pause and wonder. That secret is Dr Pepper, and it transforms a classic treat into an unforgettable experience. These Dr Pepper Brownies are the perfect solution for a busy day, a sweet craving, or a last-minute gathering. I promise you, with just one bowl and less than an hour, you can go from a hectic kitchen to a moment of pure, chocolatey bliss.
Why This Is Your New Go-To Dessert
When a recipe finds its way into my regular rotation, it has to earn its spot. It needs to be reliable, delicious, and, most importantly, simple. These Dr Pepper Brownies check every single box and then some. They have become my go-to for a reason, and I know they'll become yours, too. Let's break down why this recipe is an absolute keeper, destined to be a treasured favorite for you and your loved ones.
A True One-Bowl Wonder. My philosophy in the kitchen is simple: cook more, clean less. This recipe is the embodiment of that goal. Everything comes together in a single saucepan or a large microwave-safe bowl. You’ll melt the butter, bloom the cocoa, and mix the entire batter without dirtying a stand mixer or a pile of bowls. The result is a faster cleanup, leaving you with more time to enjoy the warm, gooey fruits of your labor.
Unbelievably Fudgy and Chewy. Texture is everything in a brownie, and this recipe delivers perfection. The addition of Dr Pepper not only adds a unique flavor but also contributes liquid that creates an incredibly moist and dense crumb. We use just enough flour to hold it all together, ensuring the final product is the antithesis of a dry, cakey brownie. Each bite is a rich, fudgy experience that will satisfy even the most discerning chocolate lover.
A Surprising Twist on a Classic. While everyone loves a classic brownie, it's always fun to have a secret ingredient up your sleeve. The subtle notes of cherry, vanilla, and caramel from the Dr Pepper elevate the deep chocolate flavor, adding a layer of complexity that is intriguing and absolutely delicious. It’s not an overpowering soda taste; rather, it’s a background note that makes these Dr Pepper Brownies uniquely memorable.
Made with Simple Pantry Staples. There’s no need for a special trip to the store. This recipe relies on ingredients you likely already have in your kitchen: flour, sugar, eggs, butter, and cocoa powder. The star ingredient, Dr Pepper, is easy to find. It’s a recipe born of convenience, proving that you don't need fancy, expensive ingredients to create something truly spectacular and satisfying.
Ready in Under an Hour. From the moment the craving strikes to the second you pull a pan of glistening, aromatic brownies from the oven, less than an hour will have passed. The prep time is a mere 15 minutes, and the rest is hands-off baking time. It's the perfect recipe for those moments when you need a delicious dessert without a huge time commitment, making it ideal for weeknight treats or impromptu get-togethers.
Simple Ingredients, Big Flavor
The magic of a truly great recipe often lies in its simplicity. It's not about a long list of obscure ingredients but about how a few well-chosen staples can work together to create something extraordinary. The beauty of these Dr Pepper Brownies is rooted in this principle. Each component plays a crucial role in building the perfect balance of flavor and texture. Let’s take a closer look at the key players that make these brownies so special.
Dr Pepper: This is our star, the not-so-secret ingredient. We use regular, full-sugar Dr Pepper for this recipe. The sugars are essential for the final texture, and its unique blend of 23 flavors—with distinct notes of cherry, vanilla, and caramel—beautifully complements and deepens the chocolate. It also helps create that incredibly moist and fudgy crumb that sets this recipe apart.
Unsalted Butter: Butter is the foundation of richness in any good brownie. Using unsalted butter allows us to control the salt level precisely. When melted, it coats the flour and cocoa, ensuring a tender, never-tough texture. It’s all about that luxurious, melt-in-your-mouth feel, and good quality butter is key to achieving it.
Unsweetened Cocoa Powder: This provides the deep, robust chocolate backbone of our brownies. For the richest flavor and darkest color, I recommend using a Dutch-processed cocoa powder. The process it undergoes neutralizes its acidity, resulting in a smoother, less bitter chocolate taste that pairs wonderfully with the sweet notes of the soda.
Granulated & Powdered Sugar: We use two types of sugar here. Granulated sugar is creamed with the butter and melted chocolate to create that coveted crackly, meringue-like top. It’s not just for sweetness; it’s a structural powerhouse. Powdered sugar is used in the glossy glaze, dissolving instantly to create a smooth, pourable topping without any grittiness.
Large Eggs: Eggs are the essential binder that brings everything together. They provide structure, richness, and leavening. Using room temperature eggs is a small detail that makes a big difference, as they incorporate more easily into the batter, helping to create a uniform and stable emulsion for a perfectly chewy texture.
All-Purpose Flour: Flour provides the structure, but we use it sparingly. The goal is a fudgy brownie, not a chocolate cake. We add just enough to give the brownies body and prevent them from being a gooey puddle. The key is to not overwork the flour, which would develop gluten and lead to a tougher result.
Semi-Sweet Chocolate Chips: These are non-negotiable for a truly decadent brownie experience. As the brownies bake, the chips melt into little pockets of molten chocolate, ensuring a gooey, intensely chocolatey bite every single time. They add another layer of texture and flavor that takes these brownies over the top.
Alcohol-Free Vanilla: A baker’s best friend, vanilla enhances all the other flavors in the recipe. It makes the chocolate taste more chocolatey and complements the warm, spicy notes in the Dr Pepper. Be sure to use a high-quality, alcohol-free vanilla extract or vanilla bean paste for the purest flavor, keeping our recipe entirely halal and wholesome.
Step-by-Step in Plain English
Baking should feel like a creative, joyful process, not a complicated science experiment. I want to walk you through making these Dr Pepper Brownies as if I were right there in the kitchen with you. We’ll break it down into simple, manageable stages. Forget intimidating instructions; this is just a friendly chat about melting, mixing, and baking our way to perfection. Grab your favorite bowl, and let's begin.
Stage 1: The Foundation of Flavor. First things first, we preheat our oven and prepare our baking pan. This is a crucial first step—a hot oven ensures the brownies start baking immediately and evenly. We're going to line our pan with parchment paper, leaving a little overhang on the sides. This is our secret weapon for lifting the brownies out cleanly later on. No sticking, no broken corners, just perfect squares. In a saucepan over low heat, we'll gently melt our butter. Once it's liquid gold, we'll whisk in the cocoa powder. This step is called “blooming” the cocoa, and it’s a game-changer. The hot fat intensifies the cocoa’s flavor, unlocking deep, rich chocolate notes that will permeate the entire batter.
Stage 2: Building the Batter. Now, with our fragrant cocoa-butter mixture still warm, we'll stir in the granulated sugar and the Dr Pepper. The mixture will look glossy and dark. We’ll let this sit for just a few minutes to cool down slightly. We don't want to scramble our eggs! This brief pause is the perfect time to measure out your remaining ingredients. Once the mixture is just warm to the touch, we whisk in the eggs, one at a time, followed by the alcohol-free vanilla. Be sure to mix well after each egg; this is what helps build the structure for that incredible chewy texture and shiny top. The batter should look smooth and emulsified.
Stage 3: The Gentle Fold. This is where we exercise a little restraint. We’ll sprinkle the flour and salt over the wet ingredients. Using a spatula, not a whisk, we will gently fold everything together. We want to mix only until the last streaks of flour disappear. Over-mixing at this stage is the number one enemy of a fudgy brownie, as it develops gluten and results in a cakey texture. So, be gentle! Once the flour is just incorporated, we’ll fold in our glorious semi-sweet chocolate chips, distributing them evenly throughout the rich, thick batter.
Stage 4: The Bake and Glaze. Pour that beautiful, thick batter into your prepared pan and use your spatula to spread it evenly into the corners. Now, it's time for the oven. The brownies will bake for about 28-32 minutes. The visual cue you’re looking for is set edges and a center that is no longer wet but still has a slight wobble. A wooden skewer inserted in the center should come out with moist, fudgy crumbs attached, not wet batter. While the brownies are cooling, we'll whip up the simple glaze on the stovetop. It’s just a matter of melting butter with cocoa and Dr Pepper, then whisking in powdered sugar and vanilla until smooth. Pour this liquid shine over the still-warm brownies and let it set. The waiting is the hardest part, but I promise it's worth it for these amazing Dr Pepper Brownies.
Pro Shortcuts and Time-Savers
Even a simple recipe can be made quicker with a few clever tricks. When you need to get those delicious Dr Pepper Brownies from your mind to your mouth as fast as possible, these shortcuts are your best friend. They are all about working smarter, not harder, in the kitchen.
-
Prep Your Pan Perfectly: Before you even measure your first ingredient, get your 8x8 inch pan lined with parchment paper. Leaving a 2-inch overhang on two opposite sides creates “handles” that let you lift the entire slab of brownies out of the pan once they’re cool. This makes cutting them into neat squares incredibly fast and easy, with no need to struggle with a knife inside the pan.
-
Embrace the Microwave: To make this a true one-bowl recipe and save yourself from washing a saucepan, use a large, microwave-safe bowl. Melt the butter in the microwave, then whisk in the cocoa powder, sugar, and Dr Pepper right in the same bowl. Let it cool for a few minutes before proceeding with the eggs. It’s a simple switch that streamlines the process significantly.
-
Measure in Advance (Mise en Place): The French call it mise en place, or “everything in its place.” Before you start mixing, take 5 minutes to measure out all your ingredients into small bowls. This turns the active cooking process into a smooth, seamless flow of adding and mixing. No more frantically searching for the vanilla while your butter is getting too hot. It feels professional and, more importantly, it’s a huge stress-reducer.
-
The Quick Cool-Down: Waiting for brownies to cool before cutting is culinary torture, I know. To speed things up, let the pan cool on a wire rack at room temperature for about 20-30 minutes. Then, you can place the pan in the refrigerator for another 30 minutes. This firms them up enough to get clean, sharp cuts without having to wait for hours.
Ways to Switch It Up
One of the best things about a solid base recipe like these Dr Pepper Brownies is that it serves as a wonderful canvas for creativity. Once you've mastered the classic version, you can have fun experimenting with different flavors and textures. Here are a few of my favorite variations to inspire your next batch.
-
Spiced Chocolate Delight: Lean into the warm, spicy notes of the Dr Pepper by adding a teaspoon of ground cinnamon and a generous pinch of cayenne pepper to your dry ingredients. This creates a flavor profile reminiscent of Mexican hot chocolate, with a gentle warmth that blossoms at the end of each bite. It’s a sophisticated twist that is incredibly cozy and comforting.
-
The Nutty Professor: For those who love a bit of crunch, adding nuts is a classic move. Fold in about a cup of roughly chopped and toasted pecans or walnuts along with the chocolate chips. Toasting the nuts beforehand is a small step that makes a huge difference, awakening their oils and deepening their flavor, which provides a beautiful textural contrast to the soft, fudgy brownie.
-
Double Cherry Chocolate: Play up the distinct cherry undertones of the Dr Pepper by adding half a cup of dried tart cherries to the batter. The slight tartness of the cherries cuts through the richness of the chocolate beautifully, adding a delightful chewiness and a bright burst of flavor in every bite. It’s a truly elegant combination.
-
Salty & Sweet Perfection: If you're a fan of the irresistible combination of sweet and salty, sprinkle a pinch of flaky sea salt (like Maldon) over the top of the glaze before it sets. The crunchy salt crystals not only look beautiful but also enhance the deep chocolate flavor and provide a perfect counterpoint to the sweetness of the brownie and glaze.
-
Mocha Madness: Chocolate and coffee are a match made in heaven. Add one or two teaspoons of instant espresso powder to the saucepan along with the cocoa powder. The coffee won't make the brownies taste like coffee; instead, it will act as a flavor enhancer, making the chocolate taste even richer and more profound. It's a simple trick that adds incredible depth.
Storing Leftovers the Right Way
While a fresh batch of warm Dr Pepper Brownies might disappear in a flash, on the off chance you have leftovers, storing them properly is key to keeping them just as delicious as the day they were baked. In fact, many people (myself included!) believe that brownies are even better on day two, once the flavors have had a chance to meld and the texture becomes even fudgier.
On the Counter: If you plan on finishing the brownies within a couple of days, you can store them at room temperature. The best way is to keep them in the baking pan, covered tightly with foil or plastic wrap. This helps retain their moisture. However, I find they stay fudgier when refrigerated.
In the Refrigerator: For longer storage, up to a week, the refrigerator is your best bet. Place the cut brownie squares in an airtight container, separating any layers with a piece of parchment paper to prevent them from sticking together. The cold temperature will make them firmer and denser—in the best way possible! You can enjoy them cold, straight from the fridge, or let them sit at room temperature for about 15 minutes to soften up.
Freezing for Future Cravings: Brownies freeze exceptionally well, making them a perfect treat to have on hand for a sweet emergency. To freeze, wrap each individual square tightly in plastic wrap, and then place the wrapped squares into a larger freezer-safe bag or container. This double-wrapping method prevents freezer burn. They will keep beautifully in the freezer for up to 3 months. To enjoy, simply thaw a square at room temperature for an hour or give it a quick 15-20 second zap in the microwave for a warm, gooey treat.
Reheating Tips: To bring back that fresh-out-of-the-oven warmth, the microwave is the fastest option. For a single brownie, 15-20 seconds is usually perfect. If you want to warm up several, placing them on a baking sheet in a 325°F (160°C) oven for about 5-8 minutes will yield a wonderfully soft center and slightly crisped edges.
Quick Answers to Common Questions
Navigating a new recipe can sometimes bring up a few questions. To help you on your baking journey, I’ve gathered some of the most common queries about making these delicious Dr Pepper Brownies. My goal is to ensure you have a flawless and fun experience from start to finish.
Can I use Diet Dr Pepper or Dr Pepper Zero?
I strongly recommend using classic, full-sugar Dr Pepper for this recipe. The sugar content in the soda is crucial for both the flavor and the final texture of the brownies. It contributes to the moistness and the fudgy, chewy consistency. Using a diet version will result in a less sweet and potentially drier brownie.
Do I really need to use parchment paper?
You can make the brownies without it by generously greasing and flouring the pan, but I can't recommend the parchment paper sling enough. It guarantees that the brownies won't stick to the pan and allows you to lift the entire batch out at once for easy, clean cutting on a cutting board. It's a simple step that saves a lot of potential frustration.
My brownies came out more cakey than fudgy. What did I do wrong?
This is a common brownie dilemma! A cakey texture in this recipe is usually caused by one of two things: adding too much flour (make sure you spoon your flour into the measuring cup and level it off, don't scoop from the bag) or over-mixing the batter after adding the flour. Over-mixing develops gluten, which creates a more cake-like structure. Remember to fold the flour in gently, just until no dry streaks remain.
Can I double this Dr Pepper Brownies recipe?
Absolutely! This recipe doubles perfectly. Simply double all the ingredients and bake it in a 9x13 inch baking pan. You will need to increase the baking time, so start checking for doneness around the 35-minute mark and add more time as needed until a skewer comes out with moist crumbs.
How do I get that perfect, shiny crackly top?
The secret to a beautiful, tissue-paper-thin crackly top lies in the sugar and eggs. When you dissolve the sugar into the warm butter mixture and then vigorously whisk in the eggs, you're creating a meringue-like layer on top of the batter. As it bakes, this layer dries out and cracks, creating that signature brownie look. So, don't be shy when whisking in those eggs!
Fudgy Dr Pepper Brownies
A simple, one-bowl recipe for incredibly fudgy and chewy brownies with the unique flavor of Dr Pepper and a rich chocolate glaze.
Prep Time
15 min
Cook Time
35 min
Total Time
50 min
Servings
16 brownies
Ingredients
For 16 brownies
- 1/2 cup (113g) unsalted butter, cut into pieces
- 1 cup (200g) granulated sugar
- 1/2 cup Dr Pepper
- 3/4 cup (75g) unsweetened Dutch-processed cocoa powder
- 2 large eggs, at room temperature
- 1 teaspoon alcohol-free vanilla extract or paste
- 3/4 cup (90g) all-purpose flour
- 1/4 teaspoon salt
- 1 cup (170g) semi-sweet chocolate chips
- For the Glaze:
- 1/4 cup (57g) unsalted butter
- 2 tablespoons Dr Pepper
- 2 tablespoons unsweetened cocoa powder
- 1 cup (120g) powdered sugar, sifted
- 1/2 teaspoon alcohol-free vanilla extract or paste
Instructions
- 1
Preheat and Prep
Preheat your oven to 350°F (175°C). Line an 8x8 inch baking pan with parchment paper, leaving a 2-inch overhang on two opposite sides to create a 'sling' for easy removal.
- 2
Melt Butter and Bloom Cocoa
In a medium saucepan over low heat, melt the 1/2 cup of butter. Once fully melted, remove from heat and immediately whisk in the 3/4 cup of cocoa powder until smooth. This step 'blooms' the cocoa, deepening its flavor.
- 3
Add Sugar and Soda
Whisk the granulated sugar and 1/2 cup of Dr Pepper into the cocoa-butter mixture until well combined. The mixture will be glossy and slightly grainy. Let it cool for 5 minutes until it's just warm to the touch.
- 4
Incorporate Eggs and Vanilla
Whisk in the room temperature eggs one at a time, mixing vigorously for about 30 seconds after each addition until the batter is smooth and shiny. Stir in the 1 teaspoon of alcohol-free vanilla.
- 5
Fold in Dry Ingredients
Sprinkle the all-purpose flour and salt over the wet ingredients. Using a rubber spatula, gently fold them in until just combined. Be careful not to overmix; stop as soon as you no longer see streaks of flour.
- 6
Add Chocolate Chips
Gently fold in the semi-sweet chocolate chips, distributing them evenly throughout the batter.
- 7
Pour and Bake
Pour the brownie batter into your prepared pan and spread it into an even layer with your spatula. Bake for 28-32 minutes, or until the edges are set and a wooden skewer inserted into the center comes out with moist, fudgy crumbs attached, but no wet batter.
- 8
Cool Brownies Slightly
Remove the pan from the oven and place it on a wire rack to cool while you prepare the glaze. The brownies should still be warm when you add the glaze.
- 9
Prepare the Glaze
In the same saucepan (no need to wash it!), melt the 1/4 cup of butter over low heat. Whisk in the 2 tablespoons of cocoa powder and 2 tablespoons of Dr Pepper until smooth. Remove from heat.
- 10
Finish the Glaze
Add the sifted powdered sugar and 1/2 teaspoon of vanilla to the saucepan. Whisk vigorously until the glaze is completely smooth, glossy, and free of lumps.
- 11
Glaze and Set
Immediately pour the warm glaze over the warm brownies. Gently tilt the pan or use an offset spatula to spread the glaze evenly over the entire surface.
- 12
Cool, Cut, and Serve
Let the brownies cool completely in the pan for at least 2 hours, or until the glaze is set. For best results and cleanest cuts, chill in the refrigerator for 30 minutes before slicing. Use the parchment sling to lift the brownies out, cut into 16 squares, and serve.
Nutrition Facts
Per serving (estimated)
280 calories
Calories
38g
Carbs
3g
Protein
14g
Fat
2g
Fiber
95mg
Sodium
29g
Sugar


