Perfectly Easy Mini Cheesecakes (Creamy & Foolproof)
The ultimate recipe for Easy Mini Cheesecakes! Learn how to make these creamy, crack-proof individual desserts in a muffin tin. Perfect for any gathering.
cookwithyara.com/recipes/easy-mini-cheesecakes
There is a quiet, profound joy in a dessert that requires no sharing. No awkward slicing, no debates over who gets the bigger piece—just a perfect, personal portion of pure delight, made just for you. It’s an elegant solution to dessert, one that feels both generous and simple. This is the magic of these Easy Mini Cheesecakes. They are everything you love about the classic, decadent dessert—the buttery, crisp crust, the impossibly creamy and tangy filling—all captured in a charming, individual form. Forget the stress of water baths and the fear of a cracked surface; this recipe is designed for beautiful results every single time.
Imagine pulling a tray of these perfect little cheesecakes from your refrigerator. Each one is nestled in its paper liner, with a pale, smooth top just waiting for a dollop of fruit compote or a scattering of fresh berries. They look like they came from a high-end bakery, but you’ll know the secret: they were made with simple ingredients, in a standard muffin tin, with a method that is as forgiving as it is delicious. This is the recipe you’ll turn to for family dinners, for special celebrations, or for those quiet evenings when you simply need a truly wonderful treat. These Easy Mini Cheesecakes are more than just a dessert; they are a small moment of guaranteed happiness.
The Philosophy of Mini Desserts
There's a certain genius in miniaturizing classic desserts. While a grand, full-sized cheesecake has its place, the move to a smaller scale offers a host of advantages that I find irresistible, both as a baker and as someone who loves to share food. The philosophy behind mini desserts, especially these Easy Mini Cheesecakes, is rooted in simplicity, elegance, and control. Firstly, the baking process itself becomes significantly less intimidating. The smaller mass bakes much faster and more evenly, dramatically reducing the risk of the dreaded cracked center that plagues many full-sized versions. This quick bake time also means you spend less time anxiously peering through the oven door.
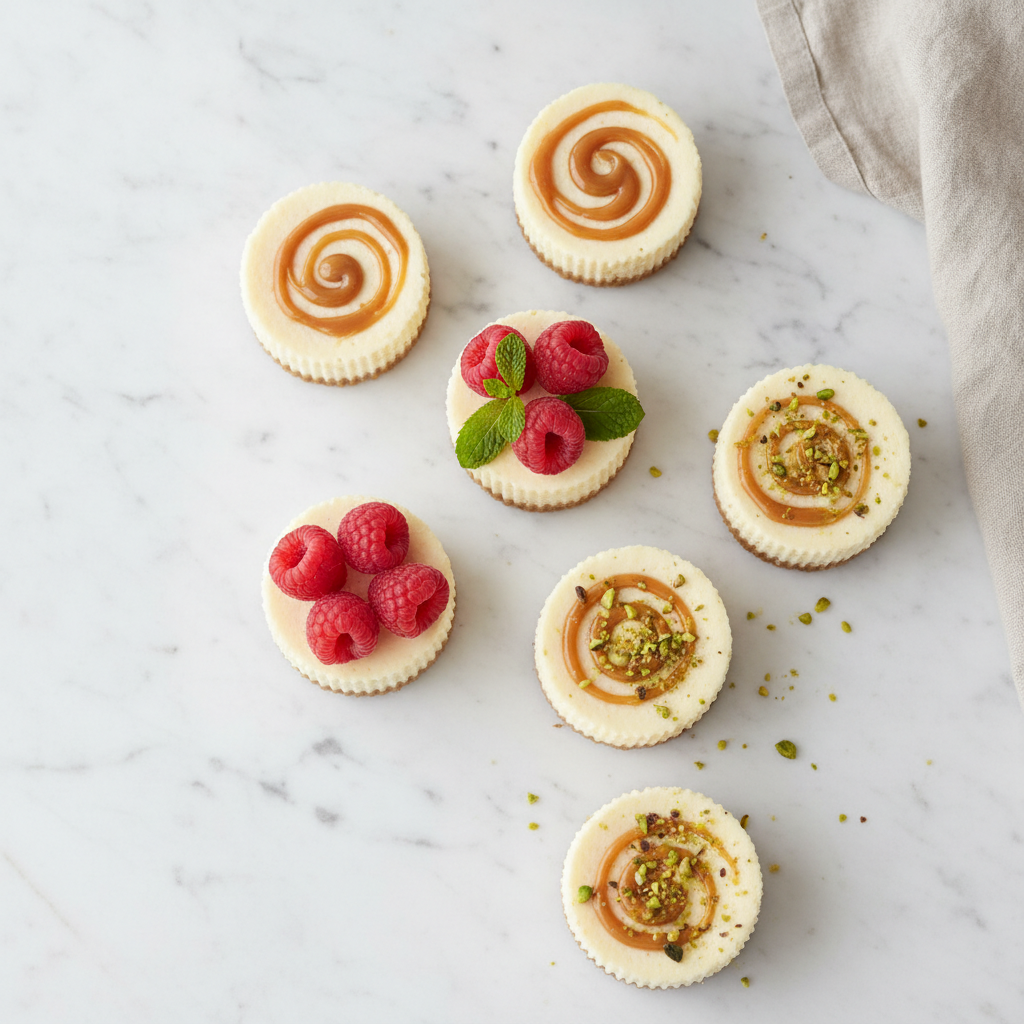
Beyond the practicalities of baking, mini desserts offer an unparalleled serving experience. They are inherently portion-controlled, which is a thoughtful touch for any gathering. Each guest receives their own complete, perfectly formed dessert, ensuring a consistent and beautiful presentation on every plate. There's no messy cutting involved, no crumbling crusts, just a simple peel of a liner. This individual format feels special and personal, a small gesture of hospitality that elevates any meal. It allows for creative topping variations, too—you can garnish one with berries, another with caramel, and a third with nuts, catering to everyone's tastes. Ultimately, mini desserts are about maximizing delight while minimizing fuss, and that’s a philosophy I can always get behind.
What Goes Into the Perfect Mini Cheesecake
Crafting the perfect dessert is like conducting a small orchestra; each ingredient must play its part beautifully for the final result to sing. For these Easy Mini Cheesecakes, the ingredient list is refreshingly simple, but the quality and preparation of each component are what elevate them from good to truly sublime. Let’s walk through the key players.
For the Crust: The foundation of any good cheesecake is its crust. We use classic graham crackers, pulsed into fine crumbs. They provide a honeyed, slightly spiced flavor that is the perfect counterpoint to the tangy filling. To bind these crumbs, we use melted unsalted butter, which crisps up beautifully in the oven. A tablespoon of granulated sugar adds a touch of sweetness and helps create that delightful snap. For a hint of Levantine warmth, I sometimes add a tiny pinch of ground cardamom or cinnamon to the crumbs—it’s a subtle touch that adds a layer of fragrant complexity.
For the Filling: This is where the magic happens. The star, of course, is full-fat, block-style cream cheese. This is non-negotiable. The kind sold in a tub is whipped and contains more water, which will result in a soupy, disappointing texture. Block cream cheese provides the dense, rich structure we’re looking for. It must, absolutely must, be at room temperature to ensure a lump-free filling. We sweeten it with granulated sugar and introduce two large eggs for richness and stability. The secret ingredient for that perfect tang and creamy mouthfeel is full-fat sour cream. You could also substitute thick, strained labneh, which offers a similar, if not more pronounced, tang that is simply divine. Finally, a splash of pure, alcohol-free vanilla extract and the finely grated zest of half a lemon cut through the richness and brighten all the other flavors without making the cheesecake taste overtly of lemon.
Assembling Your Easy Mini Cheesecakes
The process of bringing these Easy Mini Cheesecakes to life is a gentle, methodical one that rewards a little bit of care with spectacular results. It’s a rhythm of mixing, pressing, and pouring that is incredibly satisfying. Think of it less as a strict baking task and more as a calming kitchen ritual.
First, we build the foundation: the crust. After pulsing your graham crackers into fine, sandy crumbs, you’ll mix them with the sugar and melted butter. The goal is a texture that clumps together when you press it between your fingers, like damp sand. You’ll then divide this mixture among the paper liners in your muffin tin. The trick to a perfect crust is to press it down firmly and evenly. I love using the bottom of a small spice jar or a shot glass for this; it creates a compact, level base that won’t crumble when you bite into it. A quick trip to the oven sets the crust, creating a crisp platform for the creamy filling to come.
While the crusts bake and cool, you’ll turn your attention to the filling. The single most important step here is ensuring your block cream cheese is truly at room temperature. This is the secret to a silky-smooth batter. In a large bowl, you’ll beat the softened cream cheese with the sugar until it is completely, utterly smooth and creamy, with no lumps in sight. Scrape down the sides and bottom of the bowl often to make sure everything is incorporated. Only then should you add the eggs, one at a time, mixing on low speed just until the yellow yolk disappears into the batter. Over-mixing at this stage whips in too much air, which causes the cheesecakes to puff up dramatically in the oven and then sink and crack as they cool. Finally, you’ll gently fold in the sour cream (or labneh), vanilla, and lemon zest. The final batter will be thick, glossy, and luscious.
Using an ice cream scoop is the best way to portion the filling evenly over your prepared crusts, filling each liner about three-quarters of the way full. Then, they’re ready for their gentle bake in a moderate oven. Because of their small size, these Easy Mini Cheesecakes bake relatively quickly and don't require the fuss of a water bath, making them truly easy and approachable.
Secrets for Flawless Mini Cheesecakes
Baking cheesecake can feel like a high-stakes endeavor, but with a few key secrets in your back pocket, you can guarantee flawless, creamy, and crack-free results every time. These principles are especially effective for our Easy Mini Cheesecakes, ensuring a perfect outcome from the very first batch.
-
Embrace Room Temperature: I cannot overstate this. Every single one of your refrigerated filling ingredients—the cream cheese, the eggs, the sour cream—must be brought to room temperature before you begin. Cold cream cheese is the primary cause of lumpy batter. When it's cold, the fat within it remains hard and doesn't blend smoothly with the sugar. Take the time to let everything sit on the counter for at least an hour or two; this patience will be rewarded with the silkiest, smoothest filling imaginable.
-
Mix Low and Slow: The enemy of a perfect cheesecake surface is excess air. When you over-beat the batter, especially after adding the eggs, you incorporate air bubbles. In the heat of the oven, these bubbles expand, causing the cheesecake to puff up like a soufflé. As it cools, it inevitably deflates, contracts, and cracks. Always use a low speed on your mixer, and stop mixing as soon as each ingredient is incorporated. It's about combining, not whipping.
-
Don't Overbake—Look for the Wobble: One of the easiest mistakes to make is baking a cheesecake for too long. People look for a completely firm top, but by then, it's too late. The perfect visual cue for doneness is when the outer edges of the mini cheesecakes appear set and matte, but the very center (about the size of a small coin) still has a slight jiggle or wobble when you gently tap the side of the pan. The cheesecakes will continue to set from the residual heat as they cool.
-
Master the Gradual Cooldown: Cheesecakes are sensitive to sudden changes in temperature. Yanking them from a hot oven into cool room air is a recipe for cracking. Instead, practice a three-stage cooldown. First, turn off the oven and prop the door open with a wooden spoon, letting the cheesecakes cool inside the oven for one hour. Second, move them to a wire rack on the counter to cool completely to room temperature. Third, cover them and transfer them to the refrigerator to chill.
-
Patience is the Final Ingredient: The final secret is simply patience. A cheesecake is not ready to eat right after it cools. It needs a minimum of four hours in the refrigerator, but it is exponentially better if left to chill overnight. This extended chilling period allows the flavors to deepen and meld, and for the texture to set into that dense, luxurious creaminess that is the hallmark of a truly great cheesecake. Your Easy Mini Cheesecakes will thank you for the wait!
Rounding Out the Meal
While these Easy Mini Cheesecakes are a stunning dessert all on their own, how you present them can turn a simple treat into a memorable finale for a beautiful meal. Thinking about a simple accompaniment or topping adds a final layer of texture, flavor, and visual appeal.
A simple fruit topping is often the best companion. While the cheesecakes are chilling, you can whip up a quick berry compote by simmering fresh or frozen berries with a spoonful of sugar and a squeeze of lemon juice until thickened. A dollop of this warm or cool compote on top provides a beautiful color contrast and a tartness that cuts through the richness of the cheesecake perfectly.
For a touch of Levantine elegance, I adore pairing these with something fragrant. A simple syrup infused with rosewater or orange blossom water, drizzled over the top just before serving, is heavenly. Combine this with a scattering of bright green chopped pistachios for a bit of crunch and you have a dessert that feels both familiar and exotic. Another wonderful option is a spoonful of apricot or fig jam, warmed slightly to make it easy to spoon over the top. The deep, jammy fruit flavors are a classic pairing with creamy cheese. And of course, you can never go wrong with a simple dollop of freshly whipped cream and a few perfect, seasonal berries.
Leftovers and Next-Day Ideas
One of the many benefits of making these Easy Mini Cheesecakes is that they store beautifully, making them a fantastic make-ahead dessert. If you happen to have any leftovers, you can enjoy them for days to come, and they might even taste better on day two as the flavors continue to meld and mature.
To store your mini cheesecakes, place them in an airtight container and keep them in the refrigerator. This is important not only for food safety but also to prevent the delicate cheesecakes from absorbing any other odors from your fridge. They will keep perfectly like this for up to 5 days, though their freshness is best within the first 3 days. I recommend storing them plain, without any toppings, and adding those just before serving to keep everything looking and tasting its best.
These little treats are also incredibly freezer-friendly! To freeze, place the plain, fully-chilled cheesecakes on a baking sheet and pop them in the freezer until solid. Once frozen, you can transfer them to a freezer-safe bag or container, where they will keep for up to two months. When you’re ready for a treat, simply take one out and let it thaw in the refrigerator overnight. It’s a wonderful way to have a sophisticated, homemade dessert ready at a moment’s notice.
Answers to Your Questions
Why did my mini cheesecakes crack?
Cracking is usually caused by one of three things: over-mixing the batter (which incorporates too much air), an oven that is too hot, or cooling them too quickly. To prevent this, mix on low speed just until combined, verify your oven temperature with an oven thermometer, and always follow the gradual cooling process—in the turned-off oven, then on the counter, then in the fridge.
How do I know when they are perfectly baked?
The key is the “wobble test.” The edges of the cheesecakes should look set and have a matte finish, but the very center should still have a slight jiggle to it when you gently nudge the pan. They will finish setting up from residual heat as they cool. If there's no wobble at all, they are likely slightly overbaked but will still be delicious!
Can I make this recipe using low-fat cream cheese?
I strongly advise against it. Full-fat, block-style cream cheese is essential for the structure and creamy, rich texture of a classic cheesecake. Low-fat or reduced-fat versions have a higher water content and stabilizers that can result in a grainy, watery, and less flavorful dessert. It's a treat worth indulging in with the proper ingredients.
Do I really need to wait for the ingredients to get to room temperature?
Yes, absolutely! This is probably the most crucial step for a smooth, lump-free filling. Cold cream cheese doesn't blend properly with sugar and will leave you with small, unappealing lumps in your batter, no matter how much you mix. A little patience at the beginning makes all the difference.
What are some other ideas for the crust?
While graham crackers are classic, you can get creative! Try using finely crushed digestive biscuits, Biscoff cookies for a caramelized spice flavor, or chocolate wafer cookies for a darker, richer base. For a gluten-free option, a mix of finely ground almonds or pecans with a little melted butter and sugar makes a wonderful and nutty crust for these easy mini cheesecakes.
Easy Mini Cheesecakes
A simple, foolproof recipe for creamy individual cheesecakes made in a standard muffin tin. This recipe guarantees smooth, crack-proof results without a water bath.
Prep Time
20 min
Cook Time
22 min
Total Time
42 min
Servings
12 mini cheesecakes
Ingredients
For 12 mini cheesecakes
- 1 ½ cups (150g) graham cracker crumbs
- 2 tablespoons (25g) granulated sugar
- 6 tablespoons (85g) unsalted butter, melted
- 2 (8-ounce) packages (450g total) full-fat block cream cheese, at room temperature
- ¾ cup (150g) granulated sugar
- 2 large eggs, at room temperature
- ½ cup (120g) full-fat sour cream, at room temperature
- 1 teaspoon pure alcohol-free vanilla extract
- 1 teaspoon finely grated lemon zest
Instructions
- 1
Preheat and Prep Pan
Preheat your oven to 325°F (165°C). Line a standard 12-cup muffin tin with paper liners. Set aside.
- 2
Make the Graham Cracker Crust
In a medium bowl, combine the graham cracker crumbs and 2 tablespoons of granulated sugar. Pour in the melted butter and mix with a fork until all the crumbs are evenly moistened and the texture resembles wet sand.
- 3
Press and Bake Crust
Distribute about 1 ½ tablespoons of the crumb mixture into each paper liner. Use the bottom of a small glass or a spice jar to press the crumbs down into a firm, even layer. Bake for 5-7 minutes, until fragrant and lightly set. Let the pan cool on a wire rack while you prepare the filling.
- 4
Beat Cream Cheese and Sugar
In a large bowl using a handheld or stand mixer fitted with the paddle attachment, beat the room temperature cream cheese on medium-low speed until completely smooth and creamy, about 2 minutes. Add the ¾ cup of granulated sugar and beat until smooth, scraping down the sides and bottom of the bowl to ensure there are no lumps.
- 5
Incorporate Eggs Gently
Add the room temperature eggs one at a time, mixing on low speed just until the yolk disappears into the batter after each addition. Do not over-mix, as this can incorporate too much air and cause cracking.
- 6
Add Final Flavorings
Add the sour cream, vanilla extract, and lemon zest to the bowl. Mix on low speed just until everything is blended and the batter is smooth and uniform. Scrape the bowl one last time.
- 7
Fill and Bake
Divide the cheesecake batter evenly among the 12 muffin cups, filling each one about three-quarters full. An ice cream scoop works perfectly for this. Bake for 18-22 minutes, or until the edges are set and the centers have a very slight wobble when you gently shake the pan.
- 8
Begin the Cooling Process
Turn the oven off completely. Prop the oven door open with a wooden spoon and leave the cheesecakes inside to cool slowly for 1 hour. This gradual temperature change is key to preventing cracks.
- 9
Cool to Room Temperature
After an hour in the cooling oven, carefully remove the muffin tin and place it on a wire rack. Let the mini cheesecakes cool completely to room temperature on the counter.
- 10
Chill Thoroughly
Once at room temperature, cover the pan loosely with plastic wrap and transfer to the refrigerator. Chill for at least 4 hours, or preferably overnight, to allow the cheesecakes to set fully and the flavors to develop.
- 11
Serve and Garnish
When ready to serve, carefully remove the mini cheesecakes from the muffin tin. Serve them chilled, either plain or with your favorite toppings like fresh berries, fruit compote, or a drizzle of caramel.
Nutrition Facts
Per serving (estimated)
345 calories
Calories
26g
Carbs
5g
Protein
25g
Fat
1g
Fiber
210mg
Sodium
20g
Sugar