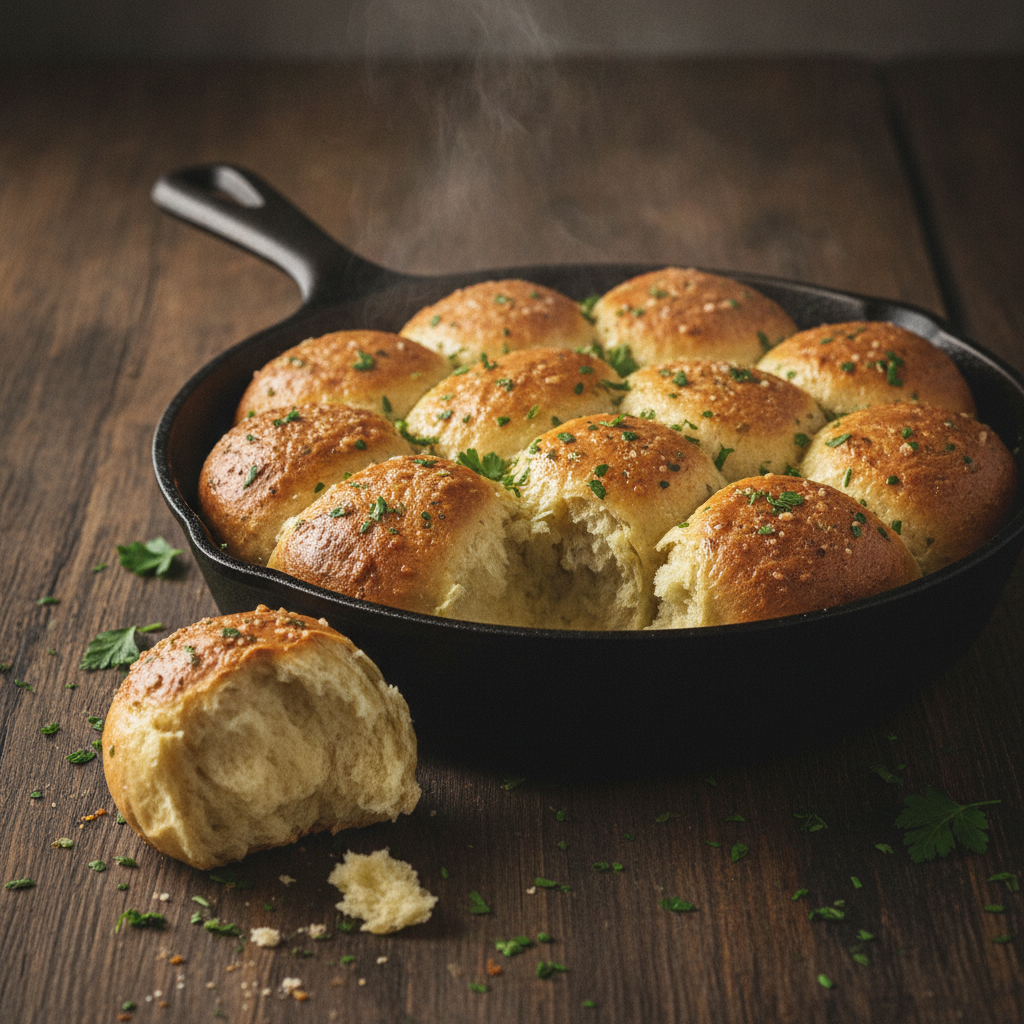
Garlic Butter Bread Rolls (Easy Meal Prep Recipe)
Learn to make fluffy Garlic Butter Bread Rolls! This foolproof recipe is perfect for meal prep, with tips for batch cooking, storage, and reheating.
cookwithyara.com/recipes/garlic-butter-bread-rolls
There's a quiet magic that happens on a Sunday afternoon, a gentle hum in the kitchen that promises a week of ease and deliciousness. For me, that magic often smells like yeast, garlic, and butter. It's the aroma of taking control of the week ahead, of transforming a little bit of effort into days of culinary comfort. We all know the feeling of a busy weekday evening, when the thought of cooking from scratch feels like a monumental task. That’s where the beauty of meal prep shines, and where this recipe for Garlic Butter Bread Rolls becomes your greatest ally. Forget the daily scramble; imagine instead reaching for a perfectly soft, fragrant roll, ready to elevate a simple soup or round out a quick salad into a truly satisfying meal. This isn't just about saving time; it's about reclaiming your evenings and ensuring that even on the most hectic days, you can gather around a meal that feels special and nourishing. This recipe is designed from the ground up to be your weekly bread solution. One focused baking session is all it takes to stock your kitchen with a treasure trove of these golden, fluffy rolls, each one a little promise of a delicious moment to come. Let’s get our hands in some dough and set ourselves up for a week of wonderful meals.
Why This Recipe Is Perfect for Meal Prep
Not all baked goods are created equal when it comes to making them ahead of time. Some recipes lose their charm within hours, becoming stale or soggy. But these Garlic Butter Bread Rolls are a meal prepper’s dream, and the reasons are baked right into their very structure and flavor. First and foremost, the dough is incredibly resilient. It’s enriched with butter and milk, which gives the finished rolls a soft, tender crumb that stays beautifully moist for days. Unlike lean, crusty breads that are best eaten fresh, these rolls have the richness to withstand storage without turning tough or dry. The texture is key; they are sturdy enough to hold up but remain pillowy and light upon reheating. Secondly, the flavor profile is designed to improve over time. The garlic butter, infused with fresh parsley, doesn't just sit on top; its savory, aromatic notes slowly permeate the bread. That initial wonderful garlic punch mellows and deepens by day two, creating an even more complex and integrated flavor. What you bake on Sunday tastes even more incredible by Tuesday. Furthermore, these rolls are the epitome of versatility. A plain dinner roll is lovely, but a garlic butter roll is an event. It has enough personality to stand on its own but is also a team player, complementing a vast array of dishes from hearty stews to light, brothy soups and every kind of roast in between. This means you can bake one large batch and use them in completely different culinary contexts throughout the week, warding off any sense of meal-prep monotony. They are a nutritionally sound addition too, providing satisfying carbohydrates that make any meal feel more complete and comforting, keeping you fueled and happy all week long.
What You'll Need
Crafting the perfect batch of Garlic Butter Bread Rolls for the week starts with a few simple, high-quality ingredients. Let’s walk through the pantry staples you’ll need, with a special focus on making them work for a large-batch, meal-prep mindset. The foundation of any great bread is the flour. I recommend using bread flour for this recipe, as its higher protein content develops stronger gluten, resulting in a chewier, loftier roll. However, all-purpose flour will also yield a wonderfully soft and delicious result, so use what you have. For meal preppers, buying flour in larger bags is always more economical. Next is our leavening agent: active dry yeast. It’s what gives the rolls their incredible airy texture. I suggest buying yeast in a jar rather than individual packets, as it’s more cost-effective for frequent baking and stores well in the refrigerator. We'll also need a touch of granulated sugar, not just for a hint of sweetness to balance the garlic, but primarily as food for the yeast to help it activate and thrive. For the liquid, whole milk is my preference for its fat content, which contributes to a tender, rich crumb. Warm water works too, but the milk adds that extra layer of softness. Now for the star of the show: the garlic butter. Use unsalted butter so you can control the salt level perfectly. And please, use fresh garlic! The flavor of freshly minced garlic is bright, pungent, and infinitely better than the pre-minced jarred variety. A whole head of garlic will be your best friend here. For herbs, fresh parsley adds a vibrant, clean flavor and a beautiful splash of color. While you can use dried parsley, the fresh version truly elevates the final product. For storage, I swear by glass containers with airtight lids. They don't stain or retain odors, and you can often reheat the rolls directly in the oven-safe base. If you're short on space, large, heavy-duty resealable bags are also a fantastic option. Just be sure to press all the air out before sealing to maintain freshness.
The Batch Cooking Method
The beauty of batch cooking these Garlic Butter Bread Rolls is in the rhythm and flow of the process. It’s a series of simple steps that, when done efficiently, result in a large, rewarding yield. The key is to organize your time and tasks, turning your kitchen into a smooth-running bakery for an hour or two. I always start with the dough, as it requires unattended rising time that we can use for other prep. Begin by proofing the yeast in warm milk with a pinch of sugar. Seeing that foam bloom on the surface is your green light that the yeast is active and ready to work its magic. While it proofs, you can measure out your flour, salt, and remaining sugar into a large mixing bowl or the bowl of your stand mixer. Once the yeast is ready, combine all the dough ingredients. Kneading is the next crucial step. Whether you do it by hand on a floured surface or with a dough hook, you're looking for the dough to transform from a shaggy mess into a smooth, elastic ball. This develops the gluten structure, which is essential for that classic soft, chewy texture. The first rise is your 'passive time' gift. Place the dough in a lightly oiled bowl, cover it, and let it double in size in a warm spot. This usually takes about an hour to 90 minutes. This is the perfect window to prepare the garlic butter. Mince your fresh garlic, chop the parsley, and melt the butter, letting the flavors meld together while the dough rises. Once risen, you’ll punch down the dough and divide it into equal portions. I recommend using a kitchen scale for uniform rolls that bake evenly. Shape each piece into a tight ball and arrange them in your baking dish. The second, shorter rise gives them their final puffiness before baking. The assembly-line approach to shaping makes this step quick and easy. Finally, they go into a hot oven to bake until golden brown. The moment they come out, you’ll brush them generously with that fragrant garlic butter. The sizzle and aroma are your immediate reward. This whole process, from mixing to baking, has about 45 minutes of active time, with the rest being hands-off rising time—a perfect, productive rhythm for a Sunday afternoon of meal prep.
The Weekly Game Plan
Having a batch of homemade Garlic Butter Bread Rolls ready to go is like having a culinary secret weapon for the week. The key to enjoying them without getting bored is to have a simple game plan. Think of the rolls as a delicious, versatile base that you can pair and adapt to fit different meals. Let’s map out a potential week. Your baking day is Sunday. You’ve made a dozen beautiful rolls, and they’re cooled and stored. Tonight, you enjoy one or two fresh from the oven with a hearty lentil soup—a perfect, comforting start to the week. On Monday, you can pack one for lunch. It’s a fantastic sidekick to a big, crisp salad with grilled chicken. The roll makes the salad feel less like a light lunch and more like a substantial, satisfying meal. For dinner, it’s perfect for sopping up the sauce from a simple chicken and vegetable stir-fry. Tuesday might be a pasta night. Instead of making separate garlic bread, you have these rolls ready. Gently warm a couple in the oven until the crust is slightly crisp and the inside is steamy soft. They are the ideal companion for a rich tomato-based sauce. By Wednesday, you can get a bit more creative. Slice a roll in half horizontally, toast it lightly, and use it as a base for a mini sandwich. Think shredded leftover roast chicken with a bit of mayo and herbs, or even a simple slice of cheese melted on top. It’s a quick, delicious, and satisfying lunch. On Thursday, if you have a creamy vegetable stew or a beef pot roast simmering, these Garlic Butter Bread Rolls are non-negotiable. Their soft texture is perfect for soaking up every last drop of flavorful gravy. By adding fresh elements like different soups, salads, and main courses each day, the rolls never feel repetitive. They become the constant, comforting thread that ties your weekly meals together with ease and flavor.
Smart Storage and Reheating
Proper storage and reheating are the twin pillars that uphold the promise of meal prep. Getting this right ensures your Garlic butter Bread Rolls taste nearly as good on Thursday as they did on Sunday. The first rule of storage is to let the rolls cool completely to room temperature before packing them away. Storing them while still warm will create condensation, leading to sogginess and spoilage. Once cool, you have a few excellent options. My top recommendation is a large, airtight glass container. Glass is non-porous, so it won’t absorb any of the garlic aroma, and it provides a sturdy, crush-proof home for your rolls. If you’re tight on space, a zip-top plastic bag works well too; just be sure to gently squeeze out as much air as possible before sealing it. For the first 2-3 days, these rolls can be stored at room temperature in a cool, dark place like a bread box or pantry. For longer storage, up to a week, the refrigerator is your best bet. The cool temperature will slow the staling process. If you’ve made a super-sized batch, the freezer is a fantastic long-term option. To freeze, arrange the cooled rolls on a baking sheet in a single layer and freeze until solid. Then, transfer them to a freezer-safe bag. They’ll keep beautifully for up to three months. When it’s time to enjoy them, you have several reheating methods. The microwave is the fastest: wrap a roll in a slightly damp paper towel and heat for 20-30 seconds. This creates steam and results in a super soft, pillowy roll. For a crispier exterior, the oven or a toaster oven is ideal. Place the rolls on a baking sheet and warm them at 350°F (175°C) for 5-8 minutes. They will emerge with a delightful crust and a warm, fluffy interior. My personal favorite trick? Brush them with a tiny bit of extra melted butter before reheating in the oven. It refreshes the exterior and makes them taste like they were just baked. This simple step makes your meal-prepped Garlic Butter Bread Rolls taste exceptionally fresh every single time.
Customization Ideas
While this classic Garlic Butter Bread Rolls recipe is a star in its own right, it also serves as a wonderful canvas for your culinary creativity. Once you've mastered the basic technique, you can easily tweak and customize it to suit your tastes or what you have on hand. It's a great way to keep your meal prep exciting. One of the easiest and most rewarding variations is adding cheese. Imagine folding half a cup of shredded mozzarella or a sharp cheddar into the dough during the final stages of kneading. Or, for a cheesier top, sprinkle grated Parmesan over the rolls along with the garlic butter just before baking. The cheese melts into golden, savory pockets and creates an irresistibly crisp crust. Herb variations offer another simple way to customize. While parsley is classic, try swapping it for finely chopped fresh rosemary for a more robust, woodsy flavor that pairs beautifully with roasted meats. A combination of thyme and oregano can lend a distinctly Mediterranean feel to the rolls. You could even add a pinch of red pepper flakes to your garlic butter for a gentle, warming heat. For a different texture and nutritional profile, experiment with the flour. Replace up to half of the bread flour with whole wheat flour for a heartier, nuttier-tasting roll with added fiber. Just be aware that you might need to add a touch more liquid, as whole wheat flour is more absorbent. Another fantastic idea is to incorporate toppings. Before the final rise, brush the shaped rolls with a little milk and sprinkle them with sesame seeds, poppy seeds, or even everything bagel seasoning for an extra layer of flavor and crunch. These simple additions can completely transform the character of your Garlic Butter Bread Rolls, ensuring that your weekly batch always feels fresh and new.
Meal Prep FAQ
How long do these Garlic Butter Bread Rolls really last?
When stored properly in an airtight container, they will stay fresh and soft at room temperature for up to 3 days. If you store them in the refrigerator, their life extends to about 5-7 days. For any longer, the freezer is the best option, where they can last for up to 3 months without a loss in quality.
What are the absolute best containers for storage?
For preventing crushing and maintaining freshness, a large, airtight glass or BPA-free plastic container is ideal. If using bags, I recommend double-bagging or using thick, freezer-grade resealable bags to protect them from air and freezer burn. The key is to minimize air exposure as much as possible.
Can I freeze the dough to bake later?
Absolutely! You can freeze the dough after the first rise. Punch it down, shape it into rolls, and place them on a baking sheet to freeze individually. Once solid, transfer them to a freezer bag. When you're ready to bake, place them in your baking dish, cover, and let them thaw and rise at room temperature for a few hours before baking as directed.
How can I best reheat them at the office?
The microwave is your best friend at work. Wrap a roll in a damp paper towel to trap steam and prevent it from drying out. Microwave on high for about 20-30 seconds, and you’ll have a warm, soft roll that feels incredibly fresh. It's a simple trick that makes a huge difference for a midday meal.
How do I stop my meal-prepped rolls from getting soggy?
The number one cause of sogginess is trapping steam. Always, always let your Garlic Butter Bread Rolls cool completely to room temperature on a wire rack before you even think about storing them. This allows all the internal steam to escape, ensuring the crust and crumb stay perfectly textured.
Can I make these with a plant-based milk and butter?
Yes, this recipe is very adaptable. You can easily substitute the whole milk with an unsweetened plant-based milk like almond or soy milk. Similarly, a high-quality plant-based butter substitute will work beautifully in both the dough and the garlic butter topping. The results will be just as delicious and satisfying.
Garlic Butter Bread Rolls
Fluffy, soft, and savory homemade bread rolls brushed with a fragrant garlic and herb butter. Perfect for making ahead.
Prep Time
2h 5m
Cook Time
20 min
Total Time
2h 25m
Servings
12 rolls
Ingredients
For 12 rolls
- 1 cup warm whole milk (about 110°F / 43°C)
- 2 1/4 teaspoons active dry yeast (1 standard packet)
- 2 tablespoons granulated sugar, divided
- 3 1/2 cups bread flour (or all-purpose flour), plus more for dusting
- 1 teaspoon salt
- 1 large egg, at room temperature
- 1/4 cup unsalted butter, melted and cooled
- For the Garlic Butter Topping:
- 1/2 cup unsalted butter, melted
- 4-5 cloves garlic, minced
- 1/4 cup fresh parsley, finely chopped
- 1/4 teaspoon salt
Instructions
- 1
Activate the Yeast
In a small bowl or the bowl of a stand mixer, combine the warm milk, yeast, and 1 tablespoon of sugar. Stir gently and let it sit for 5-10 minutes until the mixture becomes foamy and frothy. This indicates the yeast is active.
- 2
Mix the Dough Ingredients
To the yeast mixture, add the remaining 1 tablespoon of sugar, the egg, and the melted butter. Whisk to combine. In a separate large bowl, whisk together the bread flour and 1 teaspoon of salt.
- 3
Form the Dough
Gradually add the dry ingredients to the wet ingredients, mixing with a dough hook on low speed or with a wooden spoon until a shaggy dough forms. If mixing by hand, turn the dough out onto a lightly floured surface.
- 4
Knead the Dough
Knead the dough for 8-10 minutes by hand or 6-8 minutes with a stand mixer on medium speed. The dough should become smooth, elastic, and slightly tacky. Form it into a smooth ball.
- 5
First Rise
Place the dough ball into a large, lightly oiled bowl, turning it once to coat. Cover the bowl with a clean kitchen towel or plastic wrap and place it in a warm, draft-free spot to rise for 1 to 1.5 hours, or until doubled in size.
- 6
Shape the Rolls
Gently punch down the risen dough to release the air. Transfer it to a lightly floured surface and divide it into 12 equal pieces. Roll each piece into a smooth, tight ball and arrange them in a greased 9x13 inch baking dish.
- 7
Second Rise
Cover the baking dish loosely with plastic wrap or a kitchen towel. Let the rolls rise again in a warm place for 30-45 minutes, until they are puffy and have risen noticeably.
- 8
Preheat and Prepare Topping
While the rolls are on their second rise, preheat your oven to 375°F (190°C). In a small bowl, combine all the ingredients for the garlic butter topping: 1/2 cup melted butter, minced garlic, chopped parsley, and 1/4 teaspoon salt. Stir well.
- 9
First Butter Brush and Bake
Once the rolls have risen, gently brush about half of the garlic butter mixture over the tops. Bake for 18-22 minutes, or until the tops are beautifully golden brown and an instant-read thermometer inserted into the center of a roll registers 190°F (88°C).
- 10
Final Butter Brush
As soon as the rolls come out of the oven, immediately brush them generously with the remaining garlic butter mixture. This final brush adds a fresh burst of flavor and a beautiful sheen.
- 11
Cool and Serve
Let the rolls cool in the pan for a few minutes before serving warm. For meal prep, allow them to cool completely in the pan before transferring them to an airtight container for storage.
Nutrition Facts
Per serving (estimated)
245 calories
Calories
28g
Carbs
6g
Protein
12g
Fat
1g
Fiber
280mg
Sodium
3g
Sugar