

Easy Peach Crisp Recipe (Perfect for Meal Prep!)
Discover how to make the best peach crisp! This recipe features juicy peaches and a crunchy oat topping, perfect for making ahead for a week of treats.
cookwithyara.com/recipes/peach-crisp
There’s a quiet magic that happens on a Sunday afternoon, a gentle shift in the rhythm of the week. For me, it’s a time for grounding, for setting intentions, and for stocking my kitchen with goodness for the days ahead. The idea of meal prep often conjures images of neatly packed salads and portioned grains—practical, yes, but not always inspiring. What if we brought that same thoughtful preparation to the sweeter moments of our week? Imagine coming home after a long day, knowing that a warm, comforting, homemade dessert is just minutes away, with none of the usual fuss or mess. That is the promise of this beautiful make-ahead peach crisp.
So often, the desire for a special treat is overshadowed by the effort it requires. The thought of peeling fruit, mixing toppings, and waiting for something to bake can feel like too much on a busy weeknight. This is where the beauty of batch cooking comes in. By dedicating just a little bit of time during a quieter moment, you gift your future self moments of ease and delight. This isn't about rigid planning; it's about creating pockets of comfort that are ready when you need them most. This peach crisp recipe is designed for exactly that—one baking session for a whole week of sweet, satisfying moments. It’s a simple act of kindness to yourself, ensuring that even on the most hectic of days, a touch of homemade warmth is always within reach.
Why This Recipe Is Perfect for Meal Prep
Not all desserts are created equal when it comes to making them ahead of time. Some lose their texture, others their flavor. But a peach crisp is uniquely suited for preparation in advance, and in many ways, it actually gets better with a little time. The secret lies in its two distinct components: the luscious, jammy fruit filling and the crunchy, golden oat topping. When they rest together in the refrigerator, the flavors have a chance to meld and deepen in the most wonderful way.
The peach filling, baked with warm spices like cinnamon and a hint of nutmeg, becomes even more intensely flavorful overnight. The juices from the peaches release and mingle with the brown sugar and spices, creating a rich, syrupy sauce that soaks slightly into the bottom layer of the topping, making it incredibly tender. It’s a transformation that can only happen with time, turning a simple fruit dessert into something truly special. The starches in the filling also set as they cool, which means your portioned servings will hold their shape beautifully instead of being too runny.
Meanwhile, the topping is robust enough to handle storage. Made with rolled oats, flour, and butter, it's designed for crunch. While it will soften slightly as it absorbs moisture from the fruit, it reheats magnificently. A few minutes in the oven or even a toaster oven is all it takes to re-crisp the oats and remelt the butter, bringing back that delightful just-baked texture and aroma. This balance—a filling that improves with time and a topping that is easily refreshed—makes this peach crisp an ideal candidate for your weekly meal prep routine, promising a perfect dessert experience from the first day to the last.
What You'll Need
Gathering your ingredients for this make-ahead peach crisp is a simple affair, focusing on wholesome pantry staples and beautiful seasonal fruit. Let’s walk through the key players and how they contribute to a dessert that stays delicious all week long.
First and foremost, the peaches. You have options here! Fresh, ripe peaches are glorious when in season, offering unparalleled flavor and juiciness. Look for peaches that have a slight give when gently pressed and a fragrant, sweet smell. If fresh peaches aren't available, don't worry—high-quality frozen sliced peaches work wonderfully and save you the step of peeling and slicing. They are picked and frozen at peak ripeness, so the flavor is fantastic. Just be sure to thaw them slightly and drain any excess liquid before using to avoid a watery filling.
For the crunchy topping, we rely on a classic combination. Rolled oats provide a hearty, chewy texture and nutty flavor that is the hallmark of a good crisp. Avoid instant oats, as they can become mushy. All-purpose flour gives the topping structure, while brown sugar lends a deep, molasses-like sweetness that pairs perfectly with the peaches. A generous amount of unsalted butter binds it all together, creating those irresistible crunchy clusters as it bakes. For a touch of Levantine warmth, I love to add a generous pinch of cinnamon and a whisper of cardamom or nutmeg.
For storage, I highly recommend baking and storing your peach crisp in a glass or ceramic baking dish with a secure lid. Glass is non-reactive, so it won’t affect the flavor, and it’s perfect for going from the oven to the refrigerator and back to the oven for reheating. If you plan to portion it out for individual servings, a set of small, oven-safe glass containers is a fantastic investment. This way, you can reheat one serving at a time without disturbing the rest of the batch, keeping it fresher for longer. Buying oats and flour in bulk is a great way to make this an economical treat you can return to again and again.
The Batch Cooking Method
Crafting a large batch of this peach crisp is a streamlined and deeply satisfying process. The key is to approach it with an assembly-line mindset, moving smoothly from one task to the next to maximize your time in the kitchen. The entire active preparation should take no more than 20-25 minutes, leaving the oven to do the rest of the work. This efficiency is what makes it such a brilliant recipe for a Sunday afternoon cooking session.
Start by preparing the fruit first. This is often the most time-consuming part, so getting it out of the way sets you up for success. If you're using fresh peaches, peel, pit, and slice them into uniform wedges. Place them in a large bowl and gently toss them with lemon juice to prevent browning, along with a bit of sugar, cornstarch (to thicken the juices), and your chosen spices. Once mixed, spread the fruit evenly in your baking dish. This creates the beautiful, bubbling base for your crisp.
Next, move on to the topping. In a separate bowl, combine your dry ingredients: the rolled oats, flour, brown sugar, a pinch of salt, and spices. Whisk them together to ensure everything is evenly distributed. Now, add your cold, cubed butter. Using your fingertips or a pastry cutter, work the butter into the dry mixture until it resembles coarse crumbs with some pea-sized pieces of butter remaining. These little pockets of butter are what will melt and create a perfectly crisp, golden-brown topping. Sprinkle this mixture evenly and generously over the peaches, making sure to cover them from edge to edge.
The final step is the bake. The crisp will spend about 40-45 minutes in a moderately hot oven, a mostly passive time where your kitchen will fill with the incredible aroma of baked peaches and warm spices. You’ll know it’s ready when the fruit filling is bubbling thickly around the edges and the topping is a deep golden brown. Allowing the peach crisp to cool completely before covering and refrigerating is the final, crucial step. This lets the filling set properly, ensuring that your pre-portioned servings will be neat and delicious all week long.
The Weekly Game Plan
Once your delicious peach crisp is baked and cooled, the real fun begins: enjoying it throughout the week. Having a homemade dessert ready and waiting transforms an ordinary evening into something a little more special. Here’s a simple game plan to keep things interesting and make each serving feel like a unique treat.
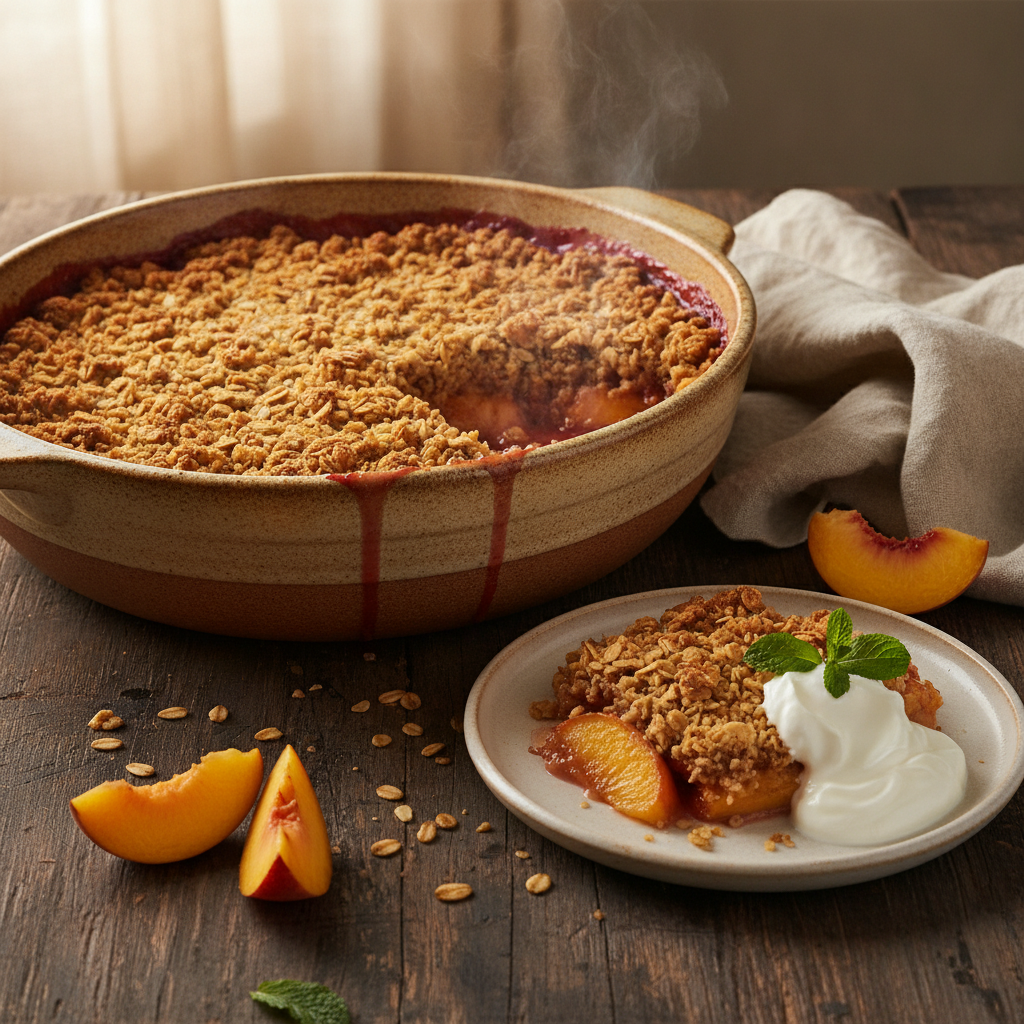
Let's say you bake the crisp on Sunday. That evening, you can enjoy the first portion warm from the oven, perhaps with a scoop of creamy vanilla bean ice cream. It's the perfect reward for your meal-prepping efforts. For the rest of the week, the crisp becomes your secret weapon for easy indulgence. On Monday, after a long day, gently reheat a square in the oven until warm and top it with a dollop of thick, tangy Greek yogurt or labneh. The coolness and tang of the yogurt provide a beautiful contrast to the warm, sweet fruit.
By midweek, you might be craving a little something different. Try crumbling a portion of the cold peach crisp over your morning yogurt or oatmeal for a decadent breakfast parfait. The flavors are reminiscent of a fruit-and-granola bowl, but so much more luxurious. On Thursday, elevate your reheated portion with a drizzle of date molasses or a light sprinkle of toasted slivered almonds for added crunch and a nutty flavor that complements the peaches perfectly. Each small addition creates a new experience, preventing any sense of repetition and keeping your pre-prepped dessert exciting. By adding one fresh element each time you serve it, you keep the experience vibrant and far from boring, proving that meal prep can be about delight, not just duty.
Smart Storage and Reheating
Proper storage and reheating are the keys to ensuring your meal-prepped peach crisp tastes as good on day five as it did on day one. With a few simple strategies, you can maintain its wonderful texture and flavor all week long. The right container is your first line of defense. I always recommend storing the crisp in the same glass or ceramic dish it was baked in, provided it has a tight-fitting lid. This minimizes transfer and cleanup. If you've portioned it into individual servings, glass containers are again the winner; they are non-porous, oven-safe, and microwave-safe, offering the most versatility.
Your peach crisp will keep beautifully in the refrigerator for up to 5 days. Be sure to let it cool completely to room temperature before covering it and placing it in the fridge. This prevents condensation from forming on the lid, which is the number one enemy of a crispy topping. For longer-term storage, this dessert also freezes exceptionally well. You can freeze the entire dish or individual portions. Wrap them tightly in a layer of plastic wrap and then a layer of foil to protect against freezer burn. It will last for up to 3 months in the freezer.
When it comes to reheating, you have a few excellent options. The best method for reviving that signature crunch is the oven or a toaster oven. Place your desired portion in an oven-safe dish and heat it at 350°F (175°C) for about 10-15 minutes, or until the filling is bubbly and the topping is fragrant and crisp. If you’re short on time, the microwave works well, though the topping will be softer. Heat it in 30-second intervals until warmed through. To add a bit of freshness back, you can sprinkle on a few fresh oats or chopped nuts before serving, or add a dollop of cool, creamy yogurt to contrast with the warm fruit. With these simple tips, your make-ahead dessert will always be a welcome treat.
Customization Ideas
One of the most wonderful things about a classic recipe like this peach crisp is how easily it can be adapted to suit your tastes, the season, or dietary needs. Think of this recipe as a template for your own creativity. The peaches are a fantastic starting point, but almost any stone fruit would be delicious here. Try swapping them for nectarines, plums, or apricots when they are at their peak. In the autumn, a combination of apples and pears with a pinch of ginger would be absolutely heavenly.
Don't hesitate to play with the topping, either. For extra texture and nutty flavor, add a half-cup of chopped pecans, walnuts, or slivered almonds to the oat mixture. You can also experiment with the spices; a bit of ground cardamom adds a lovely floral, citrusy note that is common in Levantine desserts, while a pinch of allspice can lend a deeper, more complex warmth. To make this recipe gluten-free, simply substitute the all-purpose flour with a good quality gluten-free all-purpose blend or oat flour.
For a dairy-free or vegan version, the swap is straightforward. Replace the unsalted butter with an equal amount of cold, solid coconut oil or a high-quality plant-based butter. The result will be just as crunchy and delicious. You can also scale this recipe up or down with ease. Halve the ingredients for a smaller batch perfect for one or two people, or double it in a larger baking dish to serve a crowd at a family gathering. This versatility ensures that your favorite peach crisp recipe can be enjoyed by everyone, anytime.
Meal Prep FAQ
Can I prep the components separately and assemble them later?
Absolutely! This is a fantastic strategy to guarantee the crispiest topping. You can prepare the peach filling and store it in an airtight container in the fridge for up to 2 days. The oat topping can be mixed and stored in a separate airtight container in the fridge for up to a week. When you're ready, just assemble and bake as directed.
How do I keep the topping from getting soggy?
The key is to let the peach crisp cool completely before covering it to prevent condensation. When reheating, using an oven or toaster oven is the best way to drive off any accumulated moisture and re-crisp the topping. A quick 10 minutes is usually all it takes to bring back that delightful crunch.
Is this recipe freezer-friendly?
Yes, it freezes beautifully! You can freeze the entire baked and cooled crisp, or freeze individual portions in freezer-safe containers. Thaw it in the refrigerator overnight before reheating in the oven for the best results. You can also bake it directly from frozen, just add about 20-25 minutes to the baking time.
Can I use canned or jarred peaches?
You can, but it's important to choose peaches packed in their own juice, not heavy syrup. Be sure to drain them very thoroughly to avoid a soggy filling. Since canned peaches are already quite soft and sweet, you may want to reduce the amount of sugar in the filling slightly.
How can I make single-serving portions for easy grab-and-go treats?
Instead of a large baking dish, assemble the peach crisp in individual oven-safe ramekins or small glass meal-prep containers. Bake them for a slightly shorter time, about 25-30 minutes, or until the tops are golden and the filling is bubbly. This is a perfect way to have portion control and easy-to-reheat desserts ready for the week.
Meal Prep Peach Crisp
A comforting, make-ahead peach crisp with juicy, spiced peaches and a crunchy rolled oat topping. Perfect for a week of delicious homemade desserts.
Prep Time
20 min
Cook Time
45 min
Total Time
65 min
Servings
8 servings
Ingredients
For 8 servings
- 8 medium ripe peaches (about 3 lbs), peeled, pitted, and sliced
- 1 tablespoon fresh lemon juice
- 1/2 cup granulated sugar
- 1/4 cup light brown sugar, packed
- 2 tablespoons cornstarch
- 1 teaspoon ground cinnamon, divided
- 1/4 teaspoon ground nutmeg
- 1/4 teaspoon salt, divided
- 1 1/2 cups old-fashioned rolled oats
- 1 cup all-purpose flour
- 1 cup light brown sugar, packed
- 1/2 cup (1 stick) unsalted butter, cold and cubed
- 1 teaspoon alcohol-free vanilla extract
Instructions
- 1
Preheat Oven and Prepare Dish
Preheat your oven to 375°F (190°C). Lightly grease a 9x13 inch baking dish or a similar 3-quart casserole dish with a small amount of butter or cooking spray.
- 2
Prepare the Peach Filling
In a large bowl, combine the sliced peaches and lemon juice, tossing gently to coat. This prevents the peaches from browning and adds a touch of brightness to the flavor.
- 3
Mix Filling Ingredients
To the peaches, add the granulated sugar, 1/4 cup of brown sugar, cornstarch, 1/2 teaspoon of cinnamon, nutmeg, and a pinch of salt. Stir gently until the peaches are evenly coated and the cornstarch is dissolved.
- 4
Arrange Filling in Dish
Pour the peach mixture into your prepared baking dish and spread it into an even layer. This will form the delicious, bubbly base of your peach crisp.
- 5
Combine Topping Dry Ingredients
In a separate medium bowl, whisk together the rolled oats, all-purpose flour, 1 cup of brown sugar, the remaining 1/2 teaspoon of cinnamon, and a 1/4 teaspoon of salt. Make sure all the dry ingredients are well combined.
- 6
Cut in the Butter
Add the cold, cubed butter and the alcohol-free vanilla extract to the dry ingredients. Using your fingertips, a pastry blender, or two knives, cut the butter into the mixture until it resembles coarse crumbs with some pea-sized pieces of butter still visible.
- 7
Sprinkle Topping Over Peaches
Evenly sprinkle the oat topping mixture over the peaches in the baking dish. Cover the fruit completely from edge to edge for a perfect crunchy topping on every bite.
- 8
Bake Until Golden
Place the dish on a baking sheet to catch any potential drips. Bake for 40-45 minutes, or until the fruit filling is thick and bubbling and the topping is a deep golden brown.
- 9
Cool Before Storing
Remove the peach crisp from the oven and let it cool on a wire rack for at least 30 minutes before serving. For meal prep, allow it to cool completely to room temperature before covering and refrigerating.
- 10
Store for the Week
Once completely cool, cover the baking dish tightly with a lid or foil. Store in the refrigerator for up to 5 days. You can also portion into individual airtight containers.
- 11
Reheat and Serve
To reheat, place a serving in an oven-safe dish and warm at 350°F (175°C) for 10-15 minutes until heated through and the topping is crisp. Alternatively, microwave in 30-second increments. Serve warm, plain or with a scoop of ice cream or yogurt.
Nutrition Facts
Per serving (estimated)
420 calories
Calories
78g
Carbs
5g
Protein
12g
Fat
6g
Fiber
150mg
Sodium
55g
Sugar


