Yara's Warm Spice Apple Pie Recipe
The ultimate homemade apple pie! A flaky all-butter crust filled with apples and warm spices like cinnamon, cardamom, and nutmeg. Perfect for gatherings.
cookwithyara.com/recipes/apple-pie
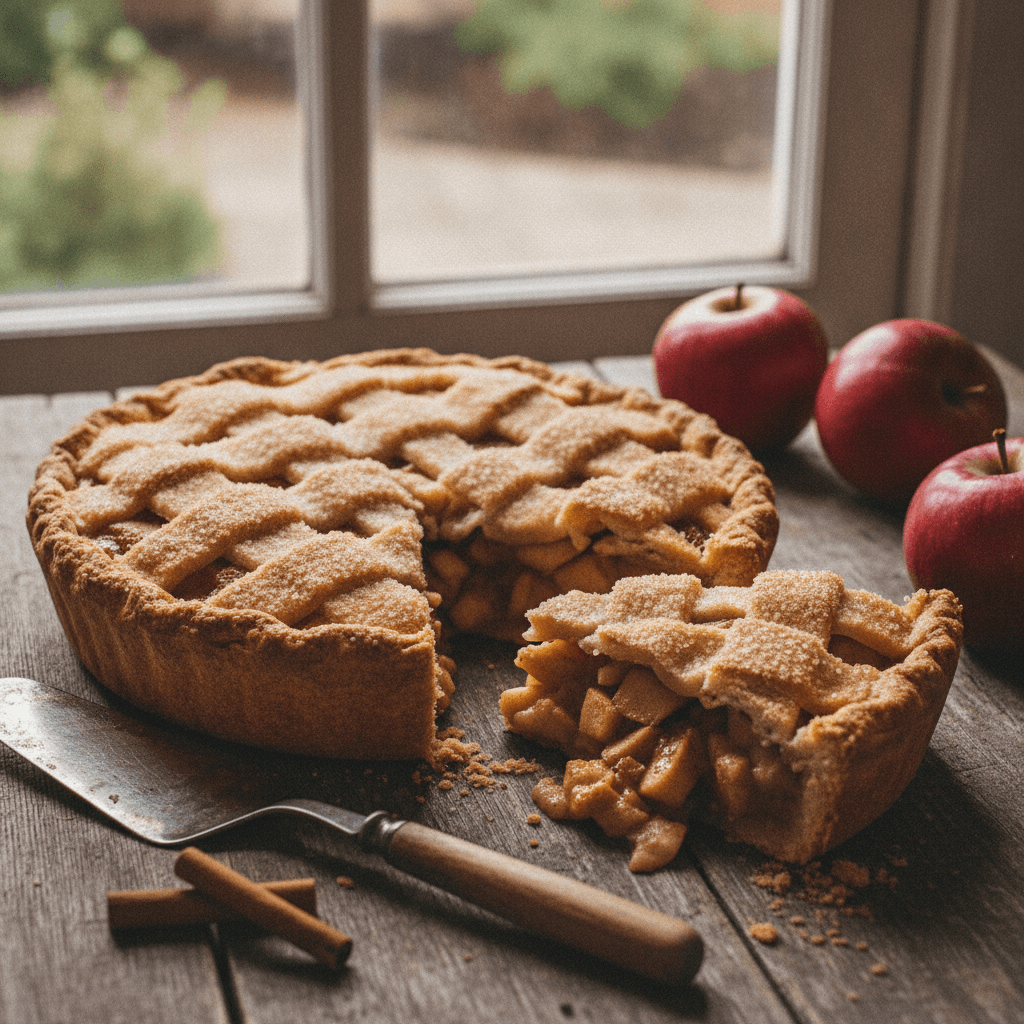
There is a universal truth in the world of home cooking: the aroma of a freshly baked apple pie signifies comfort, warmth, and the promise of something truly special. It’s more than just a dessert; it’s an experience that fills the kitchen with the sweet scent of caramelized apples and warm spices, a scent that whispers of cozy evenings and happy gatherings. Imagine pulling a masterpiece from your oven, its crust a perfect, deep golden-brown, glistening with a light dusting of sugar. The top is a beautiful lattice, revealing glimpses of the tender, bubbling apple filling beneath. The sound of the fork breaking through that crisp, flaky crust is a symphony in itself, leading to a center that is soft, fragrant, and bursting with flavor.
This isn't just any pie; it's a journey of textures and tastes. The buttery, almost savory crust provides the perfect counterpoint to the sweet and slightly tart apple filling. Each bite is a harmonious blend of flaky layers, tender fruit, and a complex warmth from a signature blend of spices. Many people feel intimidated by the idea of making a homemade apple pie from scratch, envisioning complicated steps and a high chance of failure. But I am here to promise you that with a little patience and the right techniques, you can create a stunning and delicious Warm Spiced Apple Pie that will look and taste like you’ve been baking for years. This recipe breaks down every step, from crafting the flakiest crust to achieving the perfectly set filling, ensuring your success and a truly memorable dessert.
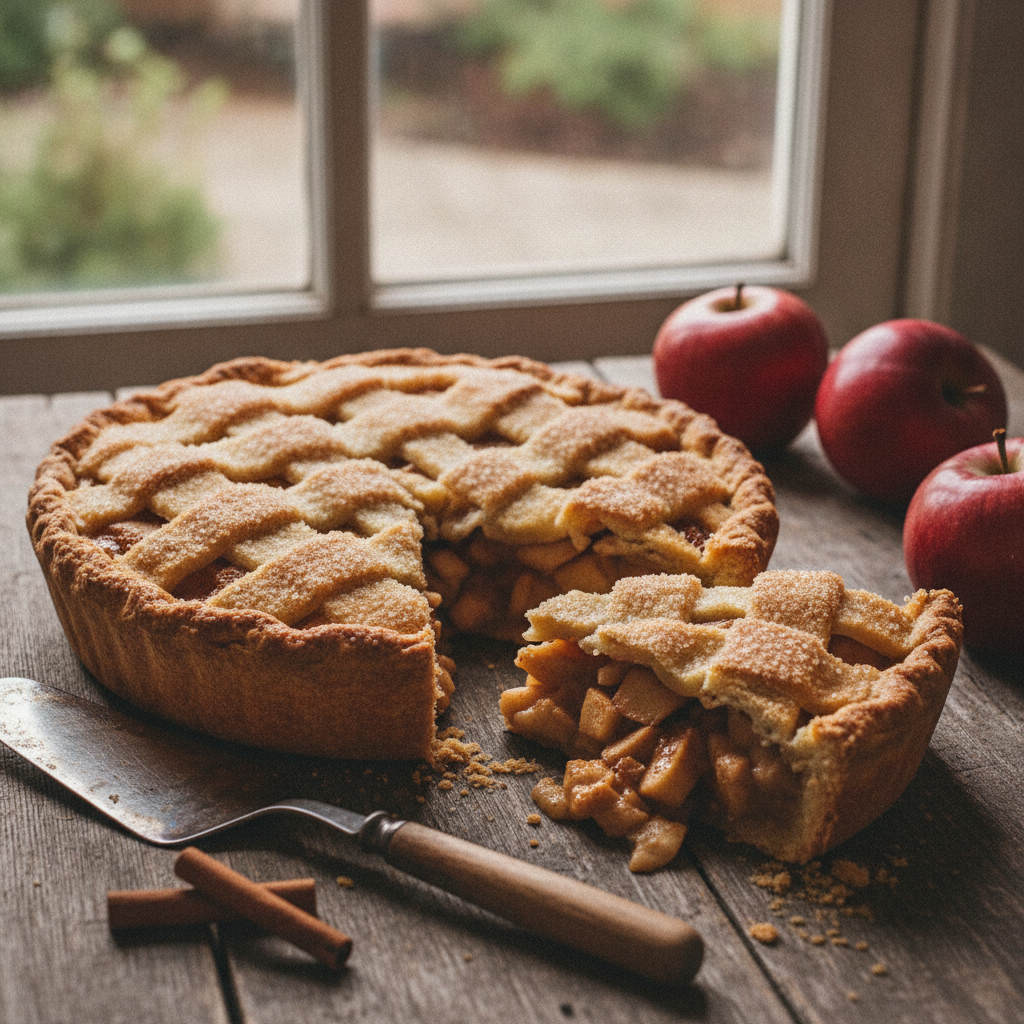
The Philosophy of a Perfect Pie
A truly exceptional apple pie is a study in balance. It’s a culinary dance between three key elements: the crust, the filling, and the bake. When these three components are in perfect harmony, the result is transcendent. The philosophy behind this Warm Spiced Apple Pie is to honor each element, understanding that none can be overlooked. The goal isn't just to make a pie, but to create a sensory experience.
The crust is the foundation, both literally and figuratively. It must be sturdy enough to hold the generous filling, yet tender and flaky enough to shatter delicately with each bite. We use all butter for its unparalleled flavor and its ability to create those coveted layers. The secret lies not in complex ingredients, but in temperature and technique—keeping everything cold to create steam pockets during baking, which in turn create flakiness.
The filling is the heart of the pie. It cannot be one-note; it must have depth. This means a careful selection of apples for a blend of sweet and tart flavors, and a texture that holds its shape instead of turning to mush. And the spices—they are the soul. Here, we move beyond simple cinnamon and introduce a whisper of cardamom and allspice, lending a sophisticated warmth that elevates the entire dessert. Finally, the bake is the grand finale, the process that marries the crust and filling into one glorious whole. It requires patience and observation, ensuring the crust is deeply golden and the filling is bubbly and cooked through. This is the philosophy: simple, high-quality ingredients, thoughtful technique, and a little bit of patience to create something truly extraordinary.
Choosing Your Apples
The star of any apple pie is, of course, the apples. The variety you choose will have the single biggest impact on the final texture and flavor of your filling. Walk into any market in the autumn, and the selection can be overwhelming, but not all apples are created equal when it comes to baking. For the perfect homemade apple pie, you need apples that are firm, hold their shape when cooked, and have a good balance of tartness and sweetness.
My absolute favorite approach is to use a combination of at least two different types of apples. This creates a much more complex and interesting filling. One variety should be primarily tart and incredibly firm, while the other can be sweeter and slightly softer to round out the flavor profile.
For the tart, structural component, Granny Smith is the undisputed champion. They are intensely tart, which balances the sugar beautifully, and their firm flesh remains distinct and slightly crisp even after an hour in the oven. They provide the backbone of the pie filling. For the sweet and aromatic component, I love using Honeycrisp or Braeburn. Honeycrisp apples have a wonderful sweet-tart flavor and a crisp, juicy texture that holds up surprisingly well to heat. Braeburns offer a balanced, rich flavor with notes of nutmeg and cinnamon that complement our spice blend perfectly.
Other excellent choices include Jonagold, Golden Delicious (which can be sweet but holds its shape well), and Pink Lady. The key is to avoid apples that are mealy or overly soft, such as Red Delicious or McIntosh, as they tend to break down into an undesirable, applesauce-like consistency. When preparing the apples, aim for uniform slices about a quarter-inch thick. This consistency ensures that every apple slice cooks evenly, resulting in a tender but not mushy filling.
Crafting the Flakiest All-Butter Crust
The secret to a truly memorable homemade apple pie lies in its crust. A perfect pie crust should be tender, flaky, and rich with the flavor of good butter. It’s the vessel that holds the beautiful filling, and its texture is just as important as the taste of the apples. While it may seem daunting, creating a fantastic all-butter crust is all about understanding one simple principle: keep everything cold.
The magic of a flaky crust happens when small pieces of solid butter are suspended within the dough. When the pie hits the hot oven, the water in the butter turns to steam, pushing apart the layers of flour and creating those delightful, flaky pockets. If the butter melts into the flour before baking, you’ll end up with a tough, dense crust instead. To ensure success, start with very cold, cubed unsalted butter. I like to pop my cubes in the freezer for about 15 minutes before I start. Even your water should be ice-cold.
Working quickly, you'll cut the cold butter into the flour, salt, and sugar mixture. You can use a pastry blender, two knives, or even your fingertips. The goal is to break the butter down until the pieces are roughly the size of peas, with some larger, almond-sized chunks remaining. These larger pieces are your insurance for flakiness. Then, you’ll add the ice water one tablespoon at a time, tossing the mixture gently with a fork until it just starts to come together into a shaggy dough. Do not overmix or knead it! Overworking the dough develops gluten, which is the enemy of a tender crust.
Turn the shaggy dough out onto a surface, gently press it into a disk, wrap it tightly, and let it rest in the refrigerator for at least one hour, or preferably two. This chilling period is non-negotiable. It allows the butter to solidify again and gives the gluten in the flour time to relax, making the dough easier to roll out and ensuring a tender final product. This patient, chilled approach is the key that unlocks a perfectly crisp and flaky foundation for your Warm Spiced Apple Pie.
The Art of the Spiced Apple Filling
While the crust provides the structure and texture, the filling is where the soul of this Warm Spiced Apple Pie truly comes alive. We are aiming for a filling that is a perfect symphony of sweet, tart, and warm spice, with apples that are tender but still hold their shape. This is where my love for Levantine flavors gets to shine, elevating a classic dessert into something truly special.
The foundation is, of course, our carefully chosen apples. Once they are peeled, cored, and sliced, we'll toss them with fresh lemon juice. This isn't just for flavor; the acid prevents the apples from browning while you work and helps to brighten the overall taste of the pie. Next comes the blend of sugars. I use both brown and white sugar. The white sugar provides straightforward sweetness, while the light brown sugar adds a wonderful depth and a slight molasses note that is simply divine with the spices.
Now for the spice blend, the heart of our recipe. We begin with classic ground cinnamon and nutmeg, the traditional aromas of apple pie. But to this, we add a crucial third spice: ground cardamom. Cardamom has a unique floral, citrusy, and slightly sweet-spicy profile that adds an incredible layer of complexity. It’s a warm, aromatic spice that pairs beautifully with apples and gives the pie a subtle, sophisticated Middle Eastern flair. A tiny pinch of allspice or ground cloves can also be added for an extra layer of warmth. Don’t forget a pinch of salt—it enhances all the other flavors.
To ensure our pie isn't a soupy mess, we need a thickener. Cornstarch is my go-to. It’s reliable and creates a clear, glossy filling. After tossing the apples with the sugars and spices, we let the mixture sit, or macerate, for about 30 minutes. This process is vital: it draws a significant amount of liquid out of the apples before they go into the oven. We then drain this liquid, simmer it on the stove to create a thick syrup, and pour it back over the apples. This extra step guarantees a perfectly set, intensely flavored filling and helps prevent the dreaded soggy bottom crust.
Assembling and Baking Your Masterpiece
With your flaky dough chilled and your spiced apple filling ready, it’s time for the most rewarding step: bringing it all together to create your Warm Spiced Apple Pie. This is where art meets craft. Begin by lightly flouring your work surface and rolling out one of the chilled dough disks. Roll from the center outwards, rotating the dough a quarter turn after each roll to maintain an even circle. You’re aiming for a circle about 12 inches in diameter for a standard 9-inch pie plate. Gently ease the dough into the plate, being careful not to stretch it. Trim the edges, leaving about a half-inch overhang.
Now, pile that glorious apple filling into the crust-lined plate. Mound the apples slightly higher in the center, as they will cook down during baking. Dot the top of the filling with a few small cubes of cold butter; this adds a lovely richness that melts down into the apples as they cook. For the top crust, you have choices. You can roll out the second disk for a solid top, ensuring you cut several steam vents to let moisture escape. Or, for that classic, beautiful look, you can create a lattice top. Cut the second rolled-out dough into even strips and weave them over and under each other directly on top of the pie.
Once your top crust is in place, trim any excess dough and crimp the edges to seal the pie. This can be as simple as pressing with a fork or as decorative as a fluted edge using your thumb and index finger. For that professional, glossy finish, brush the entire top crust with an egg wash (one egg beaten with a splash of milk or cream) and sprinkle generously with coarse sugar for a delightful crunch. Place the assembled pie on a baking sheet to catch any potential drips and pop it into a preheated oven. The baking process is two-stage: we start at a high temperature (425°F) for 15 minutes to set the crust and get that initial blast of heat for maximum flakiness. Then, we reduce the temperature (to 375°F) and continue baking until the crust is a deep golden brown and the filling is thick and bubbly. This patient baking process is the final step in creating your apple pie masterpiece.
Secrets for Apple Pie Success
Achieving apple pie perfection is within reach for every home baker. It often comes down to a few small but crucial details that can elevate your pie from good to absolutely unforgettable. Here are some of my most trusted secrets for ensuring your Warm Spiced Apple Pie turns out flawlessly every time.
First, mind the gap. A common issue is the dreaded gap that forms between the cooked filling and the top crust. This happens because the raw apples have a lot of air between the slices. The solution is to pack the apples in tightly and mound them higher than you think you need to. As they cook, they'll soften and settle, creating a full pie without a hollow top. Some bakers even pre-cook the filling slightly to release the air before baking.
Second, protect your edges. The edges of the pie crust bake much faster than the center. To prevent them from becoming too dark or even burning before the filling is cooked, create a simple pie shield. You can buy a reusable one, or just fashion a ring out of aluminum foil to cover the edges for the last 20-30 minutes of baking. This ensures an evenly golden crust all over.
Third, look for the right visual cues. A timer is a guide, but your eyes and ears are the best tools. A perfectly baked apple pie will have a deep, rich golden-brown crust, not a pale blonde one. More importantly, you should see the filling actively bubbling through the vents or lattice. This bubbling is the sign that the filling has reached a high enough temperature for the cornstarch to activate and thicken properly.
Fourth, fight the soggy bottom. My favorite trick, besides pre-cooking the drained liquid from the filling, is to add a thin layer of something absorbent to the bottom crust before adding the apples. A tablespoon of fine breadcrumbs or a mixture of flour and sugar sprinkled over the bottom crust will create a barrier that helps absorb excess moisture.
Finally, the hardest secret of all: be patient. The aroma will be intoxicating, but you must let your baked pie cool on a wire rack for at least four hours before slicing. This allows the molten filling to cool and set completely. Slicing into a hot pie will result in a soupy, runny mess, no matter how perfectly you cooked it. This cooling period is the final, crucial step to achieving those clean, beautiful slices.
Serving and Pairing Suggestions
Your beautiful Warm Spiced Apple Pie has been baked to perfection and has cooled patiently on the counter. Now comes the wonderful moment of serving it. While a slice of this pie is a magnificent treat all on its own, the right accompaniment can elevate it to a truly memorable dessert experience. The key is to choose pairings that complement the pie's flavors without overwhelming them.
The most classic and beloved partner for apple pie is, without a doubt, a scoop of high-quality vanilla bean ice cream. The contrast between the warm, spiced pie and the cold, creamy ice cream is a timeless delight. As the ice cream melts slightly, it creates a luscious sauce that mingles with the apple filling in the most perfect way.
For a slightly tangy and less sweet option that resonates with my Mediterranean palate, consider a generous dollop of thick, strained Greek yogurt or labneh. Its creamy texture and subtle tartness provide a wonderful counterbalance to the sweetness of the pie filling, creating a sophisticated and balanced bite. A drizzle of high-quality honey over the yogurt would be a lovely finishing touch.
Another fantastic option is a drizzle of homemade salted caramel sauce. The deep, slightly bitter notes of the caramel and the kick of sea salt work in beautiful harmony with the sweet apples and warm spices. For an added layer of texture, you could sprinkle some toasted nuts, like pecans or walnuts, or even some crushed pistachios over the top of the ice cream or caramel. This adds a delightful crunch that contrasts with the soft filling and flaky crust, making each spoonful a complete sensory joy.
Storing and Enjoying Leftovers
While a freshly baked Warm Spiced Apple Pie often disappears quickly, having leftovers can be a wonderful thing. Storing it properly is key to ensuring that the next day's slice is nearly as good as the first. Because it contains a fruit filling with a good amount of sugar, your apple pie can be safely stored at room temperature for up to two days. Simply cover it loosely with aluminum foil or an inverted bowl. Storing it in the refrigerator can extend its life for another two to three days, but be aware that the cold can sometimes compromise the texture of the buttery crust, making it less crisp.
When it comes to reheating, please step away from the microwave! Microwaving a slice of pie will turn that beautiful, flaky crust into a soft, steamy, and often tough disappointment. The best way to revive a slice of leftover apple pie is in the oven or a toaster oven. Place the slice on a small baking sheet and warm it at 350°F (175°C) for about 10-15 minutes. This gentle heat will warm the filling through while re-crisping the crust, bringing it back to its former glory.
Don't be afraid to get creative with your leftovers, either. A crumbled slice of apple pie makes an incredible topping for a bowl of morning oatmeal or yogurt, creating a decadent breakfast parfait. You can even blend a slice with vanilla ice cream and a splash of milk for an indulgent apple pie milkshake. Proper storage and thoughtful reheating mean you can savor every last crumb of your homemade masterpiece.
Your Apple Pie Questions Answered
Why is my apple pie filling watery?
A watery filling is usually caused by two things: using the wrong type of apples that release too much liquid, or not cooking the pie long enough. To prevent this, use firm baking apples, and be sure to macerate the apple slices in sugar to draw out excess liquid beforehand. Most importantly, bake the pie until you see the filling vigorously bubbling through the vents; this indicates the thickener has fully activated.
How do I know when my apple pie is truly done?
There are three key indicators. First, the crust should be a deep, uniform golden-brown, not pale or patchy. Second, look for thick, slow bubbles of filling emerging from the steam vents or lattice—this is the most reliable sign. Finally, if you insert a thin knife into a vent, the apple slices inside should feel tender with no resistance.
Can I use a store-bought crust to save time?
Absolutely! While a homemade all-butter crust is truly special, a good quality store-bought refrigerated or frozen pie dough can be a fantastic time-saver, especially on busy days. Just be sure to let it come to room temperature according to the package directions so it doesn’t crack when you unroll it. Your homemade filling will still make the pie a showstopper.
How do I prevent a soggy bottom crust?
This is a classic pie problem! My top tips are: first, make sure your filling isn't too wet by pre-cooking the drained juices. Second, place a baking sheet in the oven as it preheats and bake your pie directly on the hot sheet. This blast of heat helps to set the bottom crust quickly. Lastly, a light dusting of flour or fine breadcrumbs on the bottom crust before adding the filling can act as a moisture barrier.
Can I make this apple pie ahead of time?
Yes, apple pie is a great dessert to make ahead. You can prepare and assemble the entire pie (without the egg wash), wrap it tightly in foil, and refrigerate it for up to one day before baking. You can also freeze the unbaked pie for up to three months. When you're ready to bake, there's no need to thaw; just add an egg wash and bake directly from frozen, adding about 15-20 minutes to the total baking time.
Yara's Warm Spiced Apple Pie
A classic homemade apple pie with a perfectly flaky, all-butter crust and a tender, warmly spiced apple filling featuring cinnamon, nutmeg, and a hint of cardamom.
Prep Time
1h 30m
Cook Time
1h
Total Time
2h 30m
Servings
8 servings
Ingredients
For 8 servings
- For the All-Butter Pie Crust:
- 2 1/2 cups (320g) all-purpose flour
- 1 teaspoon fine sea salt
- 1 tablespoon granulated sugar
- 1 cup (226g) very cold unsalted butter, cut into 1/2-inch cubes
- 1/2 cup (120ml) ice-cold water, plus more if needed
- For the Warm Spiced Apple Filling:
- 3 lbs (about 6-7 medium) firm baking apples, a mix of tart and sweet (like Granny Smith and Honeycrisp)
- 1 tablespoon fresh lemon juice
- 1/2 cup (100g) granulated sugar
- 1/2 cup (110g) packed light brown sugar
- 1/4 cup (32g) cornstarch
- 1 1/2 teaspoons ground cinnamon
- 1/2 teaspoon ground nutmeg
- 1/4 teaspoon ground cardamom
- 1/4 teaspoon fine sea salt
- 2 tablespoons (28g) unsalted butter, cut into small pieces
- For the Egg Wash:
- 1 large egg
- 1 tablespoon milk or cream
- 1 tablespoon coarse sugar, for sprinkling
Instructions
- 1
Prepare the Pie Dough
In a large bowl, whisk together the flour, salt, and granulated sugar. Add the cold butter cubes and toss to coat. Using a pastry blender or your fingertips, cut the butter into the flour until the mixture resembles coarse crumbs with some pea-sized and almond-sized pieces of butter remaining.
- 2
Hydrate and Chill the Dough
Sprinkle the ice water over the mixture, 1 tablespoon at a time, tossing with a fork until the dough just begins to come together in a shaggy mass. Do not overmix. Divide the dough in half, gently form each half into a 1-inch thick disk, wrap tightly in plastic wrap, and refrigerate for at least 1 hour, or up to 2 days.
- 3
Prepare the Apple Filling
Peel, core, and slice the apples into 1/4-inch thick slices. Place them in a large bowl and toss immediately with the lemon juice to prevent browning. In a separate small bowl, whisk together the granulated sugar, brown sugar, cornstarch, cinnamon, nutmeg, cardamom, and salt.
- 4
Macerate the Apples
Pour the sugar-spice mixture over the apples and toss gently to combine thoroughly. Let the mixture sit at room temperature for 30-45 minutes. The apples will release a significant amount of liquid.
- 5
Create the Filling Syrup
Strain the liquid from the apples into a small saucepan. Bring the liquid to a simmer over medium heat and cook, stirring occasionally, until it thickens into a light syrup, about 5 minutes. Pour the warm syrup back over the apples and toss to coat.
- 6
Roll Out Bottom Crust
Preheat your oven to 425°F (220°C) with a rack in the lower third. On a lightly floured surface, roll one disk of chilled dough into a 12-inch circle. Carefully transfer the dough to a 9-inch pie plate, easing it into the bottom and up the sides without stretching it.
- 7
Assemble the Pie
Trim the dough overhang to about 1/2 inch. Spoon the apple filling into the crust-lined plate, mounding it slightly in the center. Dot the top of the filling with the small pieces of butter.
- 8
Add the Top Crust
Roll out the second disk of dough into an 11-inch circle. Place it over the filling. Alternatively, cut the dough into strips and weave a lattice top. Trim the top crust to match the bottom crust overhang.
- 9
Crimp and Prepare for Baking
Fold the edges of the top and bottom crusts together and crimp to seal. In a small bowl, beat the egg with the milk or cream. Brush this egg wash evenly over the top crust and sprinkle generously with coarse sugar. If using a solid top crust, cut 4-5 slits for steam to escape.
- 10
Begin Baking at High Heat
Place the pie on a foil-lined baking sheet to catch any drips. Bake at 425°F (220°C) for 15 minutes. This initial high heat helps to set the bottom crust.
- 11
Finish Baking at Lower Heat
Reduce the oven temperature to 375°F (190°C). Continue to bake for another 45-55 minutes, or until the crust is deep golden brown and the filling is thick and bubbly. If the edges are browning too quickly, cover them with a pie shield or strips of foil for the last 20 minutes.
- 12
Cool the Pie Completely
This is a critical step. Transfer the baked pie to a wire rack and let it cool for at least 4 hours before slicing and serving. This allows the filling to set properly, ensuring clean slices. Slicing too early will result in a runny filling.
Nutrition Facts
Per serving (estimated)
450 calories
Calories
65g
Carbs
4g
Protein
22g
Fat
4g
Fiber
250mg
Sodium
35g
Sugar