

Easy Homemade Dot Cakes Recipe (Funfetti Surprise!)
Learn to make beautiful dot cakes from scratch! This funfetti-style cake reveals colorful polka dots in every slice. A perfect, festive treat for any gathering.
cookwithyara.com/recipes/dot-cakes
There’s a special kind of magic reserved for celebratory cakes. It’s in the warm, sweet scent of vanilla and butter that fills the kitchen, a fragrance that promises joy and togetherness. I’ve always been captivated by the moment a cake is sliced, that collective pause of anticipation before the first piece is lifted. It’s a simple act, yet it’s filled with so much emotion. This fascination with the 'reveal' is what drew me to perfecting my own recipe for Dot Cakes. The idea of a simple, elegant cake that holds a vibrant, colorful secret inside is just pure delight.
For me, a truly great cake isn't just about looks; the texture and flavor must be sublime. I wanted to create a version of this playful cake that was more than just a novelty. I envisioned a vanilla cake with an incredibly tender, moist crumb, one that melts in your mouth and is rich with the flavor of real butter and vanilla. The surprise of the colorful dots is the whimsical bonus, the smile-inducing element that makes it unforgettable. This recipe for Dot Cakes is the result of that vision. It’s a step-by-step guide to creating a show-stopping dessert that tastes even better than it looks. We'll walk through the process together, ensuring you feel confident and excited to share this beautiful creation at your next family meal.
The Story Behind This Dish
The concept of a “surprise-inside” cake is a relatively modern marvel in the world of home baking. While elaborate cakes have been centerpieces for centuries, the idea of embedding a specific, pre-baked shape or pattern within another cake batter gained popularity with the rise of creative food blogs and social media platforms. These platforms provided a stage for inventive bakers to share techniques that went beyond simple layering and frosting. The Dot Cakes, or Polka Dot Cakes as they are often called, became an instant classic within this genre.
Its appeal is universal: it combines the classic comfort of a vanilla cake with a visual twist that feels both playful and sophisticated. Unlike complex tiered cakes that require advanced decorating skills, the magic of Dot Cakes happens inside the cake, accessible to any home baker willing to follow a few simple, clever steps. Over the years, home cooks have adapted the idea endlessly, playing with color combinations, cake flavors, and even shapes. Making one from scratch is infinitely more rewarding than any store-bought version because it allows you complete creative freedom. You choose the colors, you control the quality of the ingredients, and you get to experience the pure joy on people’s faces when you slice into your stunning creation.
What Makes This Recipe Special
This isn't just another recipe for Dot Cakes; it's a carefully crafted guide to ensure a perfect result every time. From the texture of the crumb to the vibrancy of the colors, every detail has been considered to make your baking experience joyful and your final cake absolutely delicious.
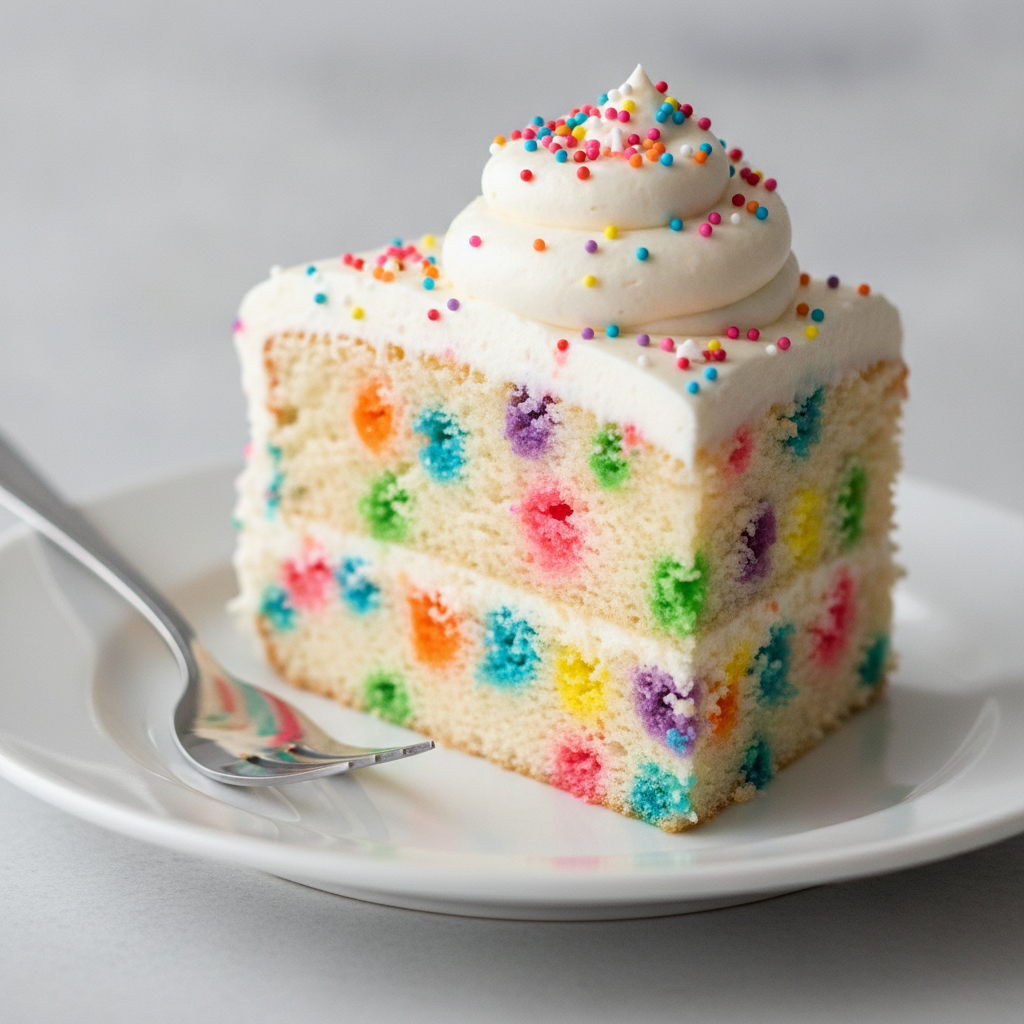
- A Stunning Visual Surprise: The absolute joy of this cake is the reveal. Cutting into the smooth, white frosted exterior to find a perfect pattern of colorful polka dots is a moment of pure delight that never gets old. It’s a simple technique with a high-impact result that will have everyone asking, “How did you do that?”
- Incredibly Moist & Tender Crumb: Many novelty cakes sacrifice flavor and texture for appearance. Not this one. We use cake flour and buttermilk to create a vanilla cake that is exceptionally soft, moist, and light. It’s a delicious cake in its own right, beautifully complementing the fun interior.
- Perfectly Balanced Flavors: The cake itself is rich with high-quality vanilla and buttery notes. We pair it with a classic cream cheese frosting that has just the right amount of tang to cut through the sweetness, creating a harmonious and utterly addictive flavor profile.
- A Foolproof, Step-by-Step Method: The idea of baking a cake inside another cake can sound intimidating, but I’ve broken the process down into clear, manageable steps. From making the cake balls to ensuring they stay perfectly suspended in the batter, this guide removes all the guesswork.
- Completely Customizable: This recipe for Dot Cakes is a canvas for your creativity. You can choose any color combination you can dream of to suit a theme or a favorite color palette. The possibilities are endless, making each cake you bake a unique piece of art.
- Halal and Wholesome: We rely on simple, high-quality, and completely halal ingredients. No complex additives or hidden components, just pure baking goodness you can feel confident serving to your loved ones.
Breaking Down the Ingredients
A spectacular cake is built on a foundation of excellent ingredients. Each component in this Dot Cakes recipe is chosen for a specific purpose, working in harmony to create the perfect texture, flavor, and appearance. Let’s explore the key players.
The heart of any great cake is the flour, and for this recipe, we use cake flour. Its lower protein content results in a finer, softer, and more tender crumb than all-purpose flour could ever achieve. It’s what gives our Dot Cakes that delicate, melt-in-your-mouth quality.
For richness and flavor, high-quality unsalted butter is non-negotiable. When creamed with sugar, it incorporates air into the batter, which is essential for a light and fluffy texture. Its fat content provides moisture and a luxurious flavor that is central to the cake’s appeal.
To balance that richness and add even more moisture, we turn to buttermilk. The acidity in buttermilk reacts with the baking soda, giving the cake a beautiful lift. More importantly, it tenderizes the gluten in the flour, ensuring the softest possible crumb while lending a subtle, pleasant tang that deepens the overall flavor profile.
Of course, a vanilla cake needs exceptional vanilla extract. This is where you don't want to skimp. A pure, high-quality vanilla extract provides an aromatic, complex flavor that imitation flavorings simply cannot replicate. It’s the soul of our cake batter. The eggs provide structure, binding the ingredients together, while their yolks add extra richness and color.
For the vibrant polka dots, gel food coloring is our secret weapon. Unlike liquid food coloring, gel-based colors are highly concentrated. This means you can achieve deep, brilliant hues without adding excess liquid, which could alter the texture of your cake batter. Finally, our tangy cream cheese frosting comes together with full-fat block cream cheese, which provides the best flavor and thick consistency, along with butter, powdered sugar, and another splash of vanilla to tie all the flavors together.
The Cooking Process Explained
Creating our beautiful Dot Cakes is a delightful two-part process, and understanding the flow will make it feel effortless. Think of it as building a delicious secret. First, we create the dots, and then we bake them into their final home.
Our journey begins by baking a simple, single-layer cake. This first cake is our color palette. We'll prepare a batch of our vanilla cake batter and divide it into as many bowls as you have colors. This is where you add your gel food coloring, mixing until you have vibrant, even hues. We bake this colorful batter in a thin layer in a sheet pan. The goal here isn't a thick, fluffy cake, but rather a cooked base that we can transform into our dots. Once it's baked and cooled, the real fun begins: we crumble the entire cake into fine crumbs.
Next, we transform those crumbs into our signature dots. By mixing the crumbs with a touch of frosting, we create a pliable, dough-like mixture. We then roll this mixture into small, uniform balls. These are the future polka dots! This step is crucial: the formed cake balls must be frozen solid. This ensures they hold their shape and don't melt away when surrounded by the new batter. Give them at least an hour in the freezer, but longer is even better.
With our dots frozen and ready, we whip up a second, fresh batch of our lovely vanilla cake batter. This will be the main cake. We pour a layer of this white batter into our prepared round cake pans, then carefully arrange the frozen, colorful cake balls on top. We gently press them in before covering them completely with the remaining batter. It’s like tucking them into a cozy bed.
The final step is the bake. The cake will need a little longer in the oven than a standard cake, as the frozen balls create cold spots that need extra time to cook through. You’ll know it’s ready when a wooden skewer inserted into the center (avoiding a dot) comes out clean. The aroma of warm vanilla will fill your home, a beautiful sign of the delicious secret baking inside.
Mistakes to Avoid
Even the most enchanting recipes can have a few tricky spots. But with a little friendly guidance, you can navigate the process of making Dot Cakes with confidence and avoid the common pitfalls that might stand between you and a perfect polka-dotted slice.
- Not Freezing the Cake Balls Solid. This is the most critical step. If the cake balls are merely chilled or slightly soft, they will melt and blend into the surrounding batter during baking, resulting in colorful streaks instead of distinct dots. Ensure they are frozen hard, like little marbles, before you proceed.
- Over-mixing the Cake Batter. After you add the flour, mix only until the streaks of flour disappear. Over-mixing develops the gluten in the flour, which can lead to a tough, dense, and rubbery cake crumb instead of the light and tender texture we’re aiming for.
- Using Liquid Food Coloring. While tempting to use what you might have on hand, liquid food colorings are less concentrated and can add too much moisture to the batter. This can make the first cake gummy and can thin out the main batter. Stick to gel food coloring for vibrant colors that don't compromise texture.
- Underbaking the Final Cake. The frozen cake balls create cold spots within the batter, meaning the cake needs a bit more time in the oven to cook through completely. Be patient and rely on the skewer test. Check the cake in a few spots to ensure the batter around the dots is fully cooked.
- Frosting a Warm Cake. This is a universal cake-baking rule, but it bears repeating! If you try to apply cream cheese frosting to even a slightly warm cake, you will have a melted, sliding mess. Be patient and let the cake layers cool completely to room temperature before you even think about frosting.
How to Serve This
Serving your homemade Dot Cakes is all about celebrating the beautiful surprise you’ve created. The presentation should be simple to let the stunning interior be the star of the show. A classic, elegant presentation will always elevate this delightful dessert.
After frosting the cake with luscious cream cheese frosting, you can keep it simple with a smooth finish or create gentle swirls with the back of a spoon for a more rustic look. A scattering of colorful sprinkles over the top can give a playful hint at the fun that lies within. Place the cake on a simple white or clear cake stand to make it a true centerpiece for your table.
When it’s time to serve, use a long, sharp, thin-bladed knife. For the cleanest slices that show off the dots perfectly, dip the knife in hot water and wipe it dry between each cut. This prevents the frosting from dragging and keeps the pattern inside pristine. For a perfect pairing, serve slices with a side of fresh, tart berries like raspberries or strawberries. Their bright acidity provides a wonderful contrast to the rich, sweet cake and frosting. A simple cup of hot mint tea or a cool glass of milk also makes for a comforting and classic accompaniment, letting the wonderful flavor of the Dot Cakes shine.
Make-Ahead and Storage Guide
One of the best things about this Dot Cakes recipe is how well its components can be prepared in advance, making the final assembly day much less hectic. Proper storage will also ensure your beautiful creation stays fresh and delicious for days.
Make-Ahead: The cake balls are perfect for making ahead. You can prepare and roll them, then store them in an airtight container or freezer bag in the freezer for up to a month. This breaks the process into two very manageable days. The cake layers themselves can also be baked a day in advance. Once completely cooled, wrap them tightly in plastic wrap and store them at room temperature.
Fridge Storage: Once the cake is fully assembled and frosted, it should be stored in the refrigerator due to the cream cheese frosting. Place it in a cake carrier or cover it loosely with plastic wrap (use toothpicks to prevent the wrap from touching the frosting). It will stay fresh and delicious for up to 4 days. For the best flavor and texture, let the cake sit at room temperature for about 20-30 minutes before serving.
Freezing: You can freeze the unfrosted, cooled cake layers. Wrap each layer securely in two layers of plastic wrap and then a layer of aluminum foil. They can be frozen for up to 2 months. Thaw them at room temperature before frosting. While you can freeze the frosted cake, the texture of the cream cheese frosting can change slightly upon thawing, so I recommend frosting it fresh for the best results.
Reader Questions Answered
Can I use a different flavor of cake?
Absolutely! While vanilla is classic because it provides a neutral background for the colorful dots, you could certainly experiment. A lemon cake would be delicious with berry-colored dots, or you could make a chocolate cake and use vanilla cake balls for a reverse effect. Just be sure the cake batter is thick enough to suspend the frozen balls.
Is it possible to make this recipe gluten-free?
Yes, you can adapt this Dot Cakes recipe to be gluten-free. I recommend using a high-quality, measure-for-measure gluten-free flour blend that contains xanthan gum. The texture may be slightly different, but it will still be a delicious and beautiful cake. Follow the recipe as written, simply substituting the flour.
Why did my cake balls sink to the bottom of the pan?
This usually happens for one of two reasons. First, the cake balls might not have been frozen completely solid, causing them to be too soft to stay suspended. Second, your main cake batter might have been a bit too thin. Ensure you are measuring your ingredients accurately, especially the liquids, to maintain a thick, supportive batter.
Can I make this as cupcakes instead of a layer cake?
What a fun idea! You can definitely make Dot Cakes cupcakes. Simply place one or two small, frozen cake balls into the center of each cupcake liner after you've filled it halfway with batter, then top with a bit more batter to cover. You will need to adjust the baking time significantly—start checking them for doneness around the 18-20 minute mark.
Can I use a different type of frosting?
A simple buttercream would work wonderfully as well. However, I personally love the slight tang of cream cheese frosting as it beautifully balances the sweetness of the vanilla cake. If you opt for buttercream, you may want to add a tiny pinch of salt or a squeeze of lemon juice to cut the sweetness a little.
Homemade Dot Cakes (Polka Dot Cake)
A delightful surprise-inside cake featuring colorful polka dots in a moist vanilla crumb. Perfect for celebrations and fun family gatherings.
Prep Time
1h 30m
Cook Time
55 min
Total Time
2h 25m
Servings
12 servings
Ingredients
For 12 servings
- For the First Cake (the 'Dots'):
- 1 1/2 cups (180g) cake flour
- 1 cup (200g) granulated sugar
- 1 1/2 tsp baking powder
- 1/2 tsp salt
- 1/2 cup (113g) unsalted butter, at room temperature
- 2 large eggs, at room temperature
- 1/2 cup (120ml) buttermilk, at room temperature
- 1 tsp pure vanilla extract
- Gel food coloring (assorted colors)
- For the Main Cake:
- 3 cups (360g) cake flour
- 2 cups (400g) granulated sugar
- 3 tsp baking powder
- 1 tsp salt
- 1 cup (226g) unsalted butter, at room temperature
- 4 large eggs, at room temperature
- 1 cup (240ml) buttermilk, at room temperature
- 2 tsp pure vanilla extract
- For the Cream Cheese Frosting:
- 16 oz (452g) block cream cheese, softened
- 1 cup (226g) unsalted butter, softened
- 4 cups (480g) powdered sugar, sifted
- 2 tsp pure vanilla extract
- 1/4 tsp salt
- Sprinkles for decoration (optional)
Instructions
- 1
Prepare the First Cake Batter
Preheat your oven to 350°F (175°C). Grease and flour a 9x13 inch baking pan. In a large bowl, whisk together the 1 1/2 cups cake flour, 1 cup sugar, 1 1/2 tsp baking powder, and 1/2 tsp salt. Add the 1/2 cup of softened butter and mix on low speed until the mixture resembles coarse sand.
- 2
Color and Bake the First Cake
In a separate bowl, whisk together the 2 eggs, 1/2 cup buttermilk, and 1 tsp vanilla. Pour the wet ingredients into the dry ingredients and mix until just combined. Divide the batter evenly into small bowls (one for each color you plan to use). Add a few drops of gel food coloring to each bowl and stir until vibrant. Pour the colored batters into the prepared pan, creating patches of color. Bake for 15-20 minutes, or until a toothpick inserted into the center comes out clean. Let it cool completely.
- 3
Form the Cake Balls
Once the colored cake is cool, crumble it into a large bowl until you have fine crumbs. Add 2-3 tablespoons of frosting (you can make a small amount of a simple buttercream or use a bit of the main frosting later) to the crumbs and mix with your hands until the mixture holds together like dough. Roll the mixture into small, tight balls about 1-inch in diameter.
- 4
Freeze the Cake Balls
Place the rolled cake balls on a parchment-lined baking sheet. Transfer the sheet to the freezer and freeze for at least 1-2 hours, or until completely solid. This step is critical and cannot be skipped, as it prevents the dots from melting during the final bake.
- 5
Prepare the Main Cake Batter
Preheat your oven to 350°F (175°C). Grease and flour two 9-inch round cake pans. In a large bowl, repeat the process for the main cake: whisk together 3 cups cake flour, 2 cups sugar, 3 tsp baking powder, and 1 tsp salt. Add the 1 cup of softened butter and mix on low until sandy.
- 6
Finish the Main Batter
In a separate bowl, whisk together the 4 eggs, 1 cup buttermilk, and 2 tsp vanilla extract. Add the wet ingredients to the dry ingredients in two additions, mixing on low speed until just combined after each addition. Do not overmix.
- 7
Assemble the Dot Cakes
Divide half of the main batter between the two prepared cake pans, spreading it evenly. Remove the cake balls from the freezer and arrange them evenly over the batter in both pans, pressing them down slightly. Pour the remaining batter over the cake balls, ensuring they are all covered.
- 8
Bake the Final Cakes
Bake for 35-45 minutes, or until a wooden skewer inserted into the center of the cake (try to avoid hitting a cake ball) comes out clean. The cake will take longer to bake than usual due to the frozen balls. Let the cakes cool in their pans for 15 minutes before inverting them onto a wire rack to cool completely.
- 9
Prepare the Cream Cheese Frosting
In a large bowl, use an electric mixer to beat the softened cream cheese and softened butter together on medium-high speed until smooth and creamy, about 2 minutes. Reduce the speed to low and gradually add the sifted powdered sugar until combined. Add the vanilla extract and salt, then increase the speed to high and beat for 3 minutes until light and fluffy.
- 10
Assemble and Crumb Coat
Place one cooled cake layer on your serving plate or cake stand. Spread about 1 cup of frosting evenly over the top. Place the second cake layer on top. Apply a thin layer of frosting all over the top and sides of the cake to trap any loose crumbs. Refrigerate the cake for 20-30 minutes to set the crumb coat.
- 11
Frost and Decorate
Remove the cake from the refrigerator and apply the remaining frosting, smoothing the sides and top with an offset spatula or creating decorative swirls. If desired, top with colorful sprinkles. For the cleanest slices, chill the cake for another 30 minutes before serving.
Nutrition Facts
Per serving (estimated)
650 calories
Calories
85g
Carbs
7g
Protein
32g
Fat
1g
Fiber
450mg
Sodium
65g
Sugar


