

Easy Rhubarb Scones Recipe (Flaky & Tender!)
My Easy Rhubarb Scones are tender, flaky, and bursting with tangy flavor. Ready in under 45 minutes for the perfect brunch or afternoon treat!
cookwithyara.com/recipes/easy-rhubarb-scones
There are some days when the clock seems to move twice as fast. Between juggling work, family, and the endless to-do list, the idea of baking something from scratch can feel like a distant dream. Yet, the craving for something warm, comforting, and homemade persists. We long for those simple pleasures—the scent of butter and sugar filling the kitchen, the joy of sharing a treat with loved ones—but feel we just don't have the time or energy. It’s on these days that we need a recipe that meets us where we are: quick, uncomplicated, and deeply rewarding.
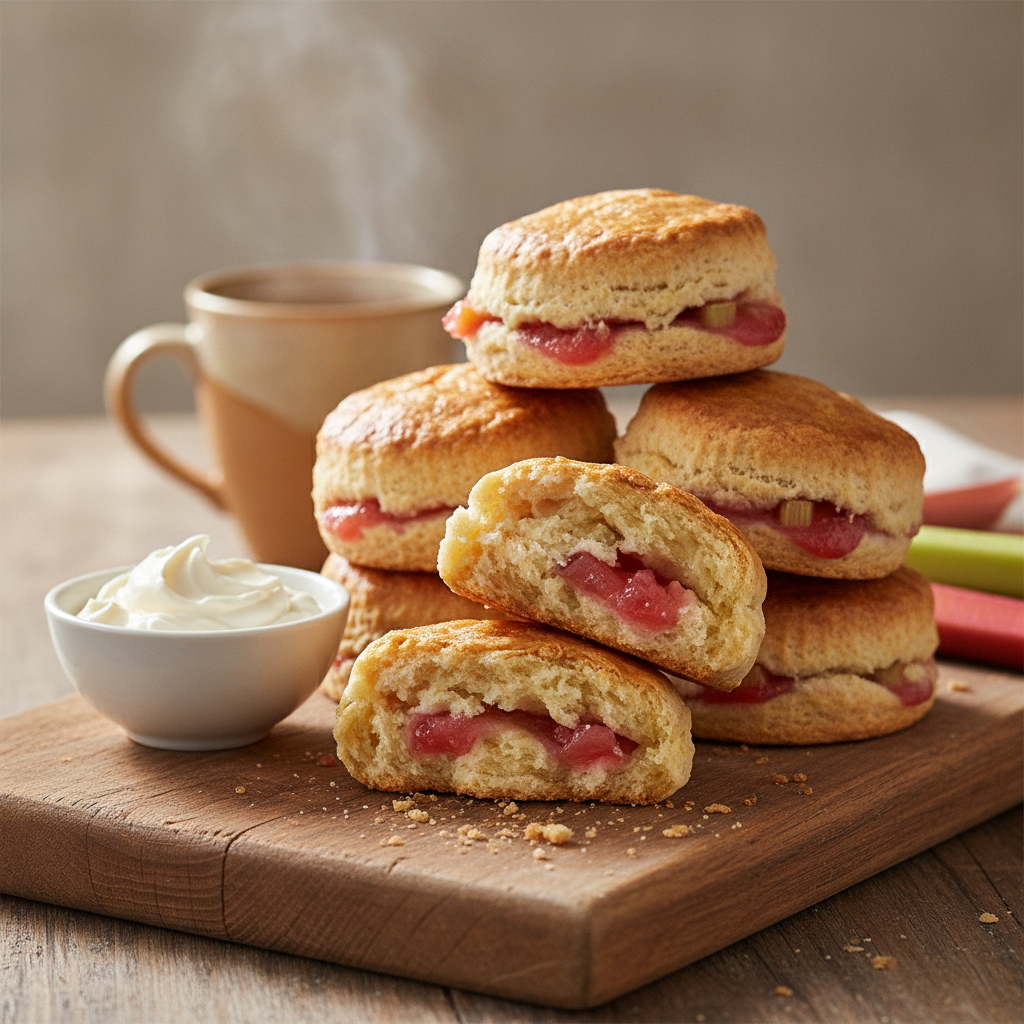
This is precisely where my recipe for Easy Rhubarb Scones comes in. It's a culinary hug in baked form, designed for the realities of modern life. Forget complicated techniques and a sink full of dishes; this recipe is streamlined for speed and simplicity without sacrificing an ounce of flavor or that incredible, melt-in-your-mouth texture. Imagine pulling a tray of perfectly golden, beautifully risen scones from your oven, their craggy tops sparkling with sugar, revealing pockets of tender, jammy rhubarb with every bite. This isn't an all-day baking project; this is your new secret for creating a moment of pure, delicious calm, from kitchen to table in well under an hour.
Why This Is Your New Go-To Treat
In a world of complex recipes, the simple, reliable ones are the true gems. This Easy Rhubarb Scones recipe isn't just about the delightful final product; it's about the ease and joy of the process. It’s designed to fit into your life, not the other way around. Here are a few reasons why you'll find yourself returning to this recipe time and time again.
Effortless Speed: From gathering your ingredients to that first warm bite, you’re looking at less than 45 minutes. The active prep time is remarkably short, making these scones perfect for a spontaneous weekend brunch or a satisfying afternoon baking session when the craving strikes. There’s no waiting for dough to rise or chill for hours.
Minimal Mess, Maximum Joy: We all appreciate a recipe that doesn’t leave the kitchen in a state of chaos. This one primarily uses one bowl for mixing the dough and one baking sheet for baking. The cleanup is as quick as the preparation, leaving you more time to actually sit down and enjoy your beautiful, homemade Easy Rhubarb Scones.
Pantry-Friendly Ingredients: You likely have most of the core ingredients—flour, sugar, butter, baking powder—in your kitchen right now. The star, rhubarb, is a seasonal delight, but the rest are everyday staples. This means you’re never far from being able to whip up a batch.
Irresistibly Flaky and Tender: The secret to a truly great scone is the texture, and this recipe delivers. By using frozen grated butter, we create countless little pockets that release steam in the oven, resulting in an incredibly light, flaky crumb that’s contrasted by a satisfyingly crisp, golden exterior. Each bite is a textural dream.
A Celebration of Seasonal Flavor: There is something so special about cooking with the seasons. Using fresh rhubarb connects us to the rhythm of the year. The tart, vibrant tang of the rhubarb cuts through the richness of the buttery scone, creating a perfectly balanced flavor that feels both comforting and refreshing.
Simple Ingredients, Big Flavor
The magic of a truly great recipe often lies not in a long, complicated list of ingredients, but in the synergy of a few well-chosen, high-quality ones. These Easy Rhubarb Scones are a testament to that philosophy. Each component plays a crucial role in building the final, delicious product, turning simple pantry staples into something truly special.
-
All-Purpose Flour: This is the foundation of our scones, providing the structure. I prefer unbleached all-purpose flour for its consistent results. The key is not to overwork it; a light touch is essential for a tender crumb. Gluten development is the enemy of a good scone, so we mix just until the dough comes together.
-
Granulated Sugar: Just enough to add a gentle sweetness that complements, rather than overpowers, the tartness of the rhubarb. It also helps create a tender texture and contributes to that beautiful golden-brown color on top.
-
Baking Powder: This is our primary leavening agent, responsible for the impressive lift and airy texture of the scones. Always check the expiration date on your baking powder; fresh leavening is non-negotiable for a successful bake.
-
Fine Sea Salt: Salt is a flavor enhancer. It doesn't make the scones salty, but it sharpens and brightens all the other flavors, from the rich butter to the tangy rhubarb. A small amount makes a world of difference.
-
Unsalted Butter: This is perhaps the most critical ingredient for texture. It must be very, very cold—I highly recommend freezing it for at least 30 minutes. When you grate the frozen butter into the flour, it creates small, flat shards. In the heat of the oven, these butter pieces melt and release steam, creating the flaky layers we're after. Using unsalted butter gives you full control over the salt content.
-
Fresh Rhubarb: The star of the show! Look for firm, crisp stalks with a vibrant pink or red color. We’ll dice it into small pieces so that you get a burst of tart, jammy flavor in every single bite. There's no need to peel it; the skin softens beautifully during baking and adds lovely color.
-
Buttermilk: The acidity in buttermilk reacts with the baking powder for extra lift, and it also contributes to a wonderfully soft, tender crumb. Its slight tang is a perfect complement to the sweet and tart flavors. If you don't have buttermilk, you can make a quick substitute by adding a tablespoon of lemon juice or white vinegar to regular milk and letting it sit for 5-10 minutes.
-
Egg: One egg enriches the dough, adding flavor, color, and structure. We'll also use a little for an egg wash, which gives the scones a gorgeous, glossy, professional-looking finish and helps the coarse sugar topping adhere.
Step-by-Step in Plain English
Baking can sometimes feel intimidating, but I promise you, the process for making these Easy Rhubarb Scones is straightforward and forgiving. Let’s walk through it together, breaking it down into simple, manageable stages. Think of it less as a strict set of rules and more as a gentle guide to creating something wonderful. You'll see just how simple it is to achieve bakery-quality results right in your own kitchen.
Stage 1: The Cold Prep (About 5 minutes) First things first, we harness the power of cold. Pop your stick of butter in the freezer for at least 30 minutes before you begin. This is our non-negotiable secret for flaky scones. While that’s chilling, preheat your oven to 400°F (200°C) and line a baking sheet with parchment paper. This preparation ensures that once the dough is mixed, it can go straight into the hot oven, which is key for getting that explosive rise.
Stage 2: The Dry Mix (About 3 minutes) In a large bowl, whisk together your dry ingredients: the all-purpose flour, granulated sugar, baking powder, and fine sea salt. Whisking does more than just combine them; it aerates the flour and ensures the baking powder is evenly distributed, which means every scone will rise beautifully. This simple step sets the stage for a light, even texture.
Stage 3: Incorporating the Butter and Rhubarb (About 5 minutes) Now for the fun part. Grab your frozen butter and a box grater. Grate the entire stick of butter directly into the flour mixture. Use your fingertips to quickly toss the butter shards with the flour until they are coated. The goal is to keep the butter pieces distinct. Then, gently fold in your diced fresh rhubarb. The mixture will look shaggy and a bit messy, and that’s exactly what you want.
Stage 4: Bringing It All Together (About 4 minutes) In a separate small bowl, whisk together the wet ingredients: the buttermilk, the egg, and a splash of vanilla extract if you're using it. Pour this mixture all at once into the dry ingredients. Use a spatula or a fork to mix until just combined. The dough will be sticky and shaggy—do not overmix! Overmixing develops gluten and leads to tough scones. We want tenderness above all else. That’s it, you’re halfway done with making these delicious Easy Rhubarb Scones.
Stage 5: Shaping and Cutting (About 3 minutes) Turn the shaggy dough out onto a lightly floured surface. With floured hands, gently press and knead the dough just 2-3 times to bring it together. Pat it into a circle that's about 1-inch thick. Use a sharp knife or a bench scraper to cut the circle into 8 equal wedges, just like a pizza. This method is much faster and easier than using a round cutter.
Stage 6: The Finishing Touches and Baking (About 22 minutes) Carefully transfer the wedges to your prepared baking sheet, leaving a little space between them. For that bakery-style finish, brush the tops with a simple egg wash (one egg yolk beaten with a splash of milk) and sprinkle generously with coarse sugar for a delightful crunch. Bake for 20-22 minutes, or until the scones are tall, golden brown, and cooked through. The kitchen will smell absolutely divine. Let them cool for a few minutes before enjoying what might just be the best rhubarb scones you've ever had.
Pro Shortcuts and Time-Savers
Even a recipe as straightforward as these Easy Rhubarb Scones can be made faster with a few clever tricks up your sleeve. For those moments when you need a delicious homemade treat on a tight schedule, these shortcuts are your best friend. They're all about working smarter, not harder, in the kitchen.
-
Prep Your Dry Mix Ahead: Measure out and whisk together your flour, sugar, baking powder, and salt and store it in an airtight container in your pantry. You can make several batches of this mix at once. When you're ready to bake, you've already completed the first step, saving you precious minutes.
-
The Food Processor Method: If you have a food processor, it can make quick work of cutting in the butter. Cube your cold (not frozen, for this method) butter and add it to the dry ingredients in the processor bowl. Pulse a few times until the butter is the size of small peas. Then, transfer the mixture to a bowl and proceed with adding the rhubarb and wet ingredients by hand. This saves you from grating the butter and can bring the dough together in seconds.
-
Frozen Fruit is Your Friend: While fresh rhubarb is wonderful, chopping it can take time. Keep a bag of pre-diced rhubarb in your freezer. You can add it to the scone dough directly from the freezer, which has the added benefit of helping to keep the butter and dough cold, promoting an even flakier texture for your Easy Rhubarb Scones.
-
Freeze-Ahead Scone Dough: This is my favorite make-ahead trick. Prepare the recipe all the way through to cutting the wedges. Place the unbaked scones on a parchment-lined baking sheet and freeze until solid. Once frozen, transfer them to a freezer-safe bag or container. You can bake them directly from frozen whenever you want fresh scones; just add 5-7 minutes to the baking time. It's a fantastic way to have a homemade treat ready at a moment's notice.
Ways to Switch It Up
One of the greatest joys of baking is making a recipe your own. This Easy Rhubarb Scones recipe is a perfect canvas for experimentation. Once you've mastered the basic technique, feel free to play with different flavors and ingredients. Here are a few ideas to inspire your next batch.
-
Add a Touch of Warm Spice: Introduce a hint of cozy spice to complement the rhubarb. Add 1/2 teaspoon of ground cardamom or 1/4 teaspoon of ground nutmeg to your dry ingredients. Cardamom, in particular, has a beautiful floral note that pairs wonderfully with tart fruit, giving the scones a subtle, sophisticated Levantine-inspired aroma.
-
Introduce a Citrus Zest: Brighten up the flavor profile by adding the finely grated zest of one orange or one lemon to the dry ingredients. Rub the zest into the sugar with your fingertips before mixing to release its aromatic oils. Orange and rhubarb are a classic pairing, and the citrus notes will make the scones taste even fresher.
-
A Nutty Crunch: For added texture and a rich, nutty flavor, try mixing in 1/2 cup of chopped toasted walnuts or pecans when you add the rhubarb. The crunch of the nuts provides a wonderful contrast to the tender scone and soft, jammy fruit.
-
Sweet and Spicy Ginger: Fresh or crystallized ginger is a fantastic partner for rhubarb. Add 1 tablespoon of finely minced crystallized ginger or 1 teaspoon of ground ginger to the dough. The gentle heat and pungent sweetness of the ginger will cut through the richness of the butter and elevate the entire flavor experience.
-
White Chocolate and Rhubarb: For a more decadent version, fold in 1/2 cup of white chocolate chips along with the rhubarb. The creamy sweetness of the white chocolate balances the rhubarb's tartness beautifully, creating a truly indulgent treat. A variation on the classic Easy Rhubarb Scones that feels extra special.
Storing Leftovers the Right Way
While these Easy Rhubarb Scones are undeniably best when enjoyed fresh and warm from the oven, they can certainly be stored for later. Proper storage is key to preserving their wonderful texture and flavor, ensuring that your second-day scone is nearly as delightful as the first.
At Room Temperature: If you plan to eat the leftover scones within a day or two, storing them at room temperature is your best bet. Place them in an airtight container or a resealable bag. To prevent them from getting soggy, you can place a paper towel inside the container to absorb any excess moisture. Avoid storing them in the refrigerator, as the cold air can dry them out quickly and make them hard.
Freezing for Later: Scones freeze beautifully, which is excellent news for anyone who loves to bake in batches. First, allow the baked scones to cool completely to room temperature. This is a crucial step to prevent ice crystals from forming. Arrange them in a single layer on a baking sheet and place them in the freezer until solid, about an hour. Once they are fully frozen, transfer them to a heavy-duty freezer bag or an airtight container. They will keep well in the freezer for up to 3 months.
The Best Way to Reheat: When you’re ready to enjoy a stored scone, reheating is essential to bring it back to life. The oven or a toaster oven is the superior method. Preheat it to 350°F (175°C) and place the scone directly on the rack or a baking sheet. Heat for 5-8 minutes (or 10-12 minutes if reheating from frozen). This method re-crisps the exterior while warming the interior, making it taste almost freshly baked. While a microwave is quick, it can make the scone soft and doughy, so I recommend using it only as a last resort.
Quick Answers to Common Questions
Here are answers to some of the questions I often receive about making these Easy Rhubarb Scones. I hope they help you feel even more confident as you head into the kitchen!
Can I make the dough ahead of time?
Yes, absolutely! You have two great options. You can mix the dough, shape it into a disc, wrap it tightly in plastic wrap, and refrigerate it for up to 24 hours before cutting and baking. Alternatively, you can follow the recipe through cutting the scones, freeze them solid on a baking sheet, and then transfer them to a freezer bag for up to 3 months. You can bake them straight from the freezer, just add a few extra minutes to the baking time.
What if I don't have buttermilk?
You can easily make a substitute! For every 1 cup of buttermilk required (this recipe calls for 3/4 cup), measure out the same amount of regular milk. Remove 1 tablespoon of the milk and replace it with 1 tablespoon of lemon juice or white vinegar. Stir and let it sit for 5-10 minutes. It will curdle slightly and be ready to use.
My scones didn't rise much. What went wrong?
This is usually due to one of three things. First, check that your baking powder is fresh—it loses its potency over time. Second, your butter may not have been cold enough. Warm butter will melt into the dough instead of creating steam pockets for lift. Lastly, be careful not to overmix the dough or twist the cutter when cutting, as this can seal the edges and prevent a good rise.
Can I use frozen rhubarb instead of fresh?
Yes, you can. Do not thaw the rhubarb before using it; add it to the flour mixture while it is still frozen. This helps keep the dough cold. You may need to add an extra minute or two to the baking time to ensure the scones are cooked through. Using frozen rhubarb is a great way to enjoy these Easy Rhubarb Scones all year round.
How can I make these scones gluten-free?
For a gluten-free version, you can substitute the all-purpose flour with a high-quality 1-to-1 gluten-free baking flour blend that contains xanthan gum. The texture will be slightly different—a bit more delicate and crumbly—but still delicious. Follow the recipe instructions as written, being extra gentle when handling the dough.
Easy Rhubarb Scones
Incredibly tender and flaky scones bursting with tart, jammy rhubarb. This simple, one-bowl recipe is ready in under 45 minutes, perfect for breakfast, brunch, or an afternoon treat.
Prep Time
20 min
Cook Time
22 min
Total Time
42 min
Servings
8 scones
Ingredients
For 8 scones
- 2 1/2 cups (300g) all-purpose flour
- 1/2 cup (100g) granulated sugar
- 1 tablespoon baking powder
- 1/2 teaspoon fine sea salt
- 1/2 cup (113g) unsalted butter, frozen solid
- 1 1/2 cups (180g) fresh rhubarb, cut into 1/2-inch dice
- 3/4 cup (180ml) buttermilk, cold
- 1 large egg
- 1 teaspoon vanilla extract (optional)
- 1 egg yolk, beaten with 1 tablespoon milk, for egg wash
- 2 tablespoons coarse sugar (like turbinado), for sprinkling
Instructions
- 1
Prepare Oven and Butter
Place the stick of unsalted butter in the freezer for at least 30 minutes. Preheat your oven to 400°F (200°C) and line a large baking sheet with parchment paper.
- 2
Whisk Dry Ingredients
In a large mixing bowl, whisk together the all-purpose flour, granulated sugar, baking powder, and fine sea salt. Whisking ensures the leavening is evenly distributed for a perfect rise.
- 3
Grate Frozen Butter
Remove the butter from the freezer. Using the large holes of a box grater, grate the entire stick of frozen butter directly into the flour mixture.
- 4
Coat Butter and Add Rhubarb
Use your fingertips or a pastry blender to quickly toss the grated butter into the flour until it's fully coated. Gently fold in the diced rhubarb until it is evenly distributed.
- 5
Mix Wet Ingredients
In a separate small bowl or liquid measuring cup, whisk together the cold buttermilk, the large egg, and the vanilla extract, if using, until smooth.
- 6
Combine Wet and Dry
Pour the wet ingredient mixture into the dry ingredient mixture all at once. Use a fork or a spatula to mix until a shaggy, sticky dough just begins to form. Do not overmix.
- 7
Gently Knead and Shape
Turn the dough out onto a lightly floured surface. Gently knead it just 2-3 times to bring it together. Pat the dough into a circle about 8 inches in diameter and 1 inch thick.
- 8
Cut the Scones
Using a sharp knife or a bench scraper, cut the circle into 8 equal wedges, as you would a pizza. This prevents twisting and ensures a higher rise.
- 9
Arrange on Baking Sheet
Carefully transfer the scones to the prepared baking sheet, arranging them about 2 inches apart to allow for even baking and browning.
- 10
Apply Egg Wash and Sugar
In a small bowl, beat the egg yolk with one tablespoon of milk. Brush this egg wash lightly over the tops of the scones, then sprinkle them generously with coarse sugar for a crunchy topping.
- 11
Bake to Golden Brown
Bake for 20-22 minutes, or until the scones are risen, firm to the touch, and a deep golden brown on top. The aroma in your kitchen will be wonderful.
- 12
Cool and Serve
Let the scones cool on the baking sheet for 5 minutes before transferring them to a wire rack to cool slightly more. They are best served warm, on their own or with a dollop of cream.
Nutrition Facts
Per serving (estimated)
320 calories
Calories
45g
Carbs
6g
Protein
14g
Fat
2g
Fiber
350mg
Sodium
18g
Sugar


