

How to Make the Best Homemade Garlic Bread
Learn the secrets to perfectly crispy, buttery homemade garlic bread. My easy, foolproof recipe guarantees amazing flavor every time. Get ready to indulge!
cookwithyara.com/recipes/garlic-bread
There's a special kind of magic that happens when you take a simple loaf of bread and transform it with butter, garlic, and herbs. It’s more than just a recipe; it’s a technique that unlocks a world of flavor and comfort. We’re talking about creating the most incredible homemade garlic bread, a side dish so beloved it often steals the show. Forget the pale, uninspired versions you might find in the freezer aisle. I want to guide you through crafting a loaf that boasts a perfectly golden, shatteringly crisp crust, while the inside remains pillowy soft, steamy, and saturated with fragrant garlic butter. The aroma alone is enough to make your kitchen feel like the warmest, most welcoming place on earth.
Many people feel intimidated by anything involving bread and an oven, thinking it requires special skills or complicated steps. I'm here to completely dispel that myth. Making exceptional garlic bread is one of the most rewarding and surprisingly simple kitchen projects you can undertake. The real secret isn't in some complicated, hard-to-master technique. Instead, it lies in understanding why each step matters—why we use softened butter instead of melted, why we wrap the loaf in foil first, and why the quality of your ingredients makes all the difference. Once you grasp these simple principles, the process becomes intuitive and easy, and you’ll be able to replicate that perfect result every single time.
The Science Behind the Best Garlic Bread
To truly master the art of making perfect garlic bread, it helps to understand a little bit of the kitchen science at play. It’s not complex chemistry, but these simple concepts are what separate good bread from an unforgettable culinary experience. First, let’s talk about that beautiful golden-brown crust. That’s the Maillard reaction in action. When the surface of the bread, coated in butter and oil, is exposed to the high heat of the oven, the sugars and amino acids react, creating hundreds of new aroma and flavor compounds. This is what gives your garlic bread its toasty, deeply savory, and slightly nutty flavor profile.
The butter-and-oil mixture itself is a masterpiece of flavor delivery. Fat is an incredible carrier for aromatic compounds, like those found in fresh garlic and parsley. By creating an emulsion of softened butter and olive oil, we’re making a spread that clings to the bread's crumb, delivering that rich flavor deep into every nook and cranny. Using softened, rather than completely melted, butter is key. It forms a paste that sits on the bread's surface, slowly melting in the oven and basting it, whereas liquid butter would just soak in and potentially make the bread soggy. Finally, our two-step baking process is intentional. Wrapping the loaf in foil for the first bake traps steam, warming the bread through to its core and allowing the butter to melt and infuse the soft interior. Unwrapping it for the final few minutes allows that direct heat to hit the surface, triggering the Maillard reaction and giving you that signature crispy, golden finish. Understanding this turns you from a recipe-follower into a confident cook.
Essential Tools and Ingredients for Garlic Bread
While the technique is straightforward, using the right tools and high-quality ingredients will elevate your homemade garlic bread from good to great. The good news is that you don't need any fancy or expensive equipment. A large serrated bread knife is essential for slicing through the crusty exterior without squishing the soft interior. You’ll also need a sturdy baking sheet to bake the loaf on, a small bowl for mixing your garlic butter, and a small spatula or butter knife for spreading. If you don't have a spatula, the back of a spoon works wonderfully. That’s truly all you need.
When it comes to ingredients, let’s start with the star: the bread. A long, crusty loaf is your best friend here. A French baguette, a wider Italian loaf, or a rustic ciabatta are all fantastic choices because their sturdy crusts can hold up to a generous amount of butter, and their airy interiors soak it up beautifully. For the fat, I love using a combination of high-quality unsalted butter and a good extra virgin olive oil. The butter provides that rich, creamy flavor we all love, while the olive oil adds a layer of fruity, peppery complexity and helps keep the butter from burning. Fresh garlic is non-negotiable for the best flavor; the pre-minced jarred variety simply can't compare to the bright, pungent aroma of freshly minced cloves. Finally, fresh flat-leaf parsley adds a clean, green note that cuts through the richness, and a good pinch of sea salt makes all the other flavors sing.
The Method: Crafting Perfect Garlic Bread, Step by Step
Let's walk through the process of creating the ultimate garlic bread. This method is designed to be foolproof, focusing on the sensory cues that tell you you're on the right track. It's a rhythm you'll quickly learn and love.
First, we prepare the loaf. The goal is to create maximum surface area for our delicious garlic butter. Using your serrated knife, slice the bread into one-inch-thick pieces, but here's the crucial part: don't slice all the way through. Stop about half an inch from the bottom crust. This keeps the loaf intact, creating an accordion-like structure that is easy to serve and fun to pull apart.
Next, we craft the heart of the recipe: the garlic-herb butter. In your bowl, combine the room-temperature softened butter, olive oil, finely minced fresh garlic, chopped parsley, and a generous pinch of sea salt. The butter must be soft enough to mash easily with a fork, not a melted liquid. Mix until you have a cohesive, fragrant, and creamy paste. This is the moment to taste and adjust your seasoning if needed.
Now for the application. Gently pry open each slice of bread and use a knife or small spatula to slather the garlic butter generously on both cut sides. Don't be shy here; this is where all the flavor comes from. Once the inside is done, spread any remaining butter over the top crust of the entire loaf. This step ensures a gloriously golden and crisp finish.
The baking is a two-part act. First, wrap the entire prepared loaf tightly in aluminum foil. This is the steaming stage. Bake it at 400°F (200°C) for about 10 to 12 minutes. This melts the butter, infuses the garlic flavor throughout, and warms the bread to its core without drying it out.
For the grand finale, carefully remove the loaf from the oven and unwrap the top of the foil, exposing the buttery crust to the oven's heat. Place it back in the oven for another 5 to 8 minutes. You're watching for that perfect moment when the top becomes deeply golden brown and irresistibly crispy. Let it rest for a minute before serving, then watch as everyone eagerly tears off a piece of your spectacular homemade garlic bread.
Troubleshooting Your Homemade Garlic Bread
Even the simplest recipes can sometimes go awry, but don't worry. Most common issues with making garlic bread are easily diagnosed and fixed for next time. Let's cover a few potential hurdles.
If your bread turns out soggy, the culprit is likely liquid. This could mean your butter was fully melted instead of softened, which causes it to soak in too quickly and create a greasy texture. It could also mean you skipped the final, unwrapped baking step, which is crucial for crisping up the exterior. Always use softened butter and never skip that final toast.
What if your garlic tastes burnt or acrid? This usually happens when finely minced garlic is exposed to direct, high heat. By mixing the garlic thoroughly into the butter and oil paste, you're protecting it. The fat acts as a buffer, allowing the garlic to cook and become fragrant rather than scorch. If it still burns, your oven might be running hot, so consider reducing the temperature slightly next time.
If you pull apart a slice and the center is still cool, the loaf simply needed more time in its foil wrap. The initial wrapped baking stage is all about heating the bread through to the core. Give it the full 12-15 minutes, especially for a thicker loaf, before you unwrap it for the final browning.
On the other hand, if your bread seems dry, you may not have used enough of the butter mixture. Be generous! This is an indulgent treat. Using a low-fat spread can also lead to dryness, as it contains more water and less of the fat needed to enrich the bread. Stick to full-fat unsalted butter for the best results. Finally, if the flavor seems a little flat, the answer is almost always salt. A proper amount of salt is essential to amplify the taste of the butter and garlic, tying everything together beautifully.
Taking Your Garlic Bread to the Next Level
Once you've mastered the classic homemade garlic bread, you can start to play and customize it. This is where you can let your culinary creativity shine. The most popular variation is, of course, adding cheese. A generous sprinkle of shredded low-moisture mozzarella or provolone, added during the last few minutes of baking, creates a gloriously gooey and satisfying cheesy garlic bread. For a sharper, nuttier flavor, a dusting of finely grated Parmesan or Pecorino Romano cheese over the top before that final bake is simply divine.
For those of us who love a bit of warmth, a pinch of red pepper flakes or, for a more gentle, smoky heat, Aleppo pepper mixed into the butter spread adds a wonderful new dimension. To lean into my Levantine roots, I sometimes add a sprinkle of za'atar or sumac over the top. Za'atar adds a complex, herby and nutty flavor, while sumac provides a bright, tangy counterpoint to the rich butter. Another professional-level tip is to use roasted garlic instead of raw. Roasting garlic transforms its pungent bite into a deep, sweet, and caramelized flavor that is incredibly luxurious. Simply mash the roasted cloves into your butter for a completely different, yet equally delicious, garlic bread experience.
Storing and Reheating Your Results
While garlic bread is undeniably best when served fresh and hot from the oven, you might occasionally have leftovers. Storing them properly is key to enjoying them later. First, allow the bread to cool completely to room temperature. This is important because wrapping warm bread will trap steam and make the crust soft and soggy. Once cool, wrap the leftovers tightly in aluminum foil or place them in an airtight container.
Your garlic bread can be stored at room temperature for up to two days. Any longer than that, and it's best to freeze it. For freezing, I recommend wrapping the cooled loaf tightly in plastic wrap and then a layer of foil. It will keep well in the freezer for up to three months. When you’re ready to enjoy it, there's no need to thaw. You can reheat it directly from the freezer.
The best way to bring your garlic bread back to life is in the oven. This method best preserves its wonderful texture. Wrap the bread in foil (whether from the counter or the freezer) and place it in a preheated 350°F (175°C) oven. Bake for 10-15 minutes (or 20-25 from frozen), then unwrap the top for the last few minutes to re-crisp the crust. An air fryer also works wonderfully for reheating individual slices, giving you a crispy result in just a few minutes. I would advise against using a microwave, as it tends to make the bread tough and chewy, destroying that perfect texture you worked so hard to create.
Common Questions About Making Garlic Bread
Can I use pre-minced garlic from a jar?
You certainly can in a pinch, but for the absolute best flavor, I strongly recommend using fresh garlic cloves. Jarred garlic often sits in an acidic liquid that can impart a slightly sour or metallic taste, and it lacks the bright, pungent aroma that makes homemade garlic bread so special. Mincing fresh cloves takes only a minute and makes a world of difference.
What's the best type of bread for garlic bread?
The ideal choice is a loaf with a sturdy, crisp crust and a relatively soft, airy interior. A classic French baguette is perfect for thinner, crispier slices, while a wider Italian loaf or a rustic ciabatta will give you softer, chewier pieces. The key is to choose a bread that can stand up to the butter without becoming flimsy.
Can I make garlic bread ahead of time?
Absolutely! This is a great make-ahead side dish for gatherings. You can prepare the entire loaf—slicing it and filling it with the garlic butter spread—up to 24 hours in advance. Simply wrap it tightly in foil and store it in the refrigerator. When you're ready to eat, you can bake it directly from the fridge, adding a few extra minutes to the initial wrapped baking time.
How can I make this recipe dairy-free?
It's very easy to adapt this recipe to be dairy-free. Simply substitute the unsalted butter with a high-quality, plant-based butter alternative. Look for one that comes in a stick form, as it will have a better texture for creating the spread. Combine it with the extra virgin olive oil as directed, and you'll have a delicious dairy-free garlic bread.
My butter mixture won't spread easily. What did I do wrong?
This almost always means your butter was too cold when you started mixing. Butter straight from the refrigerator is too firm to combine properly with the other ingredients. The fix is simple: just let the butter sit out at room temperature for 30 to 60 minutes before you begin. It should be soft enough to easily mash with a fork but not so warm that it's starting to melt.
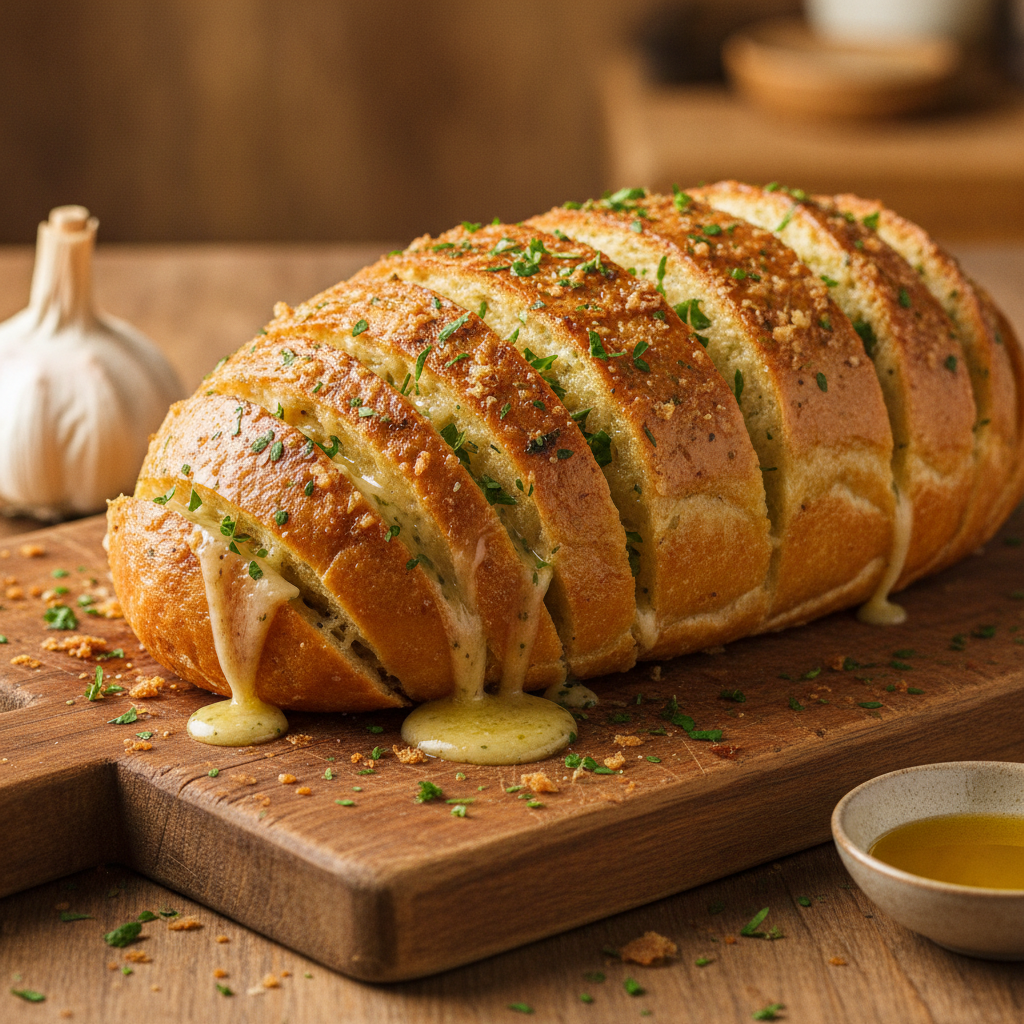
Homemade Garlic Bread
A classic, foolproof recipe for homemade garlic bread featuring a crispy crust, a soft, fluffy interior, and a rich, fragrant garlic-herb butter spread.
Prep Time
15 min
Cook Time
20 min
Total Time
35 min
Servings
8 servings
Ingredients
For 8 servings
- 1 large loaf crusty bread (like a French baguette or ciabatta, about 16-20 inches)
- 1/2 cup (113g) unsalted butter, softened to room temperature
- 1/4 cup extra virgin olive oil
- 6-8 cloves garlic, finely minced or pressed
- 1/2 cup finely chopped fresh parsley
- 1/2 teaspoon sea salt, or to taste
- 1/4 teaspoon black pepper
- 1 cup shredded mozzarella or provolone cheese (optional)
Instructions
- 1
Preheat Oven and Prep Pan
Preheat your oven to 400°F (200°C). Prepare a large baking sheet, or you can place the bread directly on the oven rack if you prefer.
- 2
Slice the Bread
Using a serrated bread knife, slice the loaf into 1-inch thick pieces. Be careful not to cut all the way through the bottom crust; you want the loaf to remain connected at the base like an accordion.
- 3
Prepare Garlic-Herb Butter
In a small bowl, combine the softened unsalted butter, extra virgin olive oil, finely minced garlic, chopped fresh parsley, sea salt, and black pepper. The butter should be at room temperature to mix easily.
- 4
Mix the Spread Thoroughly
Use a fork or a small spatula to mash and mix all the ingredients together until they are fully combined into a smooth, creamy, and fragrant paste. Give it a small taste and adjust the salt level if needed.
- 5
Apply the Butter Spread
Carefully open the slices of the bread and use a butter knife or small spatula to generously spread the garlic butter mixture on both cut sides of each slice. Don't be shy with the amount.
- 6
Coat the Top Crust
Spread any remaining butter mixture over the top crust of the entire loaf. This is the secret to getting a wonderfully golden, glistening, and extra-crispy top.
- 7
First Bake (Wrapped)
Wrap the entire loaf securely in a large piece of aluminum foil. Place it directly on the center oven rack or on a baking sheet. Bake for 10-12 minutes, which allows the bread to heat through and the butter to melt and infuse.
- 8
Second Bake (Unwrapped)
Carefully remove the bread from the oven and open the top of the foil to expose the loaf. Return it to the oven and bake for another 5-8 minutes, or until the top is beautifully golden brown and crispy.
- 9
Add Cheese (Optional)
If you are adding cheese, sprinkle it evenly over the top of the bread during the last 3-4 minutes of the second bake. Continue baking until the cheese is perfectly melted and bubbly.
- 10
Rest and Serve
Remove the finished garlic bread from the oven and let it rest on a cutting board for a minute or two before serving. This allows the butter to settle slightly and makes it easier to handle. Serve immediately while warm and fragrant.
Nutrition Facts
Per serving (estimated)
320 calories
Calories
35g
Carbs
8g
Protein
17g
Fat
2g
Fiber
450mg
Sodium
2g
Sugar


