The Best Homemade Peach Ice Cream Recipe
Discover how to make the creamiest, dreamiest homemade peach ice cream. This recipe uses fresh peaches and a rich custard base for a perfect summer treat.
cookwithyara.com/recipes/peach-ice-cream
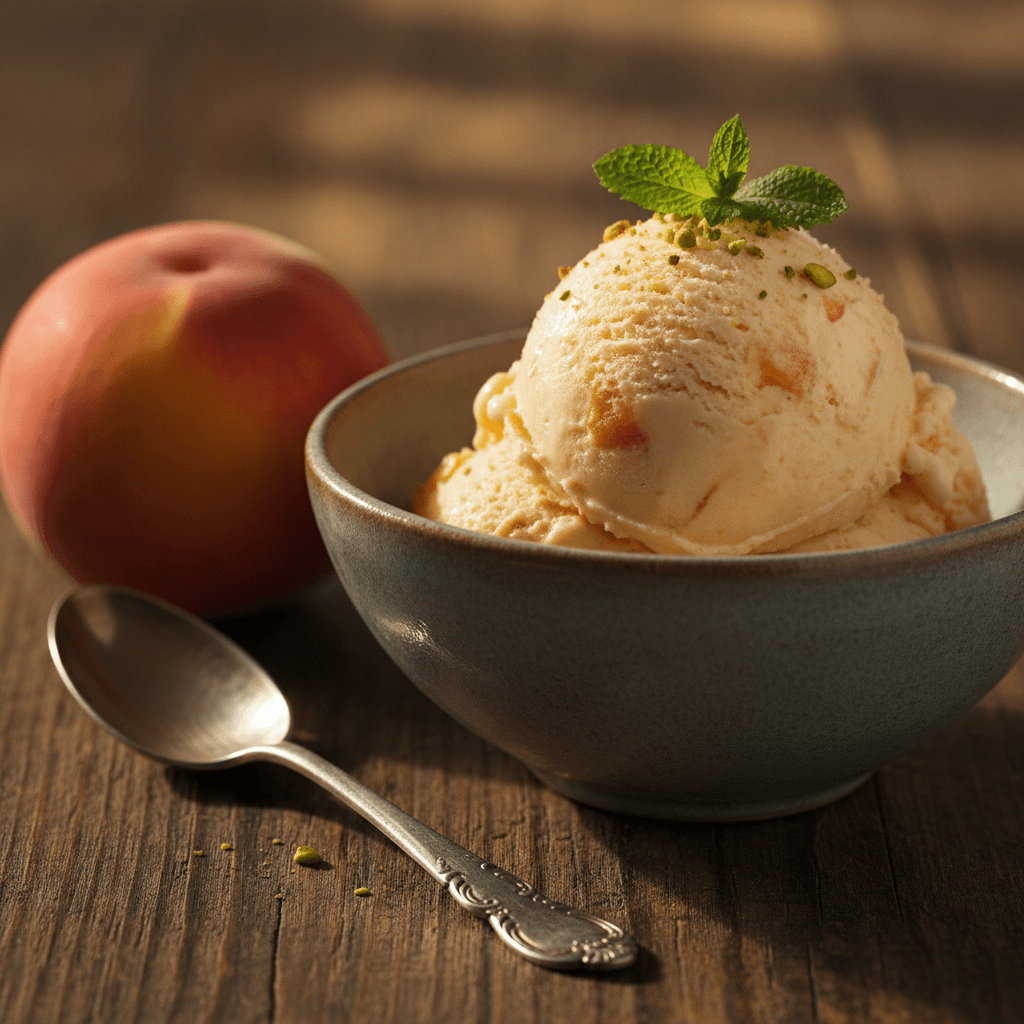
There’s a moment, right before serving a dessert you’ve poured your heart into, that is pure magic. It’s when the conversation quiets, and all eyes turn to the dish you’re bringing to the table. With this homemade peach ice cream, that moment is unforgettable. Imagine a bowl of the softest, palest orange, scooped into perfect spheres that glisten under the light. You can see the delicate flecks of real peach woven through a creamy, luxurious base. The aroma hits first—sweet, sun-ripened fruit with a whisper of warm vanilla. It’s a scent that promises pure, unadulterated summer bliss.
This isn't just any dessert; it’s an experience. It’s the kind of treat that makes people close their eyes on the first bite. As a lover of Mediterranean and Levantine flavors, I believe the best dishes are those that celebrate ingredients at their peak, and that’s the entire philosophy behind this recipe. It looks like it came from a high-end artisanal creamery, but I’m here to guide you through every step. The secret is in the technique—a classic French-style custard base that ensures an impossibly smooth texture, and a method for treating the peaches that concentrates their flavor into something truly special. This is the ultimate peach ice cream, and you can absolutely make it at home.
What Makes This a Showstopper
What elevates a simple dessert into a true showstopper? It’s a combination of stunning visual appeal, an unforgettable flavor journey, and the satisfying feeling of creating something truly special. This homemade peach ice cream checks every single box. Visually, it’s a masterpiece of subtlety. The color is a natural, gentle blush-orange, a testament to the real fruit within—no artificial colors needed. When you scoop it, it holds its shape beautifully, not too hard and not too soft, hinting at the perfect creamy texture awaiting you. The little jewels of peach puree distributed throughout promise a burst of authentic fruit flavor in every spoonful.
Then there’s the flavor experience itself. The first taste is of pure, rich sweet cream, made decadent by a velvety custard base. This is immediately followed by the bright, unmistakable taste of fresh peaches—not a vague, sugary approximation, but the genuine flavor of a sun-warmed peach picked at its peak. There's a gentle tang and a deep, fruity sweetness that lingers beautifully. It's a world away from the often icy, overly sweet tubs from the store. This is the kind of dessert you'd find at a celebrated farm-to-table restaurant, where the focus is on pristine ingredients and masterful technique. And yet, the process is entirely achievable in your own kitchen. Serving this peach ice cream isn’t just about offering a sweet treat; it’s about presenting a moment of pure, handcrafted luxury that your family and guests will remember long after the last spoonful is gone.
The Ingredients That Matter Most
At the heart of any incredible dish are exceptional ingredients, and this peach ice cream is a perfect example. While the list isn’t long, the quality of each component makes a world of difference. Let’s talk about what makes this recipe sing.
First and foremost: the peaches. You absolutely want the most fragrant, ripe yellow peaches you can find. Look for fruit that has a slight give when you press it gently and smells intoxicatingly sweet. Freestone peaches are ideal as the pit comes away easily, making prep simpler. This is where you should splurge; a perfect peach is the soul of this dessert.
Next, the dairy. The foundation of our creamy texture comes from a duo of full-fat heavy cream and whole milk. Do not be tempted to substitute with lower-fat versions! The fat content is crucial for preventing large ice crystals from forming, which is the secret to a silky-smooth, not icy, texture.
For that rich, custardy body, we turn to egg yolks. They act as a natural emulsifier, bringing the fats and liquids together into a stable, velvety base that feels luxurious on the palate. Use fresh, high-quality eggs for the best flavor and color.
Pure cane sugar provides the sweetness, but it also plays a role in the final texture, lowering the freezing point of the base to keep it scoopable. For our aromatics, a high-quality vanilla paste or alcohol-free vanilla extract is essential. Vanilla doesn't overpower the fruit; it beautifully complements and enhances the peach's natural sweetness. A tiny pinch of salt might seem insignificant, but it’s a powerhouse, balancing the sweetness and making all the other flavors pop. Finally, a squeeze of fresh lemon juice is key for the peaches, brightening their flavor and preventing them from browning, ensuring that gorgeous, vibrant color in the finished peach ice cream.
Building It Step by Step
The journey to creating the perfect homemade peach ice cream is a rewarding one, built upon a few key stages that transform simple ingredients into something sublime. It’s a process of patience and care, where each step builds upon the last to create that flawless final texture and flavor.
First, we focus on the star of the show: the peaches. We begin by preparing them, not just chopping them, but macerating them with a bit of sugar and lemon juice. This step draws out their natural juices and creates a glorious syrup, concentrating their essence. Some of these peaches are then gently cooked and pureed to create a smooth, flavorful ribbon that will run through the ice cream, while others are left in small, tender chunks to provide delightful bursts of texture.
Next comes the heart of the recipe: the custard base. This is where the magic of French-style ice cream happens. We gently heat the milk, cream, and a portion of the sugar. In a separate bowl, we whisk the egg yolks and remaining sugar until they’re pale and fluffy. The crucial technique here is tempering—slowly streaming the warm cream mixture into the eggs while whisking constantly. This gently raises the temperature of the yolks without scrambling them, creating a smooth, stable foundation.
The tempered mixture is returned to the heat and cooked gently, stirring constantly, until it thickens just enough to coat the back of a spoon. This custard is then immediately strained through a fine-mesh sieve to catch any tiny bits, ensuring a perfectly silky texture. This step is non-negotiable for a professional-quality result. At this point, we stir in the vanilla and a pinch of salt.
Now comes the most important test of patience: chilling. The custard base must be chilled completely, ideally overnight in the refrigerator. A thoroughly cold base freezes faster in the ice cream maker, which results in smaller ice crystals and a much creamier final product. Rushing this step is the number one cause of icy homemade ice cream.
Finally, the churn. The cold custard is churned according to your ice cream maker’s instructions until it reaches the consistency of soft-serve. In the last few minutes of churning, we stream in the chilled peach puree and fold in the reserved peach chunks. The finished peach ice cream is then transferred to a freezer-safe container to harden for a few hours. This final freeze, or “ripening,” allows the flavors to meld and the texture to firm up into the perfectly scoopable dessert we’ve been dreaming of.
Presentation and Plating Tips
Presenting your homemade peach ice cream with a little extra care can elevate it from a simple dessert to a truly memorable finale for any meal. The beauty of this ice cream lies in its natural, rustic elegance, so our plating should enhance that.
First, consider your serving vessels. Chilling your bowls or glasses in the freezer for at least 20 minutes before serving is a professional touch that makes a huge difference. It prevents the ice cream from melting too quickly, allowing your guests to savor every bite. Simple ceramic bowls in cool tones like slate blue, sage green, or even a classic white can make the pale orange of the peach ice cream pop beautifully.
When it comes to scooping, aim for a perfect sphere. An ice cream scoop dipped briefly in warm water will glide through the frozen dessert, creating a clean, round shape. For a more generous, family-style presentation, you could serve it directly from a chilled, attractive container, allowing guests to help themselves.
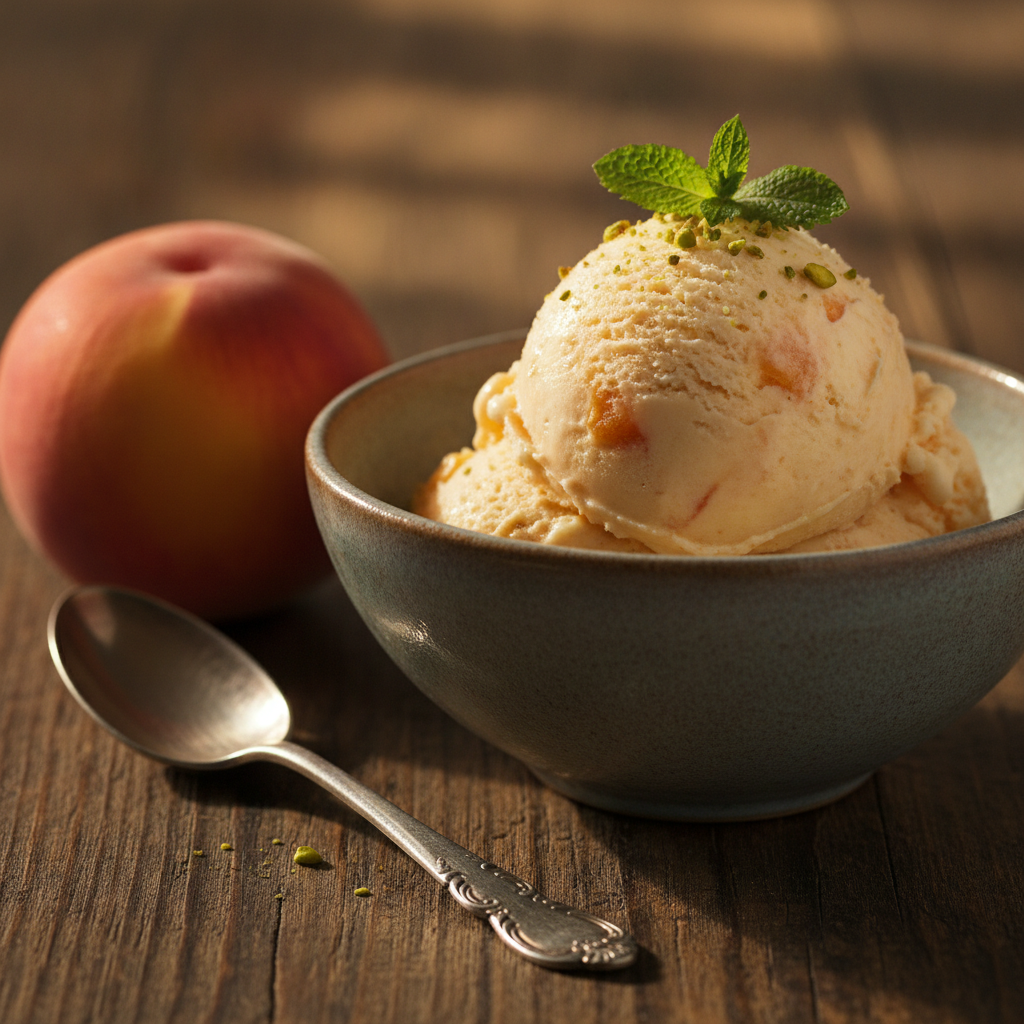
Garnishes are where you can add a final flourish of flavor and visual appeal. A few thin slices of a fresh, ripe peach placed alongside the scoop instantly connects the dessert to its core ingredient. A single, vibrant green mint leaf provides a stunning color contrast and a hint of fresh aroma. For a touch of my beloved Levantine influence, a light sprinkling of finely chopped, unsalted pistachios adds a delightful crunch and a beautiful speckling of green. A very light drizzle of golden honey or a spoonful of the reserved peach syrup can also add an extra layer of sweetness and a lovely sheen. The key is restraint; let the gorgeous color and texture of the peach ice cream itself be the star.
Scaling Up for a Crowd
One of the greatest joys of making a dessert this delicious is sharing it with lots of loved ones. Thankfully, this peach ice cream recipe scales up beautifully for larger gatherings, with just a bit of planning. The key is to manage your time and your equipment effectively.
To double the recipe, simply double all the ingredient quantities. The most important consideration is the capacity of your saucepan for the custard and your ice cream maker. You may need to use a larger pot or Dutch oven to gently cook the custard base without it boiling over. Most home ice cream makers have a 1.5 to 2-quart capacity, so you will almost certainly need to churn the doubled recipe in two separate batches. Never overfill your ice cream maker bowl; it needs space for air to incorporate as it churns, which is essential for a light, creamy texture.
Here’s a smart prep-ahead strategy. The custard base is your best friend when it comes to planning. You can prepare the entire custard base up to two days in advance. Cook it, strain it, and let it chill, tightly covered, in the refrigerator. This breaks up the work and ensures your base is perfectly, deeply chilled when it’s time to churn. The peaches can also be prepared a day ahead. Macerate and cook them as directed, then store the puree and chunks in an airtight container in the fridge.
On the day of your gathering, your main task is simply churning. Churn the first batch, transfer it to a freezer container, and place it in the freezer to firm up. Wash and refreeze your ice cream maker’s bowl (if required by your model) or use a second frozen bowl if you have one, then churn the second batch. Allowing both batches to ripen in the freezer for at least 4-6 hours will meld the flavors and create the perfect scoopable consistency. This way, the active work is done well before your guests arrive, leaving you free to enjoy the occasion.
Storing Any Leftovers
While it’s hard to imagine having any leftover peach ice cream, proper storage is key to making sure that the next scoop is just as creamy and delicious as the first. The main enemy of stored ice cream is air, which can lead to freezer burn and the formation of pesky ice crystals that ruin that perfectly smooth texture you worked so hard to achieve.
Your best tool for storage is a good quality, airtight, freezer-safe container. Shallow, flat containers are often better than deep tubs because they allow the ice cream to freeze more quickly and evenly. Once you've transferred the ice cream to the container, the most important trick is to press a piece of plastic wrap, parchment paper, or wax paper directly onto the entire surface of the ice cream before putting the lid on. This creates a barrier that minimizes contact with air, dramatically reducing the risk of ice crystals forming on the surface.
Store the container in the coldest part of your freezer, which is usually at the very back, not on the door. The temperature fluctuations from opening and closing the freezer door are another culprit behind icy textures. Stored this way, your homemade peach ice cream should maintain its wonderful quality for up to two weeks. After that, it's still perfectly enjoyable, but you may begin to notice a slight change in texture. When you’re ready to serve it again, let the container sit on the counter for 5-10 minutes to soften slightly, making it easier to scoop.
Variations to Explore
Once you’ve mastered this classic peach ice cream recipe, you have a wonderful canvas for culinary creativity. Here are a few variations to explore that can add new dimensions of flavor and texture to this beloved treat.
-
Spiced Peach & Cream: Infuse the warm cream and milk mixture with a cinnamon stick and two or three lightly crushed green cardamom pods for about 30 minutes before making the custard. Strain them out and proceed with the recipe. The warm spices add a beautiful, fragrant depth that pairs exquisitely with the sweet peaches.
-
Grilled Peach & Honey: For a smoky, caramelized flavor, halve and pit your peaches, brush them lightly with a neutral oil, and grill them over medium heat until they have light char marks and are softened. Let them cool, then chop and proceed with the recipe, perhaps swapping some of the sugar for a drizzle of honey in the base.
-
Peach & Raspberry Ripple: Prepare a simple raspberry coulis by simmering fresh or frozen raspberries with a little sugar and a squeeze of lemon juice until thickened. Strain it to remove the seeds and chill it completely. When you transfer the churned peach ice cream to its storage container, layer it with spoonfuls of the raspberry coulis, then gently swirl with a knife to create a beautiful and delicious ripple effect.
-
Tangy Peach Frozen Yogurt: For a lighter, tangier version, replace half of the heavy cream with full-fat, plain Greek yogurt. Stir the yogurt into the custard base after it has been cooked and completely chilled, just before churning. This creates a refreshing treat with a delightful creamy tang.
-
A Simpler Weeknight Version: When you crave the flavor without the time for a custard, you can try a no-churn method. Puree the prepared peaches. In a large bowl, whip 2 cups of cold heavy cream to stiff peaks. In a separate bowl, whisk one (14-ounce) can of sweetened condensed milk with your vanilla and peach puree. Gently fold the whipped cream into the peach mixture. Freeze until firm. The texture will be different—less dense and more airy—but still wonderfully delicious.
Questions You Might Have
Can I make this peach ice cream without an ice cream maker?
Yes, you can! It requires a bit more hands-on time, but it's definitely possible. Prepare the base as directed and pour it into a shallow, freezer-safe dish. Every 30-45 minutes for the first 3-4 hours, remove it from the freezer and use a fork or whisk to vigorously break up any ice crystals, scraping down the sides and corners. This manual churning process helps keep the texture smoother. Fold in your peach puree and chunks about halfway through this process.
Why did my ice cream turn out icy instead of creamy?
Iciness is almost always caused by large ice crystals. This can happen for a few reasons: the custard base wasn't chilled thoroughly enough before churning, your freezer isn't cold enough, or you used lower-fat milk or cream. For the creamiest result, ensure the base is chilled for at least 8 hours (or overnight) and that your freezer is set to its coldest setting.
Can I use frozen or canned peaches for this recipe?
Fresh, ripe peaches will always give you the best, brightest flavor. However, if they aren't in season, high-quality frozen peach slices are the next best option. Thaw them completely and drain any excess liquid before proceeding with the recipe. I would advise against using canned peaches, as they are often packed in a heavy syrup that can make the ice cream overly sweet and alter its texture.
How far in advance can I make the components?
The custard base is perfect for making ahead; it can be made, strained, and stored in an airtight container in the refrigerator for up to 2 days. The peach puree and chunks can also be prepared a day in advance and kept chilled. This makes the final churning process very quick and easy on the day you plan to serve it.
Is it okay to use white peaches instead of yellow?
You can certainly use white peaches. They have a more delicate, floral flavor and less acidity than yellow peaches. Be aware that the final ice cream will have a much paler, creamier color rather than the signature blush-orange hue, but it will still be incredibly delicious.
Creamy Homemade Peach Ice Cream
A rich and decadent homemade peach ice cream made with a French-style custard base and fresh, ripe peaches for the ultimate summer dessert.
Prep Time
25 min
Cook Time
20 min
Total Time
9h
Servings
1.5 quarts
Ingredients
For 1.5 quarts
- 2 lbs ripe yellow peaches (about 4-5 medium)
- 3/4 cup granulated sugar, divided
- 1 tablespoon fresh lemon juice
- 2 cups heavy cream, cold
- 1 cup whole milk
- 1/8 teaspoon fine sea salt
- 6 large egg yolks
- 1 teaspoon vanilla paste or alcohol-free vanilla extract
Instructions
- 1
Prepare the Peaches
Bring a pot of water to a boil. Score a small 'X' on the bottom of each peach. Blanch the peaches in boiling water for 30-60 seconds, then immediately transfer to an ice bath. The skins should peel off easily. Halve, pit, and chop the peaches into small 1/2-inch pieces.
- 2
Macerate the Fruit
In a medium bowl, toss the chopped peaches with 1/4 cup of the granulated sugar and the lemon juice. Let the mixture sit for at least 30 minutes, or until the peaches have released their juices and a syrup has formed.
- 3
Create the Peach Puree
Transfer half of the macerated peach mixture (including the syrup) to a small saucepan. Cook over medium heat for 5-7 minutes until the peaches are very soft. Cool slightly, then blend until smooth. Place the puree and the remaining peach chunks in separate airtight containers and chill thoroughly in the refrigerator.
- 4
Warm the Dairy
In a medium, heavy-bottomed saucepan, combine the heavy cream, whole milk, salt, and the remaining 1/2 cup of granulated sugar. Warm the mixture over medium-low heat, stirring occasionally, until the sugar has dissolved and the mixture is steaming. Do not let it boil.
- 5
Prepare the Egg Yolks
While the cream mixture is warming, place the 6 egg yolks in a separate medium-sized heatproof bowl. Whisk the yolks for about a minute until they are smooth and slightly lightened in color.
- 6
Temper the Eggs
Slowly and carefully, pour about one cup of the warm cream mixture into the egg yolks while whisking constantly. This is called tempering; it gently raises the temperature of the eggs to prevent them from scrambling. Once combined, pour the tempered egg mixture back into the saucepan with the rest of the cream.
- 7
Cook the Custard Base
Return the saucepan to medium-low heat. Cook, stirring constantly with a wooden spoon or heatproof spatula, scraping the bottom of the pan. Continue until the custard thickens enough to coat the back of the spoon (when you run your finger through it, the line should hold). This will take about 5-8 minutes. Do not let it curdle.
- 8
Strain and Add Vanilla
Immediately pour the hot custard through a fine-mesh sieve into a clean bowl. This removes any small bits of cooked egg and ensures a silky-smooth texture. Stir in the vanilla paste or alcohol-free extract.
- 9
Chill the Custard Base
Cover the bowl with plastic wrap, pressing it directly onto the surface of the custard to prevent a skin from forming. Chill in the refrigerator for at least 6 hours, but preferably overnight. The base must be completely cold before churning.
- 10
Churn the Ice Cream
Pour the thoroughly chilled custard base into your ice cream maker and churn according to the manufacturer's instructions. Churn until it reaches the consistency of thick soft-serve, typically about 20-25 minutes.
- 11
Add the Peaches
In the last 2-3 minutes of churning, pour in the chilled peach puree and add the reserved peach chunks. Allow the machine to mix them in evenly.
- 12
Freeze to Ripen
Transfer the finished peach ice cream to a freezer-safe, airtight container. Press a piece of parchment paper or plastic wrap directly onto the surface. Freeze for at least 4-6 hours, or until firm and scoopable. This final step, called ripening, allows the flavors to meld.
Nutrition Facts
Per serving (estimated)
320 calories
Calories
28g
Carbs
5g
Protein
22g
Fat
1g
Fiber
95mg
Sodium
26g
Sugar