The Ultimate Creamy Homemade Peach Ice Cream
Discover how to make the creamiest, dreamiest homemade peach ice cream with this foolproof custard-style recipe. Perfect for summer gatherings!
cookwithyara.com/recipes/homemade-peach-ice-cream
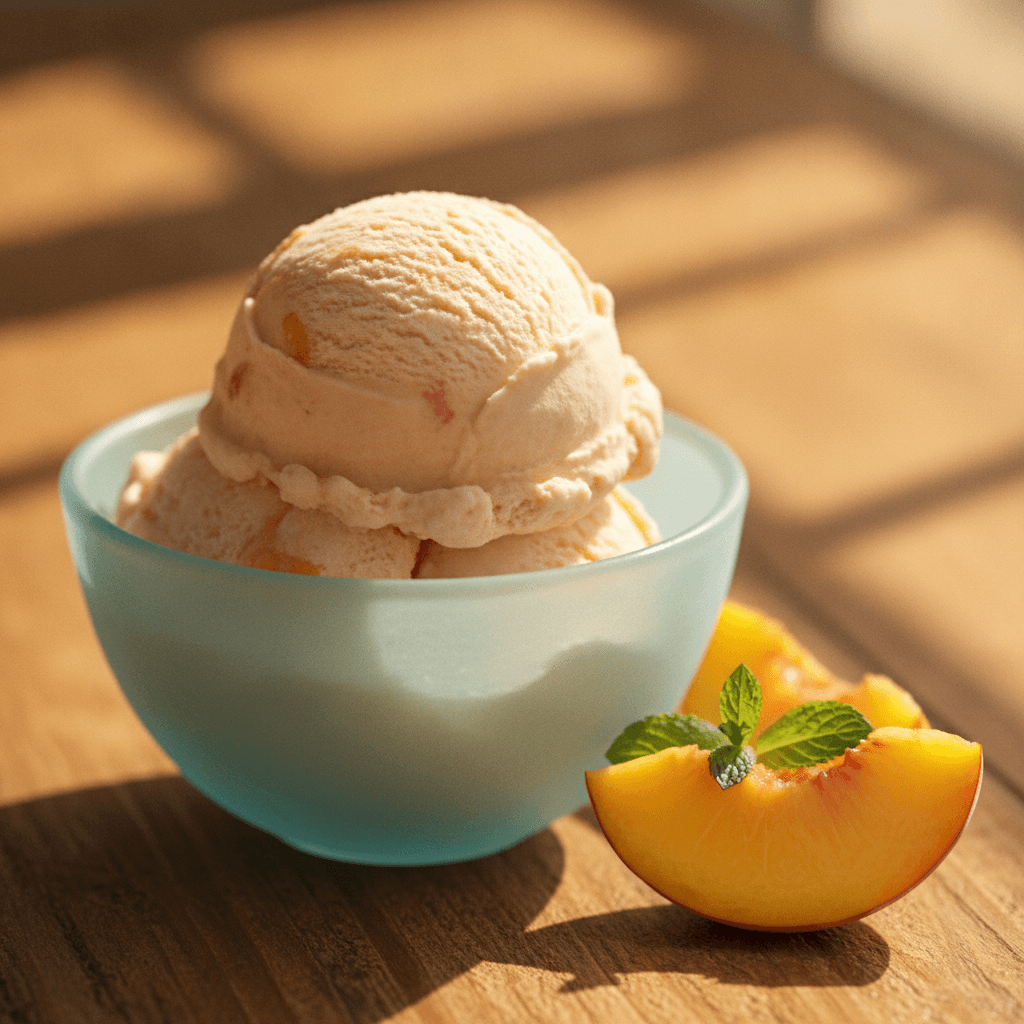
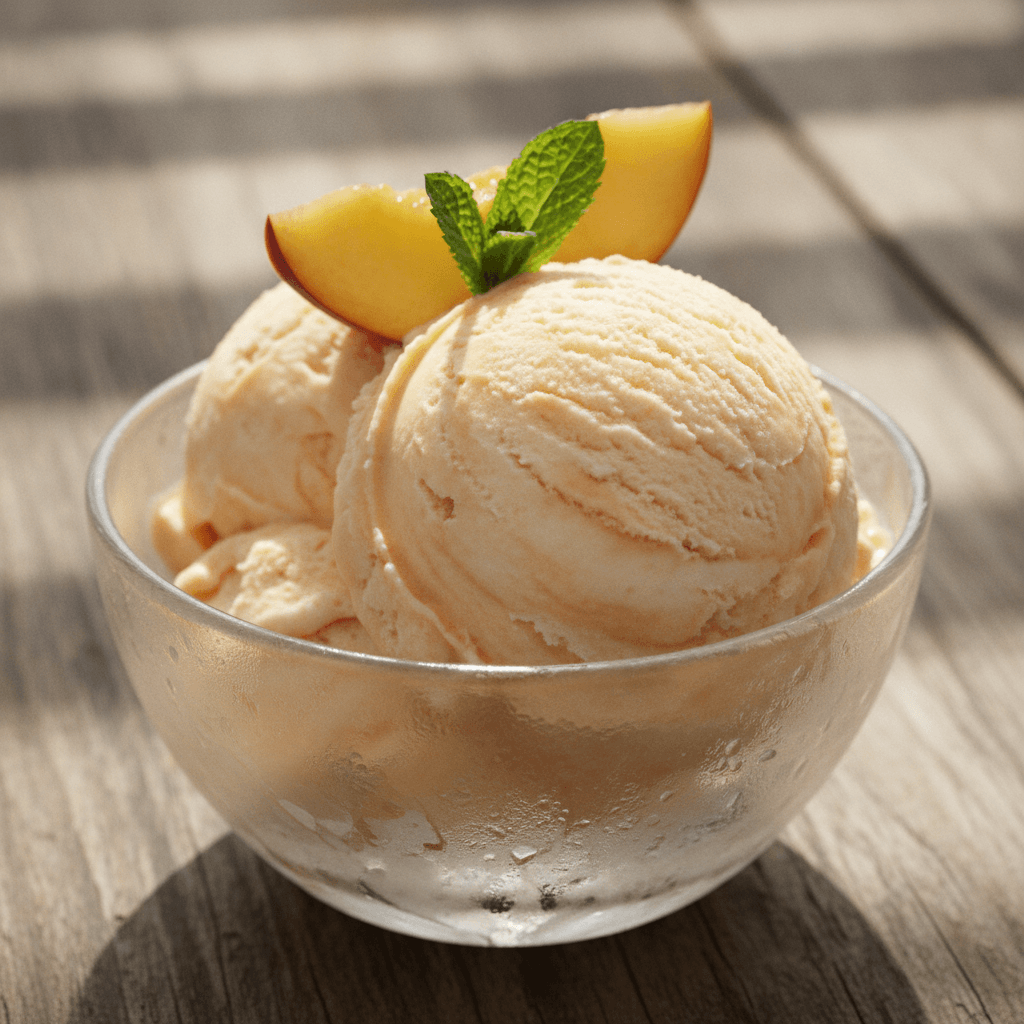
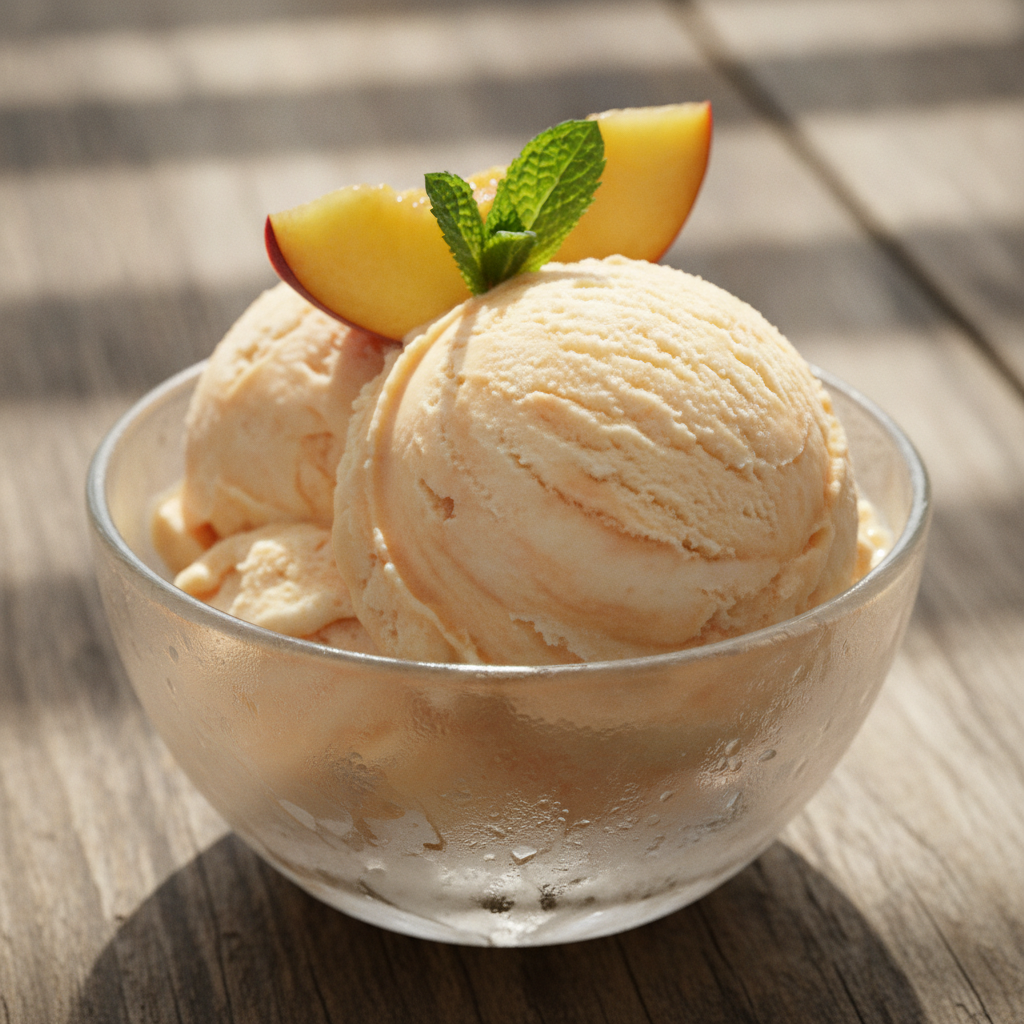
Imagine this: a warm evening, the air thick with the scent of jasmine, and you bring out a dessert that stops conversation. It’s a bowl of the most beautiful, blush-colored ice cream, glistening with the faintest hint of condensation. As you scoop it, it yields with a slow, creamy pull, revealing delicate flecks of real fruit. This isn't just any dessert; it's the perfect homemade peach ice cream, and it’s a taste of pure, unadulterated summer.
The first spoonful is a revelation. It’s intensely peachy, with a flavor so pure and vibrant it tastes like sunshine itself. The texture is impossibly smooth, a rich, velvety custard that melts slowly on your tongue without a single ice crystal in sight. This is the kind of treat that creates memories, the kind that has everyone asking, “You made this from scratch?!” And you’ll be able to smile and say yes, you absolutely did. While it looks and tastes like it came from a high-end artisan creamery, I’m here to guide you through every simple step. The secret lies not in complicated techniques, but in honoring beautiful ingredients and a little bit of patience. This homemade peach ice cream recipe is your key to capturing the fleeting magic of peach season in a scoop.
What Makes This a Showstopper
What truly elevates this homemade peach ice cream from a simple sweet treat to a memorable showstopper is its profound depth of flavor and luxurious texture. This isn’t the one-note, artificially flavored peach ice cream you might find in a store. This is a celebration of the fruit at its peak. By using perfectly ripe, fragrant peaches and macerating them to concentrate their essence, we ensure every bite sings with authentic, sun-ripened flavor. The sweetness is balanced, allowing the natural tartness and floral notes of the peach to shine through.
But the magic is truly in the mouthfeel. We’re making a French-style, custard-based ice cream, which means we enrich our base with egg yolks. This is the secret to an unbelievably creamy, dense, and satiny texture. The yolks act as a natural emulsifier, preventing large ice crystals from forming during the freezing process. The result is a scoop that is smooth and rich, with a satisfying weight that feels utterly indulgent. It’s the kind of texture that you'd expect to find at a gourmet gelateria, where every detail is perfected. The visual appeal is just as stunning. The base is a pale, creamy yellow from the rich yolks, beautifully swirled with the soft pink and orange hues of the peach purée. It doesn't just taste amazing; it looks breathtakingly beautiful in a bowl or cone, promising a truly special experience before you even take the first bite. This homemade peach ice cream is a testament to how simple ingredients, treated with care, can create something truly extraordinary.
The Ingredients That Matter Most
At the heart of any unforgettable recipe are exceptional ingredients. For our homemade peach ice cream, quality is paramount. While the list isn’t long, each component plays a crucial role in building the final, perfect flavor and texture.
First and foremost, the peaches. This is where you should absolutely seek out the best you can find. Look for freestone peaches (where the pit pulls away easily) that are heavy for their size and yield gently to pressure. The most important test? Your nose. A ripe peach should have a sweet, intoxicating fragrance. This is the flavor that will define your ice cream, so don’t settle for hard, underripe fruit. The color should be a vibrant yellow with a soft red blush.
Next, our dairy foundation: heavy cream and whole milk. The fat content here is non-negotiable for creaminess. Heavy cream, with its high butterfat percentage, coats the ice crystals as they form, keeping them tiny and resulting in a smooth, not icy, texture. Whole milk provides the necessary liquid and body without making the final product too heavy. Think of them as the perfect partners for creating a luxurious base.
Egg yolks are our magic ingredient. They are the cornerstone of this rich custard base, providing flavor, color, and, most importantly, powerful emulsifying properties. This is what gives our homemade peach ice cream its signature velvety-smoothness and resistance to iciness.
For sweetness and structure, we use granulated sugar. It does more than just sweeten; it lowers the freezing point of the mixture, ensuring the ice cream stays scoopable and doesn't freeze into a solid block of ice.
A splash of fresh lemon juice is essential. It serves two purposes: it brightens the flavor of the peaches, making them taste even more vibrant, and its acidity helps prevent the fruit from browning, keeping the color beautiful. A small pinch of fine sea salt might seem minor, but it’s a flavor wizard, balancing the sweetness and making all the other flavors, especially the peach, pop. Finally, a touch of pure vanilla extract adds a layer of aromatic warmth that complements the fruit beautifully. For a signature Levantine touch, I sometimes add a whisper of orange blossom water along with the vanilla—it’s an optional but gorgeous addition that enhances the floral notes of the peaches.
Building It Step by Step
The process of making this sublime homemade peach ice cream is a gentle, rewarding journey broken down into a few key stages. Each step builds upon the last, transforming simple ingredients into a frozen masterpiece. It’s a lesson in patience and the magic of food science, and I promise, the results are worth every moment.
First, we coax the very soul out of our peaches. After peeling and dicing the ripe fruit, we combine it with a portion of the sugar and a splash of lemon juice. This process, called maceration, is where the sugar gently draws out the intensely flavorful juices from the fruit, creating a glorious, syrupy mixture. We let this sit for about an hour, allowing time for the flavors to meld and deepen.
While the peaches work their magic, we turn our attention to the heart of the recipe: the crème anglaise, or custard base. This begins by gently warming the heavy cream, milk, and a pinch of salt. In a separate bowl, we whisk the egg yolks and remaining sugar until they’re pale and slightly thickened. Now for the most critical technique: tempering. We slowly ladle the warm cream mixture into the yolks while whisking constantly. This gradually raises the temperature of the eggs without scrambling them. Once combined, the entire mixture returns to the pot and is cooked over low heat, stirring constantly, until it thickens enough to coat the back of a spoon. This is the foundation of our ice cream's incredible texture.
Once the custard is ready, it's strained through a fine-mesh sieve to ensure it's perfectly smooth, and the vanilla is stirred in. The next step is arguably the most important: chilling. The custard base must be completely and thoroughly cold before it goes into the ice cream maker. I recommend chilling it in the refrigerator for at least 4-6 hours, but overnight is even better. This ensures the ice cream churns properly and freezes into a creamy, not icy, consistency.
With our base perfectly chilled, we prepare our peaches by puréeing them until they reach our desired consistency—I like to leave a few small chunks for texture. Then, it's time to churn. We combine the cold custard base with the peach purée and pour it into our ice cream maker, letting it churn until it reaches the consistency of thick, soft-serve ice cream. The final step is the 'ripening' or hardening phase. We transfer the churned ice cream to a freezer-safe container, press a piece of parchment paper on the surface to prevent ice crystals, and freeze for at least 4 hours to allow it to firm up into a perfectly scoopable homemade peach ice cream.
Presentation and Plating Tips
Serving your beautiful homemade peach ice cream is the final, delightful step in the process, and a little attention to detail can make it a truly memorable experience. Presentation elevates a delicious dessert into a work of art, and this ice cream deserves to be showcased.
First, always serve ice cream in chilled bowls or glasses. Pop your serving dishes in the freezer for at least 15-20 minutes before scooping. This simple step prevents the ice cream from melting too quickly, preserving its perfect texture from the first spoonful to the last. For the best scoop, dip your ice cream scoop in a glass of hot water and wipe it dry before each scoop. This allows the scoop to glide through the firm ice cream, creating those perfect, round spheres you see in creameries.
Garnishes add layers of color, flavor, and texture. A few paper-thin slices of fresh, ripe peach arranged alongside the scoop instantly connects the dessert to its star ingredient. A single, vibrant mint leaf provides a beautiful pop of green and a hint of fresh aroma. For a touch of my beloved Mediterranean pantry, I adore sprinkling a few chopped pistachios over the top. Their nutty crunch and gorgeous color are a wonderful contrast to the creamy ice cream. A delicate drizzle of golden honey or a very light dusting of ground cardamom can also add a sophisticated flavor note.
Consider the vessel. A simple, elegant glass bowl allows the soft, peachy color to shine. For a more rustic, family-style presentation, you could even serve scoops directly from a chilled, pre-frozen loaf pan. When you bring your masterpiece to the table, it's not just dessert; it's a moment of shared joy, made even more special by your thoughtful presentation.
Scaling Up for a Crowd
There are few things more joyous than sharing a truly special dessert with a large group of loved ones. The beauty of this homemade peach ice cream is that it can easily be scaled up for family gatherings, weekend dinners, or any occasion that calls for a celebration. The key to success is planning and working in batches.
Most home ice cream makers have a capacity of 1.5 to 2 quarts. Attempting to overfill the machine will prevent the base from churning and freezing properly, resulting in a soupy mess. Therefore, to serve a crowd, you will need to make the recipe in successive batches. Simply double or triple the ingredient quantities for the custard base and the peach mixture, but churn only the amount specified for your machine at one time.
Preparation is your best friend when serving a large group. The custard base is the perfect make-ahead component. You can prepare a large batch of the custard and store it in an airtight container in the refrigerator for up to two days before you plan to churn. This breaks up the work and frees up your time on the day of your gathering. The peaches can also be macerated a day in advance and kept in the fridge. This not only saves time but also allows their flavor to deepen even further.
On the day you wish to serve, simply churn your batches one after another. As each batch of homemade peach ice cream finishes churning, transfer it to a large, freezer-safe container. Place the container in the coldest part of your freezer (usually the back) and continue with the next batch. By the time your guests arrive, you’ll have a large container full of perfectly ripened, scoop-ready ice cream, and you’ll be relaxed and ready to enjoy the gathering.
Storing Any Leftovers
While it’s hard to imagine having any leftovers of this incredible homemade peach ice cream, proper storage is key to ensuring that the last scoop is just as creamy and delicious as the first. The enemy of homemade ice cream is air and temperature fluctuation, which can lead to dreaded ice crystals and freezer burn.
To store your ice cream perfectly, choose the right container. A shallow, flat container with a tight-fitting lid is ideal, as it allows the ice cream to freeze quickly and evenly. Many specialty containers are designed for homemade ice cream, often long and narrow, which also helps with scooping.
Before you seal the container, take one crucial extra step: press a piece of parchment paper or plastic wrap directly against the entire surface of the ice cream. This creates a barrier that prevents air from coming into contact with the ice cream, significantly reducing the chance of ice crystals forming on the surface. After applying the paper or wrap, seal the container tightly with its lid.
Where you store it in the freezer matters, too. Avoid the freezer door, which is subject to constant temperature changes every time it’s opened. Instead, store your container in the coldest part of the freezer, which is typically at the very back on a lower shelf. For the absolute best texture and flavor, plan to enjoy your homemade peach ice cream within one to two weeks. While it will still be safe to eat after that, its creamy, pristine texture is at its peak within that timeframe.
Variations to Explore
Once you’ve mastered the classic homemade peach ice cream recipe, a world of delicious possibilities opens up. This recipe serves as a perfect canvas for your culinary creativity. Here are a few variations to inspire you on your next ice cream-making adventure:
-
Roasted Peach and Brown Sugar: Instead of macerating the peaches, try roasting them. Halve the peaches, toss them with a touch of brown sugar and a pinch of cinnamon, and roast until tender and caramelized. Let them cool completely, then purée. This method adds a deep, complex, and slightly smoky flavor that is incredibly sophisticated.
-
Peach and Cardamom Ice Cream: For a warm, aromatic twist straight from the Levant, add about 1/2 teaspoon of finely ground cardamom to the cream and milk mixture as it heats. The fragrant, slightly citrusy notes of cardamom are a classic pairing with peaches and will give your ice cream an exotic and memorable flavor.
-
Peach and Raspberry Swirl: Create a beautiful visual and flavor contrast by swirling in a ribbon of raspberry purée. After churning, layer the soft ice cream in your storage container, alternating with spoonfuls of a simple raspberry sauce (fresh raspberries cooked down with a little sugar and lemon juice, then strained). Use a knife to gently swirl the layers together before freezing.
-
Dairy-Free Coconut Peach Ice Cream: For a dairy-free version, you can create a wonderfully rich base using full-fat canned coconut milk and coconut cream in place of the dairy. To replicate the richness of the custard, you can omit the eggs and instead add a slurry of 2 tablespoons of cornstarch mixed with 2 tablespoons of the cold coconut milk to the base as it cooks, stirring until it thickens. The coconut flavor is a beautiful match for fresh peaches.
Questions You Might Have
Why did my homemade peach ice cream turn out icy instead of creamy?
An icy texture is the most common issue in homemade ice cream and usually stems from one of three things. First, the custard base may not have been chilled thoroughly enough before churning. It needs to be refrigerator-cold (ideally overnight) to freeze quickly. Second, the issue could be the fat content; using lower-fat milk or cream will result in a less creamy, more icy final product. Finally, improper storage without a protective layer like parchment paper on the surface can allow ice crystals to form over time.
Can I make this recipe without an ice cream maker?
Absolutely! While an ice cream maker makes the process easier, you can achieve a great result without one. Pour the fully chilled ice cream base into a shallow, freezer-safe dish. Freeze for 45 minutes, then remove it and stir vigorously with a whisk or fork, breaking up any frozen bits. Return it to the freezer and repeat this process every 30-45 minutes for 3-4 hours, until it's frozen but still scoopable. This manual churning breaks up the ice crystals, mimicking the action of a machine.
Do I have to use egg yolks in the base?
You don't have to, but it will change the style and texture. This recipe is for a French-style custard base, where yolks provide incredible richness and creaminess. An ice cream made without eggs is called Philadelphia-style. To adapt this recipe, you would omit the yolks and the tempering step, simply heating the cream, milk, and sugar until the sugar dissolves, then chilling and churning as directed. It will be lighter and more refreshing, but less rich and dense.
How do I know when my peaches are ripe enough for ice cream?
The best indicators are scent and touch. A ripe peach should have a strong, sweet, and floral fragrance—you should be able to smell its peachiness from a short distance. It should also give slightly when you press it gently near the stem. Avoid peaches that are rock-hard or have any green patches, as they lack the sugar and flavor needed for a fantastic homemade peach ice cream.
Can I use frozen peaches instead of fresh?
Yes, frozen peaches are a great option, especially when peaches are not in season. Be sure to thaw them completely before you begin. I recommend draining off any excess liquid after they have thawed so you don't add extra water to the ice cream base, which could dilute the flavor and contribute to an icier texture. From there, you can proceed with the macerating and puréeing steps just as you would with fresh fruit.
Creamy Homemade Peach Ice Cream
An ultra-creamy, custard-style homemade peach ice cream, bursting with the flavor of fresh, ripe peaches. The perfect summer treat for any gathering.
Prep Time
30 min
Cook Time
15 min
Total Time
9h 15m
Servings
8 servings
Ingredients
For 8 servings
- 2 lbs ripe peaches (about 4-5 large), peeled, pitted, and diced
- 1 cup granulated sugar, divided
- 1 tablespoon fresh lemon juice
- 2 cups heavy cream
- 1 cup whole milk
- 1/8 teaspoon fine sea salt
- 6 large egg yolks
- 1 teaspoon pure vanilla extract
- 1/4 teaspoon orange blossom water (optional)
Instructions
- 1
Macerate the Peaches
In a medium bowl, combine the diced peaches, 1/2 cup of the granulated sugar, and the fresh lemon juice. Stir gently to combine, then let the mixture sit at room temperature for at least 1 hour to allow the peaches to release their juices.
- 2
Prepare the Custard Base
In a medium saucepan, combine the heavy cream, whole milk, and salt. Warm over medium-low heat, stirring occasionally, until the mixture is hot and steam begins to rise, but do not let it boil.
- 3
Whisk Eggs and Sugar
While the cream mixture is heating, place the egg yolks and the remaining 1/2 cup of sugar in a separate large bowl. Whisk vigorously for about 2 minutes, until the mixture is thick, pale yellow, and falls from the whisk in a ribbon.
- 4
Temper the Egg Yolks
Slowly and carefully, pour about one cup of the hot cream mixture into the egg yolk mixture while whisking constantly. This is called tempering and it prevents the eggs from scrambling. Once combined, pour the tempered egg mixture back into the saucepan with the remaining cream.
- 5
Cook the Custard
Return the saucepan to medium-low heat. Cook, stirring constantly with a wooden spoon or spatula, until the custard thickens enough to coat the back of the spoon. You should be able to draw a clean line through it with your finger. This will take 5-8 minutes. Do not let it curdle.
- 6
Strain and Chill the Base
Immediately pour the finished custard through a fine-mesh sieve into a clean bowl. This will catch any small bits of cooked egg. Stir in the vanilla extract and optional orange blossom water. Cover and chill in the refrigerator for at least 4 hours, or preferably overnight, until thoroughly cold.
- 7
Purée the Peaches
While the base is chilling, transfer the macerated peaches and all their juices to a blender or food processor. Pulse until the peaches are mostly puréed, but leave some small chunks for texture if desired. Chill the peach purée until you are ready to churn.
- 8
Combine and Churn
Once the custard base is fully chilled, whisk in the cold peach purée until well combined. Pour the mixture into the frozen canister of your ice cream maker. Churn according to the manufacturer's instructions, typically for 20-30 minutes, until it reaches the consistency of thick soft-serve ice cream.
- 9
Freeze and Ripen
Transfer the churned ice cream to a freezer-safe, airtight container. Press a piece of parchment paper directly onto the surface of the ice cream to prevent ice crystals from forming. Freeze for at least 4 hours, or until firm and scoopable. Enjoy within 2 weeks for the best texture.
Nutrition Facts
Per serving (estimated)
380 calories
Calories
35g
Carbs
5g
Protein
25g
Fat
1g
Fiber
90mg
Sodium
33g
Sugar