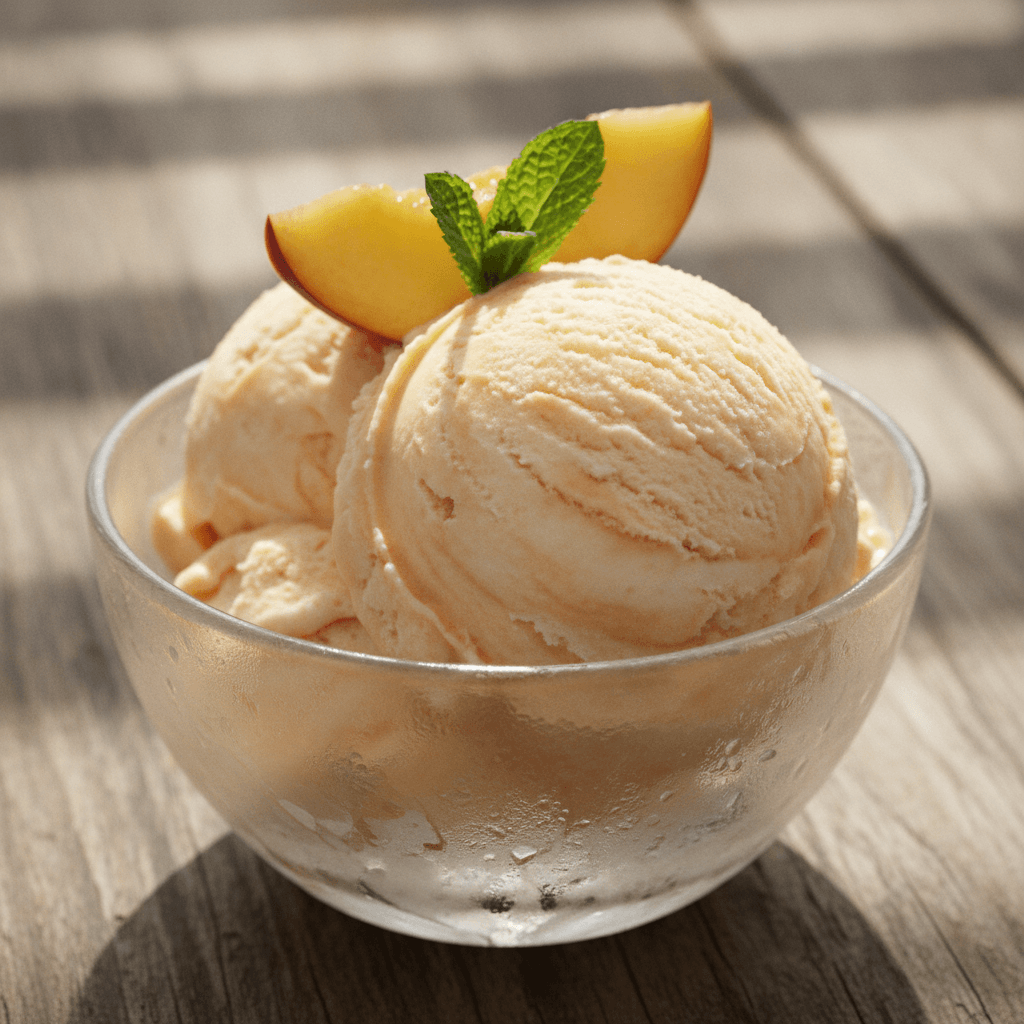
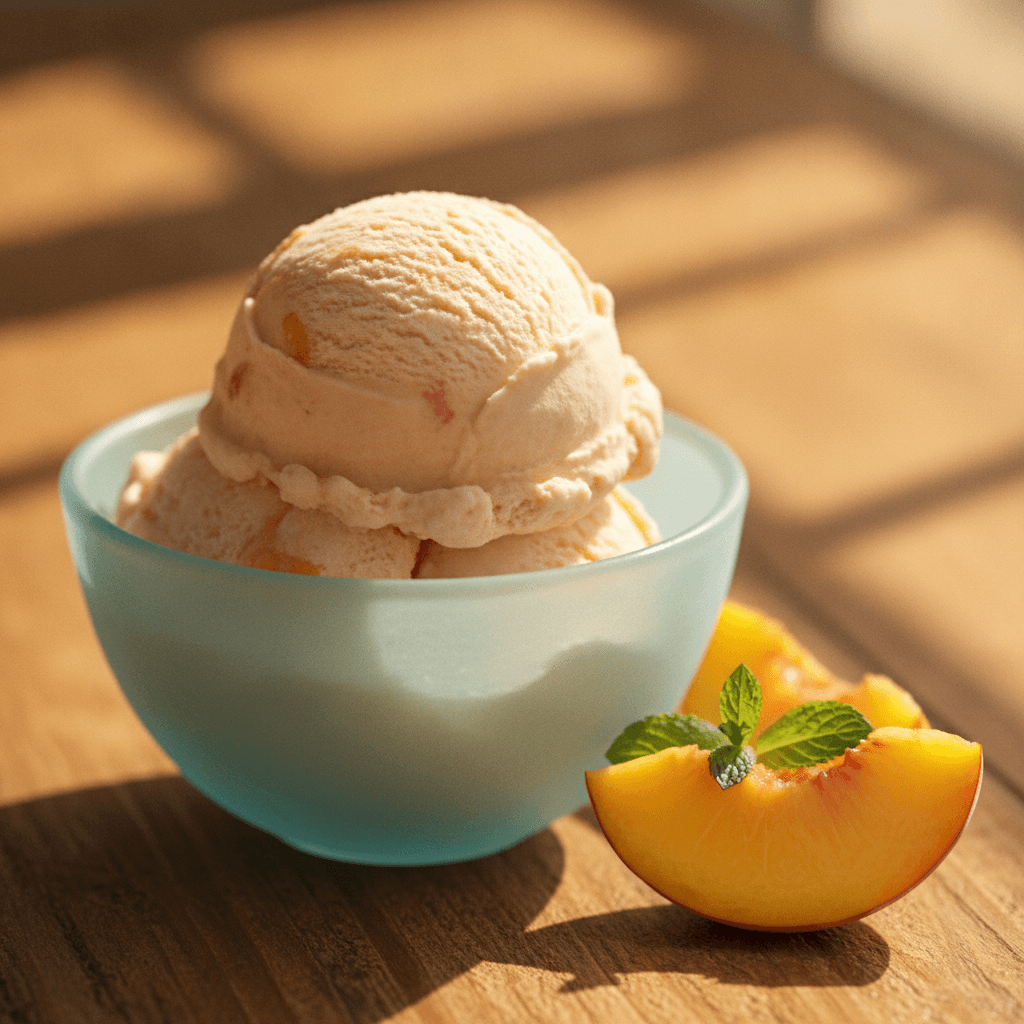
The Ultimate Creamy Peach Ice Cream Recipe
Discover the secret to incredibly creamy, flavorful homemade peach ice cream. This no-fail recipe guides you through creating the perfect summer dessert.
cookwithyara.com/recipes/peach-ice-cream-recipe
There is a unique magic in the gentle hum of an ice cream maker on a warm afternoon. It’s a sound of anticipation, a promise of something truly special. For me, that promise is often fulfilled by this very peach ice cream recipe. We’re not just talking about a frozen dessert; we’re talking about capturing the very essence of a sun-ripened peach—its fragrant sweetness, its delicate floral notes—and transforming it into a scoop of pure, velvety bliss. The goal is a texture so impossibly smooth it melts on your tongue, a flavor so intensely peachy it transports you to an orchard in full bloom. Many homemade ice creams fall short, ending up icy or grainy. The thought of making a custard base can feel intimidating, with whispers of scrambled eggs and failed emulsions. But I want to assure you that the process is far more forgiving than you think.
The secret isn't a single magical ingredient, but an understanding of the technique. Once you grasp why each step is important—why we chill the base, why we temper the eggs so carefully, why full-fat dairy is non-negotiable—the how becomes simple and rewarding. This guide is more than a list of instructions; it’s a journey into the craft of creating exceptional ice cream. With this foundation, you won't just make this spectacular peach ice cream recipe once; you'll unlock the ability to create countless flavors, all with that same luxurious, professional-quality texture. So let's demystify the process and churn up a batch of the most glorious peach ice cream you've ever tasted.
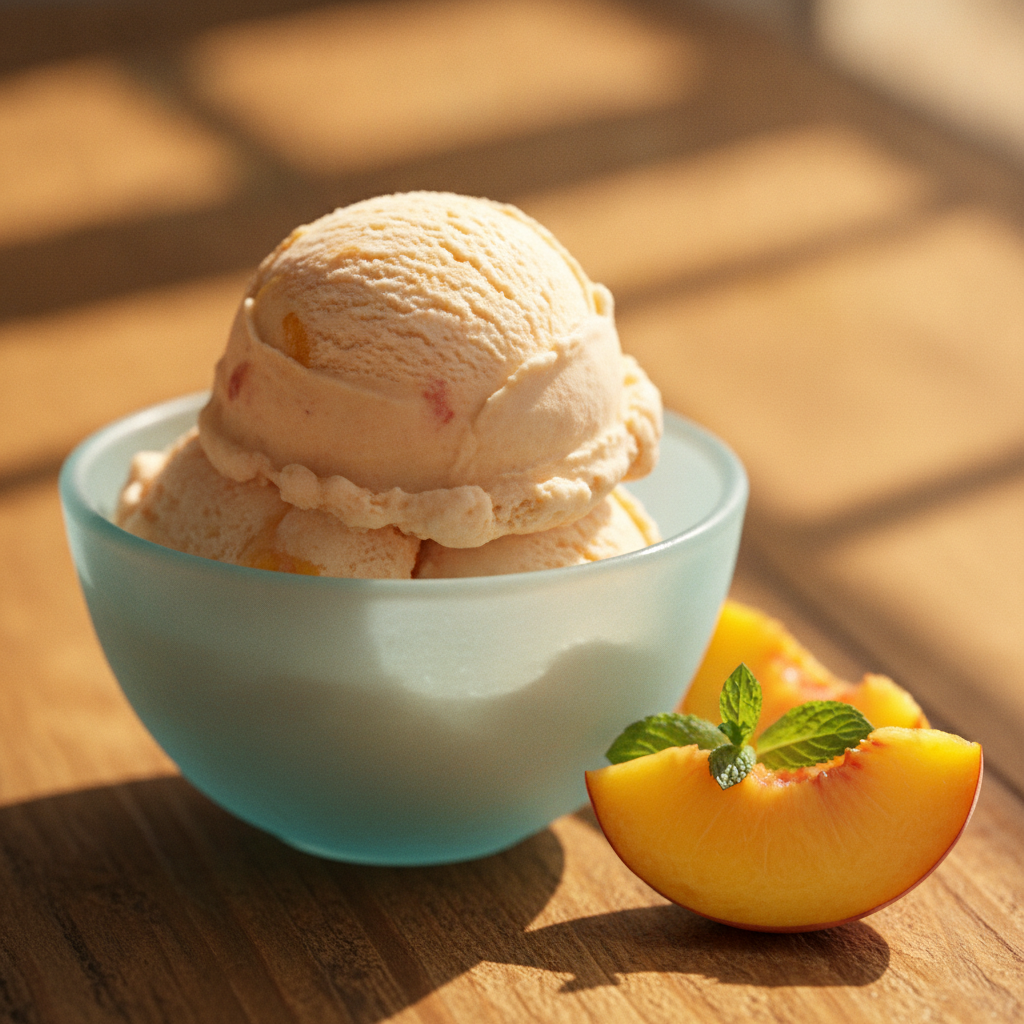
The Science Behind the Perfect Scoop
Creating truly creamy ice cream is a delicious science experiment happening right in your kitchen. The main villain we’re fighting against is the formation of large ice crystals. The smaller the ice crystals, the smoother and creamier the final texture will be. Every step in this peach ice cream recipe is designed to keep those crystals as tiny as possible. First, let's talk about fat. The high fat content from the heavy cream and egg yolks is crucial. Fat globules don't freeze; instead, they get in the way of the water molecules, physically obstructing them from joining together to form large, crunchy crystals. This is why using low-fat substitutes will always result in a less creamy, icier product.
Next up is sugar. Sugar does more than just add sweetness; it plays a critical role in the texture by lowering the freezing point of the mixture. This means the ice cream doesn't freeze into a solid, rock-hard block. It stays soft enough to scoop even at low freezer temperatures. The egg yolks are our emulsifying heroes. They contain lecithin, a natural emulsifier that helps bind the fat and water molecules together into a stable, homogenous mixture. This prevents separation and contributes to that signature rich, custardy mouthfeel. Finally, the two most important technical steps: chilling and churning. Chilling the custard base thoroughly before churning is non-negotiable. A very cold base freezes much faster in the ice cream maker. Faster freezing means less time for large ice crystals to form. Understanding these principles empowers you to not just follow a recipe, but to truly master the art of homemade ice cream.
Tools and Ingredients for Peach Ice Cream Success
While the technique is paramount, having the right tools and ingredients sets you up for a flawless execution of this peach ice cream recipe. Don’t worry, you don’t need a professional kitchen, just a few key items. The most important tool is, of course, an ice cream maker. A model with a pre-frozen canister is the most common and affordable type. The key is to ensure the canister is frozen completely solid, typically for at least 24 hours. A heavy-bottomed saucepan is essential for making the custard, as it distributes heat evenly and prevents the delicate eggs from scorching. You'll also want a fine-mesh sieve to strain the custard, guaranteeing a perfectly smooth base free of any potential tiny bits of cooked egg. An instant-read thermometer is a fantastic tool for precision, taking the guesswork out of knowing when your custard is perfectly cooked (around 170-175°F or 77-79°C), though the classic 'coats the back of a spoon' test works well too.
When it comes to ingredients, quality is everything. For the star of the show, seek out the most fragrant, ripe yellow peaches you can find. They should have a slight give when gently pressed and smell intoxicatingly sweet. This is where the majority of your flavor will come from. For the dairy, do not compromise: use full-fat heavy cream and whole milk. Their fat content is essential for the creamy texture we're aiming for. Fresh egg yolks will give the ice cream its rich color and custardy body. A splash of fresh lemon juice is our secret weapon; it brightens the peach flavor and prevents the puree from browning, keeping the final color vibrant. Finally, a touch of alcohol-free vanilla extract or the seeds from a vanilla bean will complement the peaches beautifully, adding a layer of aromatic warmth without overpowering the fruit.
The Method, Step by Step
Let's walk through the creation of our creamy peach ice cream, breaking it down into manageable stages. Each step builds upon the last, leading us to a truly sublime final product. Think of this as a gentle rhythm, a process to be enjoyed.
Stage 1: Prepare the Peach Base. The first step is to concentrate that beautiful peach flavor. We'll start by macerating the chopped peaches with sugar and a bit of lemon juice. This process draws the natural juices out of the fruit. Then, we'll gently cook this mixture down until the peaches are soft and the liquid has slightly thickened. This not only deepens the flavor but also reduces the water content, which helps prevent iciness later. Once cooked, we'll puree the mixture until it's very smooth and then pass it through our fine-mesh sieve for an ultra-silky texture. This puree must be chilled completely—at least two hours in the refrigerator.
Stage 2: Create the Custard. While the peaches chill, we'll make our French-style custard base. In your heavy-bottomed saucepan, gently heat the whole milk, a portion of the heavy cream, and some of the sugar. We're just warming it until it's steamy and the sugar dissolves. Meanwhile, in a separate bowl, we'll whisk our egg yolks with the remaining sugar until they are pale and slightly thickened.
Stage 3: The Crucial Tempering Step. This is the part that often worries people, but it’s simple if you go slow. To prevent the eggs from scrambling, we must temper them. Slowly, a ladleful at a time, whisk the hot milk mixture into the egg yolks. Keep whisking constantly. This gradually raises the temperature of the yolks. After adding about half of the milk, you can confidently pour the warmed yolk mixture back into the saucepan with the rest of the milk.
Stage 4: Cook and Thicken. Now, return the saucepan to low-medium heat and cook, stirring constantly with a wooden spoon or spatula, scraping the bottom and sides. The custard will slowly thicken. This takes patience. You’ll know it’s ready when it reaches 170-175°F (77-79°C) or when it’s thick enough to coat the back of your spoon, and a finger drawn through it leaves a clean line.
Stage 5: Strain and Chill Overnight. Immediately pour the finished custard through your fine-mesh sieve into a clean bowl. This is your insurance policy for a silky-smooth texture. Stir in the remaining cold heavy cream and the vanilla. Now for the most important, non-skippable step: cover and chill the base for at least 4 hours, but for the absolute best texture, chill it overnight. A deeply chilled base churns faster and results in a creamier ice cream.
Stage 6: Churn and Harden. The next day, your patience pays off. Whisk the chilled peach puree into your chilled custard base until fully combined. Pour this glorious mixture into your pre-frozen ice cream maker and churn according to the manufacturer's directions. It will thicken to the consistency of soft-serve ice cream. Transfer the churned ice cream to an airtight, freezer-safe container. Press a piece of parchment paper directly on the surface to prevent ice crystals, and freeze for at least 4 hours to harden, or 'ripen', into a perfectly scoopable treat. This final freeze allows the flavors to meld and the texture to set perfectly, giving you the best peach ice cream recipe result.
Troubleshooting Your Homemade Ice Cream
Even with the most detailed recipe, things can sometimes go sideways. Don't worry! Most common issues are easily fixable or, at the very least, a learning experience for your next batch. Here’s how to troubleshoot some potential hiccups with your peach ice cream recipe.
If your ice cream is icy or grainy… This is the most common problem and it usually points to one of three things. First, your custard base might not have been cold enough before churning. An overnight chill is truly best. Second, your ice cream maker's freezer bowl might not have been frozen solid. It needs to be rock solid, at least 24 hours in the coldest part of your freezer. Third, you may have used lower-fat milk or cream. The fat content is critical for a smooth texture, so stick to whole milk and heavy cream.
If your custard base looks curdled or has bits of scrambled egg… This means the eggs were heated too quickly during the tempering step. Don't panic! You can often save it by immediately pouring the custard through a fine-mesh sieve. Most of the cooked bits will be strained out. Next time, be sure to add the hot milk to the eggs much more slowly, whisking vigorously the entire time.
If your ice cream won't thicken in the machine… Again, this almost always comes down to temperature. The freezer bowl was likely not cold enough, or the custard base was still warm. There's no quick fix once you've started churning, but you can pour the mixture back out, chill it and the bowl more thoroughly, and try again. It's a testament to how vital the chilling step is for a successful batch of homemade peach ice cream.
If the peach flavor tastes weak… This is a result of the peaches themselves. Either they weren't fully ripe and fragrant, or the puree contained too much water. Gently cooking the peaches down, as instructed in the recipe, helps concentrate their flavor and evaporate some excess water. For a bigger flavor punch next time, you could even try roasting the peaches first.
If the finished ice cream is too hard to scoop… This can sometimes happen if there isn't quite enough sugar or fat in the recipe, or if your freezer is set to a very low temperature. Let the container sit on the counter for 5-10 minutes before scooping to soften slightly. Remember that sugar is key to scoopability, as it lowers the freezing point of the mixture.
Taking It to the Next Level
Once you've mastered the classic peach ice cream recipe, you can start to play and add your own signature touches. This is where cooking becomes truly creative. One of my favorite ways to elevate the flavor is by roasting the peaches instead of simmering them. Toss sliced peaches with a tablespoon of brown sugar and a pinch of warming spice like cinnamon or cardamom, then roast at 400°F (200°C) until tender and caramelized. This deepens the fruit flavor in the most incredible way.
Another professional touch is to make a brown butter custard. Before you even begin the custard, gently brown the butter in your saucepan, then proceed with adding the milk and cream. The nutty, toasted notes of brown butter are an absolutely sublime pairing with sweet peaches. For textural contrast, consider adding mix-ins after churning. Fold in toasted pistachios or almonds for a delightful crunch. Crumbled shortbread cookies or buttery baked goods also work beautifully. For a touch of Levantine flavor, swirl in a ribbon of delicate rose jam or add a mere whisper of orange blossom water to the custard base. These small additions can transform a great ice cream into an unforgettable one.
Storing Your Results
Properly storing your homemade peach ice cream is the final, crucial step to ensure every scoop is as good as the first. Your enemy here is air, which leads to freezer burn and the formation of large ice crystals on the surface. After churning, transfer the ice cream to a shallow, flat, airtight container. A loaf pan or a specialized ice cream container works much better than a deep, round tub because it allows the ice cream to freeze faster and more evenly.
The most important trick is to press a piece of parchment paper or plastic wrap directly against the entire surface of the ice cream before sealing the lid. This creates a barrier that prevents air from coming into contact with your dessert, dramatically reducing the risk of freezer burn. Store it in the coldest part of your freezer, usually at the back, not in the door where temperatures fluctuate. For the best flavor and texture, homemade ice cream is best enjoyed within one to two weeks. While it will still be safe to eat after that, the texture may begin to degrade over time. But let's be honest, a batch of this delicious peach ice cream rarely lasts that long!
Common Questions
Can I make this peach ice cream recipe without an ice cream maker?
Yes, you can make a no-churn version, though the texture will be slightly different. To do this, prepare the peach puree and custard base and chill them as directed. Instead of combining them and churning, whip the 1 1/2 cups of heavy cream to stiff peaks. Gently fold the chilled custard into the whipped cream, then fold in the chilled peach puree. Transfer to a loaf pan, cover, and freeze for at least 6 hours. For a smoother texture, stir it vigorously every 45 minutes for the first 3 hours of freezing.
Can I use frozen peaches for this recipe?
Absolutely. Frozen peaches are a great option, especially when fresh ones aren't in season. Thaw them completely before you begin and drain off any excess liquid that accumulates. The flavor might be slightly less intense than peak-season fresh peaches, but you will still get a delicious result.
How far in advance can I make the custard base?
You can make the custard base up to two days in advance and store it in an airtight container in the refrigerator. In fact, a longer chilling time is beneficial! An overnight or 24-hour chill will improve the final texture of your ice cream, making it even creamier.
My custard curdled! What did I do wrong?
Curdling, or scrambling the eggs, happens when the eggs are heated too quickly. This is why the tempering step is so important. You must add the first few ladles of hot milk to the egg yolks very slowly while whisking constantly. Also, be sure to cook the custard over gentle, low-to-medium heat, never letting it come to a boil.
How can I prevent the ice cream from getting rock hard in the freezer?
This is usually due to an imbalance in the sugar-to-liquid ratio or not enough fat. This peach ice cream recipe is formulated to be creamy and scoopable. However, if your freezer is exceptionally cold, it might become very firm. Simply let the container sit at room temperature for 5-10 minutes before scooping to soften it perfectly.
Creamy Homemade Peach Ice Cream
A rich, custard-based homemade peach ice cream recipe that delivers an incredibly creamy texture and intense fresh peach flavor. Perfect for warm summer gatherings.
Prep Time
25 min
Cook Time
15 min
Total Time
9h
Servings
1.5 quarts
Ingredients
For 1.5 quarts
- 2 lbs ripe yellow peaches (about 4-5 medium)
- 3/4 cup granulated sugar, divided
- 1 tablespoon fresh lemon juice
- 1 1/2 cups heavy cream, cold, divided
- 1 cup whole milk
- 5 large egg yolks
- 1/4 teaspoon fine sea salt
- 1 teaspoon alcohol-free vanilla extract
Instructions
- 1
Prepare the Peach Base
Peel, pit, and chop the peaches. In a medium saucepan, combine the chopped peaches, 1/4 cup of the granulated sugar, and the lemon juice. Cook over medium heat, stirring occasionally, for 10-15 minutes, until the peaches are very soft and the juices have thickened slightly.
- 2
Puree and Chill the Peaches
Transfer the cooked peach mixture to a blender or food processor. Blend until completely smooth. For an extra-silky texture, press the puree through a fine-mesh sieve into a bowl. Cover and refrigerate until completely cold, at least 2 hours.
- 3
Start the Custard Base
In a heavy-bottomed saucepan, combine 1/2 cup of the heavy cream, the whole milk, the remaining 1/2 cup of sugar, and the salt. Warm over medium-low heat, stirring occasionally, until the sugar has dissolved and the mixture is steaming. Do not let it boil.
- 4
Prepare the Egg Yolks
In a medium heatproof bowl, whisk the egg yolks until they are smooth and combined. Do not add the sugar to the yolks yet, as it can start to 'cook' them.
- 5
Temper the Egg Yolks
Slowly, a little at a time, pour about one cup of the hot milk mixture into the egg yolks while whisking constantly. This gently raises the temperature of the yolks without scrambling them. Once tempered, pour the egg yolk mixture back into the saucepan with the remaining milk.
- 6
Cook the Custard
Return the saucepan to medium-low heat. Cook, stirring constantly with a wooden spoon or heatproof spatula, until the custard has thickened enough to coat the back of the spoon. This should take 5-8 minutes. If using a thermometer, it should register 170-175°F (77-79°C).
- 7
Strain and Chill the Base
Immediately pour the hot custard through the fine-mesh sieve into a clean bowl. Stir in the remaining 1 cup of cold heavy cream and the vanilla extract. This helps to cool the base down quickly.
- 8
Chill Overnight
Cover the bowl with plastic wrap, pressing it directly onto the surface of the custard to prevent a skin from forming. Refrigerate for at least 4 hours, but preferably overnight for the best texture.
- 9
Combine and Churn
Once both the custard base and the peach puree are thoroughly chilled, whisk them together until fully combined. Pour the mixture into the frozen canister of your ice cream maker.
- 10
Churn the Ice Cream
Churn according to the manufacturer's instructions, typically for 20-25 minutes, or until the ice cream is the consistency of thick soft-serve.
- 11
Harden (Ripen) the Ice Cream
Transfer the churned ice cream to an airtight, freezer-safe container. Press a piece of parchment paper directly onto the surface. Freeze for at least 4 hours to allow it to harden fully before serving.
Nutrition Facts
Per serving (estimated)
320 calories
Calories
28g
Carbs
5g
Protein
22g
Fat
1g
Fiber
150mg
Sodium
26g
Sugar