
Perfect Ninja Slushie Recipes (Lemon Mint Delight)
Master your Ninja blender with our foolproof Lemon Mint slushie recipe! Learn the science of the perfect icy texture and explore endless flavor variations.
cookwithyara.com/recipes/ninja-slushie-recipes
There's a special kind of magic that happens when you press the button on a high-powered blender. It's a roar of potential, the promise of transformation. With a machine like a Ninja, you hold the power to turn humble, solid ice into a vortex of impossibly fine, snowy crystals. This isn't just about making a cold drink; it's about mastering a texture that is both refreshing and luxurious—a cloud-like slush that's perfectly spoonable, delightfully drinkable, and utterly satisfying on a warm day. The goal is to create a beverage that’s smooth from the first sip to the last, with no jarring, chunky ice shards to disrupt the experience.
Many of us have tried to make slushies at home, only to end up with either a disappointingly watery juice with floating icebergs or a stubborn block of frozen fruit that refuses to blend. It can feel intimidating, like a secret guarded by convenience stores and specialty shops. I’m here to tell you that the secret is simply technique. Once you understand the why behind each step—why simple syrup is non-negotiable, why the order you load the pitcher matters, why a certain ratio of ice to liquid is key—the how becomes incredibly simple. Mastering this foundational knowledge will not only help you perfect our vibrant Lemon Mint recipe but will unlock a whole universe of creative ninja slushie recipes you can whip up in minutes. Get ready to transform your kitchen into the ultimate refreshment destination.
The Science Behind the Perfect Slushie
To become a true slushie artist, it helps to think like a scientist for a moment. What are we actually doing when we make a slushie? We are controlling the formation of ice crystals. The perfect slushie texture comes from creating millions of tiny, uniform ice crystals suspended in a flavorful liquid. A powerful motor and sharp, stacked blades of a Ninja blender are designed for this exact task. They create a powerful vortex, a swirling tornado inside the pitcher that continuously pulls larger ice cubes down into the blades, shattering them into microscopic particles before they have a chance to clump together. This rapid, forceful process is the key to that signature smooth, snowy consistency.
But it's not just about brute force. The ingredients play a crucial role, particularly sugar. Sugar does more than just add sweetness; it's a scientific tool that interferes with the freezing process. In chemistry terms, it lowers the freezing point of water. This means the water-sugar solution in your slushie freezes at a temperature below 32°F (0°C). This simple act prevents the ice crystals from freezing into a hard, solid block, resulting in a softer, more scoopable, and less icy final product. This is why using a simple syrup (sugar dissolved in water) is far superior to just adding granulated sugar, which won’t dissolve properly in the cold mixture and will lead to a gritty texture. Understanding this interplay between power and properties is what elevates your homemade drink from a simple blended ice beverage to one of the best ninja slushie recipes you've ever had.
Essential Tools and Ingredients for Your Slushie Adventure
While the concept is simple, having the right tools and quality ingredients on hand makes all the difference. Your success in creating a wide variety of ninja slushie recipes begins with a well-equipped station.
First and foremost is the blender. A Ninja blender, whether it's the classic Total Crushing Pitcher model, a personal-sized blender, or even the Ninja Creami, is designed for this job. Its powerful motor and blade design are ideal for pulverizing ice evenly. If you don't have a Ninja, any high-powered blender with at least 1000 watts will work well. A blender with a tamper is also a fantastic asset, as it allows you to push down ingredients towards the blades without stopping the machine, preventing air pockets from forming. Beyond the blender, you'll want basic tools like liquid and dry measuring cups, a good citrus juicer (manual or electric) to get the most out of your lemons, and a fine-mesh sieve if you prefer a completely pulp-free slushie.
For the ingredients, quality is paramount. The foundation of any slushie is ice. Use ice made from filtered water for the purest, cleanest taste that won't interfere with your other flavors. For our Lemon Mint version, fresh is non-negotiable. Use freshly squeezed lemon juice; the bottled kind simply cannot compare in brightness and aroma. Similarly, use fresh, vibrant mint leaves. Look for leaves that are bright green and fragrant, with no wilting or brown spots. The final key ingredient is your sweetener, which should be a simple syrup. You can make this easily with a 1:1 ratio of sugar to water, gently heated until the sugar dissolves completely. Making your own simple syrup is a game-changer for achieving that perfectly smooth, professional-grade slushie texture every single time.
Mastering the Method: Your Step-by-Step Guide to the Perfect Ninja Slushie
Let’s walk through the process of creating the perfect slushie, focusing on the technique that you can apply to countless flavor combinations. This method ensures a flawless texture every time.
Stage 1: The Foundation of Flavor—Simple Syrup. The first step in any great slushie is preparing a simple syrup. In a small saucepan, combine equal parts sugar and water (for example, one cup of each). Warm over medium heat, stirring gently, just until the sugar has completely dissolved. There's no need to boil it. The goal is simply to create a homogenous sweet liquid. This step is critical because it ensures the sweetness is evenly distributed and prevents any gritty texture from undissolved sugar crystals. Once dissolved, remove it from the heat and let it cool completely. For the best results, chill it in the refrigerator for at least 30 minutes. Adding warm syrup to ice is a recipe for a watery slushie.
Stage 2: Prepare Your Fresh Ingredients. While the syrup cools, juice your lemons and prepare your mint. This is where the vibrant, fresh flavor of our recipe comes to life. The aroma alone will tell you you're on the right track.
Stage 3: The Art of Loading the Pitcher. There is a correct order to add ingredients to your Ninja blender to ensure the best performance. Always start with the liquids at the bottom: your chilled simple syrup, water, and fresh lemon juice. This liquid base helps the blades to spin freely at the start and begin creating that crucial vortex. Next, add your soft ingredients, like the fresh mint leaves. Finally, add the ice on top. This sequence prevents the blades from getting stuck on hard ice right away.
Stage 4: The Two-Phase Blend. Don't just turn the blender on high from the start. Begin by using the 'PULSE' function a few times. This will act like a jackhammer, breaking up the large ice cubes into smaller, more manageable pieces. You'll hear the loud cracking sounds give way to a more uniform noise. After 4-5 pulses, you're ready for the main event.
Stage 5: The High-Speed Finish. Now, secure the lid and blend on a high-speed setting. Watch for the vortex to form in the center of the pitcher. This is the sign that everything is circulating perfectly. Let it blend for 30-60 seconds, or until you see a uniformly smooth, thick, and snowy texture throughout. The sound of the blender will also change, becoming smoother and higher-pitched as the last of the ice crystals are broken down. This is the moment of transformation for all great ninja slushie recipes.
Stage 6: The Final Check and Serve. Turn off the blender and check the consistency. It should be thick enough to hold its shape on a spoon for a moment before melting. If it’s too thin, add another handful of ice. If it’s too thick and won't blend, add a small splash of cold water. Pour into chilled glasses immediately, garnish with a fresh mint sprig and a lemon wheel, and enjoy the fruits of your labor.
Your Ninja Slushie Troubleshooting Guide
Even with a great recipe, things can sometimes go sideways. Don't worry! Most issues are easily fixable and offer a great learning opportunity for perfecting your personal technique for making ninja slushie recipes. Here’s how to troubleshoot common problems.
If your slushie is too watery or soupy... This is the most common issue and almost always comes down to the ice-to-liquid ratio. You likely have too much liquid. The fix is simple: add more ice, about half a cup at a time, and blend again until you reach the desired thickness. Also, ensure your simple syrup was completely chilled before you started.
If your slushie has large, unblended ice chunks... This usually means there wasn't enough liquid at the base for the blender to form a proper vortex, or you didn't pulse first to break down the big pieces. To fix it, add a small splash of cold water or juice (just a tablespoon or two) to help get things moving again. If you skipped the pulsing step, remember it for next time—it makes a huge difference.
If your blender stalls and the blades stop spinning... This is likely due to an air pocket forming around the blades, especially with very thick mixtures. Turn off the blender immediately. Use a long spatula or the blender's tamper to stir the mixture, pushing the frozen parts from the corners down towards the center. Then, replace the lid and try blending again.
If your slushie tastes bland or not sweet enough... Remember that cold temperatures dull our perception of sweetness. A liquid that tastes perfectly sweet at room temperature will taste less sweet when frozen. This is why a properly sweetened simple syrup is key. If it's already blended, you can't easily add more sugar, but you can add a bit more chilled simple syrup and blend briefly to incorporate it.
If your finished slushie has a gritty texture... This is the one problem that's hard to fix after the fact. It means you added granulated sugar directly to the cold mixture instead of using a simple syrup. The sugar crystals couldn't dissolve in the icy liquid. Consider this a lesson learned for your next batch! Always, always dissolve your sweetener first.
Taking Your Slushie Game to the Next Level
Once you’ve mastered the basic technique for our Lemon Mint slushie, a world of creativity opens up. Here are a few ways to elevate your creations and develop your own signature ninja slushie recipes.
Infuse Your Simple Syrup: This is a professional technique that adds incredible depth of flavor. While gently warming your sugar and water, toss in other aromatics. Think a cinnamon stick and a star anise for a spiced lemonade slushie, a few bruised cardamom pods for a Middle Eastern flair, or even a sprig of rosemary or thyme for an herbaceous twist. Just be sure to strain the solids out before chilling the syrup.
Introduce Creamy Textures: For a richer, less icy texture reminiscent of a sorbet, add a small amount of frozen fruit. A handful of frozen mango, pineapple, or a few chunks of frozen banana will add body and a lovely creaminess without overpowering the primary flavor. This is a fantastic way to add natural sweetness and nutrients.
Elevate Your Garnish: Presentation enhances the entire experience. Before pouring, rim your glasses with sugar or finely chopped mint mixed with sugar. Garnish not just with a mint sprig, but with a delicate, paper-thin wheel of lemon, a few pomegranate arils for a pop of color and tartness, or even a light drizzle of fragrant rosewater or orange blossom water right before serving. These final touches transform a simple drink into an elegant dessert.
How to Store Leftover Slushie
In an ideal world, slushies are made and enjoyed immediately for the best texture. The fine ice crystals that make them so delightful are inherently unstable and will want to melt or refreeze into a solid block over time. However, if you do find yourself with leftovers, don't throw them out!
The best way to store a leftover slushie is in an airtight, freezer-safe container. Press a piece of plastic wrap directly onto the surface of the slushie before sealing the lid to minimize contact with air and prevent freezer burn. It will freeze solid. To revive it, take the container out of the freezer and let it sit on the counter for about 15-20 minutes, or until it's just soft enough that you can break it up with a fork. Scrape the semi-frozen mixture back into your Ninja pitcher, add a tiny splash of cold water, and give it a quick re-blend to bring it back to life. It may not be quite as perfect as the first time, but it will be very close.
An even better and simpler option? Pour your leftover ninja slushie recipes into popsicle molds. They freeze beautifully and make for a fantastic, ready-to-eat frozen treat for another day, preserving all that delicious flavor in a new and convenient form.
Common Questions About Ninja Slushie Recipes
Can I use a different blender to make these recipes?
Yes, you absolutely can. However, the key to a great slushie is power. A high-powered blender (generally 1000 watts or more) is essential for pulverizing the ice into fine, snowy crystals. If you use a standard or less powerful blender, you may need to work in smaller batches and stop to stir more frequently to achieve a smooth result.
How can I make sugar-free ninja slushie recipes?
You can easily adapt these recipes to be sugar-free. Create a simple syrup using a sugar substitute that dissolves well in water, such as erythritol or a monk fruit blend. Alternatively, you can rely on the natural sweetness of fruit by blending in very ripe, sweet fruits like mango, pineapple, or berries, and adjusting the sweetness with a few drops of liquid stevia if needed.
What’s the secret to making an extra-thick slushie?
For a super-thick, spoonable slushie, the secret is twofold: use a little less liquid and incorporate some frozen fruit. Reduce the amount of water or juice in the recipe slightly. Adding about half a cup of frozen fruit pieces, like mango or pineapple, acts as a natural thickener and stabilizer, creating a creamier, denser final product.
Can I prepare a large batch of slushie for a family gathering?
Absolutely! Blending a large batch is a great idea for gatherings. To do this without overloading your blender, simply work in batches. Prepare a full recipe, pour the finished slushie into a large, freezer-safe bowl or pitcher, and place it in the freezer while you blend the next batch. Just before serving, give the entire mixture a vigorous stir to break up any large frozen sections and ensure a consistent texture.
Why does my slushie separate into ice and liquid so quickly?
This is a natural process called syneresis. The tiny ice crystals will naturally begin to melt and separate from the denser, sugary liquid over time. While you can't stop it completely, you can slow it down. Using a properly made and thoroughly chilled simple syrup is the best defense, as the sugar helps create a more stable emulsion. Serving in chilled glasses also helps maintain the cold temperature for longer.
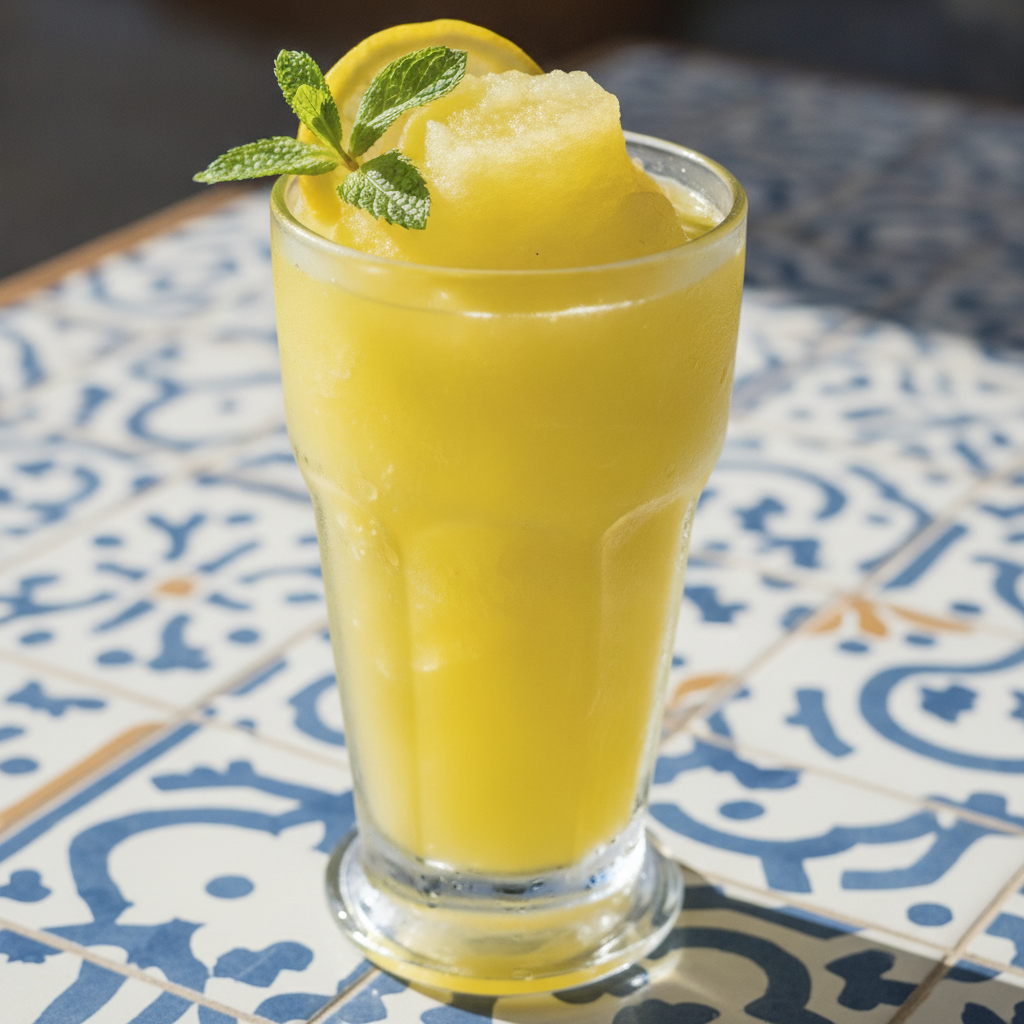
Refreshing Lemon Mint Ninja Slushie
A vibrant and icy Levantine-inspired slushie made with fresh lemon juice, fragrant mint, and a touch of sweetness. Perfect for hot days and easily made in a Ninja blender.
Prep Time
10 min
Cook Time
5 min
Total Time
15 min
Servings
4 servings
Ingredients
For 4 servings
- 1 cup granulated sugar
- 1 cup water (for simple syrup)
- 1 cup freshly squeezed lemon juice (from about 5-6 lemons)
- 1 cup packed fresh mint leaves, plus more for garnish
- 2 cups cold water
- 6-7 cups ice cubes
Instructions
- 1
Prepare the Simple Syrup
In a small saucepan, combine 1 cup of sugar and 1 cup of water. Heat over medium heat, stirring occasionally, just until the sugar has completely dissolved. Do not let it boil.
- 2
Chill the Syrup Completely
Once the sugar is dissolved, remove the saucepan from the heat. Pour the syrup into a heatproof jar or bowl and place it in the refrigerator to cool down completely, for at least 30 minutes.
- 3
Juice the Lemons
While the syrup is chilling, juice your lemons until you have 1 cup of fresh juice. For the best flavor and texture, strain the juice through a fine-mesh sieve to remove any seeds or excess pulp.
- 4
Prepare the Mint
Wash your mint leaves thoroughly and pat them dry. Pack them into a measuring cup to ensure you have 1 full cup. Set aside a few nice sprigs for garnish later.
- 5
Load the Ninja Pitcher
Pour the liquids into the Ninja blender pitcher first: the chilled simple syrup, the fresh lemon juice, and the 2 cups of cold water. Add the packed mint leaves next.
- 6
Add Ice and Pulse
Add the 6-7 cups of ice on top of the liquids and mint. Secure the lid and use the 'PULSE' function 4-5 times to break up the large ice cubes. This initial step prevents the motor from stalling.
- 7
Blend to Slushie Consistency
Switch the blender to a high-speed setting (like 'SMOOTHIE' or HIGH). Blend continuously for 45-60 seconds, or until the mixture is thick, smooth, and has an even, snowy texture. You should see a vortex form in the center.
- 8
Check Texture and Adjust
Turn off the blender and check the consistency. If it's too thin, add another cup of ice and blend again. If it's too thick to blend properly, add a splash of cold water and blend.
- 9
Garnish and Serve Immediately
Pour the slushie into chilled glasses. Garnish each glass with a fresh mint sprig and a thin wheel of lemon. Serve immediately for the best texture and flavor.
Nutrition Facts
Per serving (estimated)
220 calories
Calories
58g
Carbs
0.5g
Protein
0.2g
Fat
1g
Fiber
10mg
Sodium
55g
Sugar